
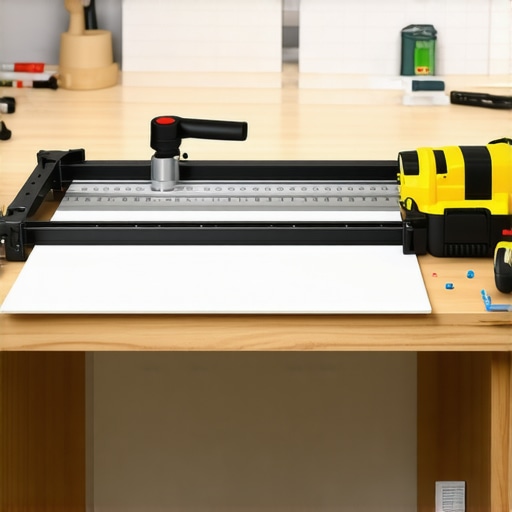
The mechanics of a perfect manual tile cut
A manual tile snap cutter works by creating a controlled stress fracture along the surface of a ceramic or porcelain tile. This process involves a tungsten carbide scoring wheel that weakens the glaze and a breaker bar that applies pressure to propagate the crack through the entire body of the tile. Unlike wet saws, snap cutters rely on structural physics rather than abrasion to achieve a clean edge.
Most guys skip the leveling compound. They think the underlayment will hide the dip. It won’t. I spent three days grinding concrete on a job last month just so the floor wouldn’t click like a castanet. When you are using a manual snap cutter on a floor that isn’t flat, you find out real quick. The tile won’t sit flush on the cutter bed. You try to snap it, and because the tile is bridged over a hollow spot in the machine’s own padding, it shatters like a dropped lightbulb. I have spent twenty five years on my knees, smelling like WD-40 and damp concrete, and I can tell you that the snap cutter is the most misunderstood tool in the flooring world. It is not a cheap alternative to a wet saw. It is a precision instrument designed for speed and structural integrity. When you cut a tile with a saw, you are introducing water into the material and creating a slurry that can interfere with the bond of your thin-set. A dry snap keeps the tile pristine, ensuring that your showers that wow remain structurally sound for decades.
“A floor is only as good as the subfloor beneath it; deflection is the enemy of every joint.” – Master Flooring Axiom
The molecular disruption of the scoring process
The scoring wheel does not actually cut the tile but instead creates a microscopic line of high stress in the silicate structure of the glaze. When the tungsten carbide wheel travels across the surface, it exerts downward force that displaces the molecular bonds of the ceramic. This creates a path of least resistance that the fracture will follow when the breaker foot is engaged. If the score is too deep, you are actually crushing the edge, which results in a jagged finish.
Understanding the Mohs scale of hardness is vital here. Most porcelain tiles sit at a seven or eight on the scale. This means your scoring wheel must be made of a material with a higher hardness rating, typically tungsten carbide or titanium-coated alloys. The pressure you apply must be consistent. A common mistake is bouncing the wheel or scoring the same line twice. Scoring twice creates two parallel fracture paths, which leads to a ruined tile. You want a single, crisp sound, like a zipper being pulled. This sound indicates that you have successfully bypassed the surface tension of the glaze without compromising the structural integrity of the clay body underneath. This precision is especially important when preparing tiles for showers with a style where every edge is visible.
Why your subfloor is lying to you
Subfloor flatness is the single most important factor in determining whether a manual snap cutter will produce a clean break. If the subfloor has a dip greater than 1/8 inch over ten feet, the tile will not sit flat during the installation, leading to lippage and eventual cracking. When using a snap cutter on-site, the tool itself must be placed on a perfectly flat surface to ensure the spring-loaded beds can depress evenly under the breaker foot pressure.
I have seen it a thousand times. A contractor thinks he can save time by ignoring the prep work. He throws down some thin-set and hopes for the best. But a floor is a system. If the subfloor deflects, the grout will fail. If you are dealing with old, cracked grout, you should look into grout restoration secrets for long lasting results. The snap cutter is your first diagnostic tool. If you cannot get a clean snap on a tile that should be easy to cut, check the surface you are working on. The physics of the lever arm on a professional-grade cutter, like a Montolit or a Rubi, requires a stable base. Any flex in the cutter’s rails or the floor beneath it will absorb the energy meant for the tile, resulting in a curved or incomplete break. This is why many pros prefer a solid steel base over a cast aluminum one, even if it weighs twenty pounds more.
| Feature | Manual Snap Cutter | Electric Wet Saw |
|---|---|---|
| Setup Time | Under 30 Seconds | 15 to 20 Minutes |
| Dust Level | Zero Airborne Dust | High Slurry/Mist |
| Edge Quality | Factory Sharp | Slightly Chipped |
| Portability | Very High | Low (Requires Water) |
The ghost in the expansion gap
Expansion gaps at the perimeter of a room are mandatory to allow for the natural movement of the building and the flooring materials. For tile installations, this gap is usually 1/4 inch and is hidden by the baseboards. Failure to provide this gap will cause the tile to tent or buckle when the temperature and humidity fluctuate, regardless of how well the tiles were cut. A manual snap cutter allows you to make these perimeter cuts quickly without leaving the room.
When you are finishing a room, the transition between the floor and the wall is where the magic happens. Many people overlook the importance of the trim. If you want to elevate the look of a room, consider chic baseboard designs that transform rooms. The snap cutter is perfect for these perimeter cuts because it creates a clean, square edge that sits perfectly under the molding. You do not need the polished edge of a wet saw for a cut that will be covered by wood. You need speed and accuracy. The manual cutter provides both. Remember that while most people want the thickest underlayment, too much cushion actually causes the locking mechanisms on LVP to snap under pressure, and in tile, it causes the grout to crack due to vertical deflection.
The tungsten carbide secret and rail maintenance
The longevity of a snap cutter depends entirely on the maintenance of the guide rails and the sharpness of the scoring wheel. Rails should be cleaned daily with a dry cloth and occasionally lubricated with a silicone-based spray to ensure the carriage moves without any friction. Friction in the carriage leads to stuttering during the score, which is a primary cause of tile breakage.
- Clean rails every four hours of use to remove ceramic dust.
- Inspect the scoring wheel for chips or flat spots every fifty cuts.
- Check the rubber padding on the breaker feet for wear to prevent marring the tile.
- Ensure the spring-loaded platforms move freely without grit in the springs.
- Measure the distance from the fence to the wheel to calibrate the built-in ruler.
If you are working with high-gloss tiles, the cleanliness of the cutter is even more vital. Any piece of debris on the bed of the cutter will create a pressure point that will shatter the tile. Once the tiles are set and the job is done, maintenance doesn’t stop. Homeowners should follow tile cleaning tips for a sparkling bathroom to keep the glaze looking as good as the day it was snapped. A dirty floor hides cracks, and cracks are the first sign of a subfloor failure.
“The bond between the tile and the substrate is the most critical structural link in any wet area.” – TCNA Handbook Standards
The 1/8 inch that ruins everything
Precision in tile cutting is measured in fractions of an inch, and a deviation of 1/8 inch can ruin the alignment of an entire layout. This is particularly true in large format tiles where the grout joints are narrow. A manual cutter with a lateral fence allows for repetitive cuts with millimetric accuracy, which is essential for maintaining straight lines across a large room. If you mess up the layout, you will be looking for ways how to refresh grout without replacing it sooner than you think.
When you are cutting for a layout, you have to account for the thickness of the tile itself. A 10mm porcelain tile requires significantly more breaking force than a 6mm ceramic wall tile. The lever on your cutter is a force multiplier. If you apply the force too quickly, you create a shockwave that can travel diagonally through the tile. A slow, steady increase in pressure is the secret. It allows the stress fracture to find its way along the score line. This is the difference between a professional and a DIYer. The pro feels the tile. He hears the snap before it happens. He knows when the subfloor is stable and when the tool is dialed in. He also knows that the job isn’t done until the baseboards makeover ideas are implemented to hide those 1/4 inch expansion gaps that keep the floor from exploding in the summer heat.