
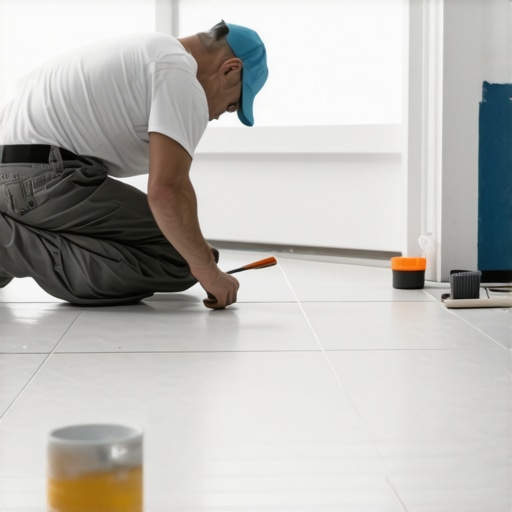
The physics of the perfect edge between wood and stone
I spent three days grinding concrete on a job last month just so the floor wouldn’t click like a castanet. Most guys skip the leveling compound and think the underlayment will hide the dip. It won’t. That same lack of precision ruins the transition between your baseboards and your tile. When you are painting trim against a hard surface, you are not just applying color. You are managing surface tension and mechanical bonds. If you ignore the physics of the gap, you end up with paint bleeding into the grout or a jagged line that looks like a heartbeat on a monitor. My hands are stained with wood dye and my back aches from 25 years of kneeling on porcelain, but I can tell you that a clean line is the difference between a pro and an amateur. You need to treat the junction where the baseboard meets the floor as a structural engineering challenge. Any movement in the subfloor will cause the trim to shift, breaking the seal of your paint. This is why I always check for deflection before I even open a can of semi-gloss. A floor that bounces will never hold a clean edge.
The answer to preventing paint bleed on tile surfaces
Protecting tile from paint during baseboard installation requires understanding surface tension and capillary action. A painter’s shield or low-tack tape creates a mechanical barrier, but the caulk line at the grout interface determines the final aesthetic finish and moisture resistance of the room. You must ensure the substrate is clean before application. Dust is the enemy of adhesion. If your tile is not level, the baseboard will leave gaps that swallow paint and create irregularities. Using a putty knife to press tape into the grout joints is the only way to prevent wicking. For those working on showers that wow, this precision is even more vital due to high moisture levels. Failure to seal this edge leads to water infiltration behind the baseboards, which can rot the wall studs over time.
The ghost in the expansion gap
Wood moves and tile does not. This is a fundamental law of construction that most homeowners ignore. When the humidity rises, your baseboards expand. When it drops, they shrink. If you have painted your baseboards right down to the tile without a proper buffer, that movement will crack the paint film. I have seen beautiful 15000 dollar walnut floors cup because the installer forgot about the crawlspace humidity. The same thing happens at the micro-scale with your trim. In a dry climate like Phoenix, your baseboards will shrink so much they show a gap of raw wood at the bottom. In a swampy place like Houston, they might swell and push against the tile. You need a flexible bridge. This is where high-quality elastomeric caulk comes in. It acts as a shock absorber. You apply the caulk, let it skin over, and then paint. This ensures that when the wood moves, the paint stays intact. It also creates a dam that prevents liquids from the mop bucket from seeping under the wall. If you are looking for chic baseboard designs, remember that the best design is one that can handle the physics of your local climate.
“A floor is only as good as the subfloor beneath it; deflection is the enemy of every joint.” – Master Flooring Axiom
The chemical reality of surface tension
Paint is a liquid that wants to go where it is easiest. On a microscopic level, your grout is a series of canyons and your tile is a polished plateau. When you bring a wet brush near that junction, the paint wants to jump into the grout pores via capillary action. This is the same force that pulls water up a straw. To stop it, you have to change the surface energy of the interface. This is why I never use cheap masking tape. Cheap tape has a rubber-based adhesive that leaves a residue. That residue attracts dirt and prevents grout restoration later on. I use a high-end acrylic-based tape with edge-lock technology. These tapes have a polymer that reacts with the water in the paint to form a gel barrier. It literally builds a wall at the edge of the tape. But even the best tape fails if you don’t burnish the edge. You take a flexible putty knife and run it along the edge of the tape with firm pressure. You are trying to force the adhesive into the micro-cracks of the tile surface. If you don’t do this, the paint will find a way under.
Preparation methods for professional results
| Material | Pros | Cons | Best Use |
|---|---|---|---|
| Blue Painter’s Tape | Easy to find, cheap | Bleeds on textured tile | Smooth ceramic floors |
| Yellow Sensitive Tape | Low tack, no residue | Expensive, thin | Recently sealed grout |
| Metal Paint Shield | Reusable, fast | Requires steady hand | Long straight runs |
| Frog Tape | Chemical barrier | Costly | Porcelain with deep grout |
Preparation is ninety percent of the job. You need to vacuum the baseboard and the floor junction with a brush attachment. Then you wipe it down with denatured alcohol. If there is any wax or grease from cleaning products on the floor, the tape won’t stick. I have seen guys try to tape over floors that were just treated with oil soap. The tape just curls up like a dead bug. Once the surface is clean, you apply your tape in short, manageable sections. Do not try to run ten feet of tape at once. You will lose your alignment. Overlap each piece by an inch. This ensures no paint can sneak through the seams. If you are dealing with baseboards makeover ideas, consider the height of the trim. Taller baseboards have more leverage and are more prone to warping, which means your tape line needs to be even more secure. After taping, I often apply a very thin bead of clear caulk along the tape line. This seals the tape perfectly. When you pull the tape, you get a line so sharp it could cut paper.
The 1/8 inch that ruins everything
Most people think they should paint all the way to the floor. They are wrong. You should leave a tiny gap, about the thickness of a credit card, between the paint and the floor surface. This prevents the paint from bonding the baseboard to the tile. If the paint bonds them together, any house settling will cause the paint to peel off in long strips. It looks terrible. Also, consider the wear layer of your floor. If you are working with luxury vinyl or engineered wood, the surface is often textured. Taping on a textured surface is a nightmare. This is when the “dry brush” technique becomes your best friend. You load the brush with paint and then wipe most of it off on a rag. You then work toward the floor with very little material. It takes three coats instead of one, but you will never have a drip. This is especially important near tile cleaning areas where chemicals might eventually interact with the paint edge. I’ve seen harsh cleaners melt cheap latex paint right off the baseboards because the installer didn’t use a high-quality enamel.
Checklist for a flawless finish
- Verify subfloor stability to prevent future trim movement.
- Deep clean the tile and grout with denatured alcohol to remove wax.
- Apply high-quality acrylic-adhesive tape in 2-foot sections.
- Burnish the tape edge with a stiff putty knife or 5-in-1 tool.
- Apply a micro-bead of paintable caulk to seal the tape edge.
- Use a short-handle sash brush for maximum control near the floor.
- Remove tape while the final coat of paint is still slightly tacky.
- Inspect the grout lines for any seepage and clean immediately with a damp rag.
The biggest mistake is leaving the tape on too long. If the paint dries completely, it forms a bridge over the tape. When you pull the tape, it rips the paint off the baseboard. It is a heartbreaking sight. I’ve seen grown men cry over a ripped paint film on a 5000 square foot project. You want to pull the tape at a 45-degree angle away from the painted surface. Do it slowly. If you hear a tearing sound, stop. Use a sharp utility knife to score the edge. This is why I prefer to work in sections. It allows me to paint a wall and pull the tape before it sets too hard. If you are working on how to refresh grout, you might want to do your painting first. New grout is very porous and will soak up paint like a sponge. Protect your investment. A floor is a structural system, and the paint is the final protective layer of that system. Treat it with the respect it deserves.
“Modern adhesives have changed the game, but they cannot overcome a dusty substrate.” – TCNA Installation Handbook
The chemistry of adhesion and the environment
The temperature in the room matters more than you think. If it is too hot, the water in the paint evaporates too fast. This increases the viscosity and makes the paint gummy. Gummy paint does not flow into a smooth line. It leaves ridges. If it is too cold, the paint won’t cure. I’ve seen paint stay tacky for three days in a damp basement. This is why I always check the HVAC settings before I start. For those concerned with sustainability, eco-friendly tile solutions often pair well with low-VOC paints. These paints have different drying profiles. They usually dry faster on the surface but take longer to through-cure. You have to be patient. Do not rush the second coat. If you apply wet paint over a partially cured first coat, you will cause the first layer to re-emulsify. This leads to sagging and a complete loss of your clean edge. It will buckle. The bond will fail. You will be back to square one, scraping paint off your beautiful tile with a razor blade. No one wants to spend their Saturday doing that. Take your time. Do it right. Your floor will thank you for the next twenty years.