
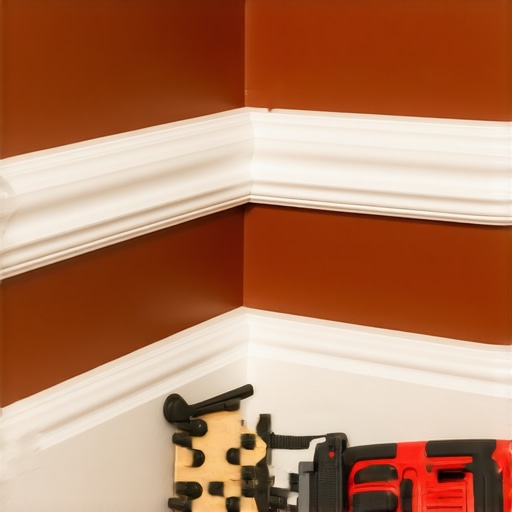
The Professional Approach to Cutting Quarter Round for Bathroom Corners
I have spent twenty five years on my knees with a moisture meter and a level. I have seen every shortcut in the book. Most guys skip the leveling compound. They think the underlayment will hide the dip. It won’t. I spent three days grinding concrete on a job last month just so the floor wouldn’t click like a castanet. That is the reality of a professional finish. When you are dealing with bathroom corners, you are not just cutting wood or PVC. You are engineering a moisture resistant barrier that hides the inevitable expansion gap between your floor and your wall. This is a structural necessity, especially when you have high end tile and heavy baseboards installed. If you mess up these cuts, you leave a gateway for humidity to rot your subfloor. We do not do that here. We build floors to last decades, not just until the check clears.
The geometry of a bathroom corner
Cutting quarter round for bathroom corners requires a 45 degree miter or a coped joint to bridge the gap between baseboards and tile floors. Accuracy depends on measuring the actual angle of the wall because few bathroom corners are exactly 90 degrees due to heavy mud sets and thick grout. You cannot assume that the framers did their job or that the drywall finishers did not leave a hump of mud in the corner. I have found corners that were 92 degrees and corners that were 88 degrees. A two degree difference will leave a gap big enough to swallow a nickel. You need to use an angle finder. This tool is not optional for professional results. When you place your quarter round against the baseboard, you are looking for a tight, mechanical fit. This is the only way to ensure that your bathroom remains a sanctuary rather than a breeding ground for mold. If you are looking for design inspiration, consider these baseboards makeover ideas to elevate your space to complement your new trim.
“A floor is only as good as the subfloor beneath it; deflection is the enemy of every joint.” – Master Flooring Axiom
The physics of the miter saw blade
Choosing the right saw blade is the difference between a clean edge and a shredded mess of wood fibers. For quarter round, you must use an 80 tooth or 100 tooth carbide tipped finish blade to minimize tear out and ensure a microscopic bond. When the saw blade spins at 4,000 RPM, the teeth are hitting the material with incredible force. If you use a standard 24 tooth construction blade, the wood will splinter. You will spend the next four hours with wood filler trying to hide your mistakes. The hook angle of the blade also matters. A negative hook angle is often preferred for trim because it provides a more controlled cut. You also need to think about the kerf. The kerf is the width of the cut made by the blade. If you do not account for the 1/8 inch of material that the blade turns into sawdust, your piece will be short every single time. Precision is the mark of a master. Amateurs guess; professionals measure and calculate.
Why your subfloor is lying to you
Subfloors are rarely level and this lack of uniformity creates a nightmare for trim installation because the quarter round must follow the contour of the tile. In bathrooms, the pitch of the floor toward the drain often complicates the vertical alignment of the trim. You might have a subfloor that looks flat, but a moisture test will reveal the truth. Concrete slabs in many regions hold onto moisture for months. If you install your trim before the slab has reached an equilibrium moisture content of around 4 percent, the trim will expand and pop off the wall. I have seen solid oak quarter round buckle and pull the nails right out of the studs because the installer did not understand the relationship between relative humidity and wood expansion. In bathrooms with showers that wow modern designs for 2025, you have to be even more careful because the steam levels fluctuate wildly. You must use a high quality PVC or a pre primed moisture resistant fiberboard if you want the trim to stay put.
The 1/8 inch that ruins everything
Leaving an expansion gap is a non negotiable rule for any floating floor or hardwood installation to prevent buckling and peaking. Quarter round serves the functional purpose of covering this gap while allowing the floor to move naturally with temperature changes. If you pin the quarter round too tightly against the floor, you are essentially locking the floor in place. When the humidity rises, the floor has nowhere to go but up. This creates a hollow sound when you walk on it. I have been called to jobs where the entire floor had lifted two inches off the subfloor because the trim was nailed into the flooring instead of the baseboards. Never nail into the floor. Always nail into the baseboards. This allows the floor to slide underneath the trim as it breathes. It is a simple concept that many people fail to grasp. We are dealing with physics here. Wood is a living material that reacts to its environment.
| Method | Tool Used | Best For | Moisture Resistance |
|---|---|---|---|
| Miter Cut | Power Miter Saw | PVC Trim | High |
| Coping | Coping Saw | Solid Wood | Medium |
| Scarf Joint | Miter Box | Long Runs | Low |
The chemistry of the adhesive bond
Modern flooring professionals use a combination of mechanical fasteners and chemical adhesives to ensure that corners stay tight for the life of the home. Using a cyanoacrylate adhesive with an activator allows you to bond the mitered corners together before they ever touch the wall. This is the secret to a perfect outside corner. You glue the two pieces together on your workbench, wait ten seconds for the activator to set, and then install the entire assembly as one piece. This prevents the joint from opening up as the house settles. Inside corners in bathrooms are even more difficult because of the way grout restoration secrets for long-lasting results often involve adding layers of material that change the wall angle. You have to be precise. I use a dab of 100 percent silicone on the bottom edge of the quarter round where it meets the tile. This creates a secondary water seal that keeps mop water from seeping under the baseboards. It is an extra step that most guys skip, but it is why my floors look better ten years later.
“Acclimation is not a suggestion; it is a requirement for the structural integrity of the installation.” – NWFA Technical Guidelines
The struggle of the coped joint
Coping is a traditional technique where one piece of trim is cut at a 90 degree angle and the other is shaped to fit its profile. This method is superior for inside corners because it allows for movement and hides gaps better than a standard miter. If you are working with solid wood, you should be coping your inside corners. You start by cutting a 45 degree miter to reveal the profile of the wood. Then, you use a coping saw to cut away the back of the wood, following that profile line. This creates a piece that overlaps the adjacent trim. It is a labor intensive process that requires a steady hand and a sharp eye. Most people today are too lazy to cope. They just slap some caulk in the gap and call it a day. But if you want a floor that looks like it was installed by a craftsman, you learn how to cope. It is a skill that separates the pros from the guys who just bought a saw at a big box store last weekend.
Maintaining the aesthetic integrity
Once the installation is complete, the maintenance of the trim and the surrounding tile is vital for preserving the value of the home. Using the correct cleaning agents will prevent the breakdown of the finish on the quarter round and the grout lines. You should never use harsh acids or bleach on your floors. These chemicals will eat away at the protective coatings and eventually rot the wood trim from the inside out. For the best results, consult tile cleaning tips for a sparkling bathroom in 2025. You also need to keep an eye on the grout. If the grout starts to crack where it meets the trim, you have a movement issue. This usually means the subfloor has too much deflection. You can try to how to refresh grout without replacing it but if the structural issue persists, the trim will continue to pull away. Everything in a bathroom is connected. The shower, the floor, the baseboards, and the grout all work together as a single system.
Master Flooring Installation Checklist
- Measure the moisture content of the subfloor and the trim material.
- Calibrate the miter saw for a perfect 90 degree and 45 degree cut.
- Use an angle finder to determine the exact degree of every corner.
- Acclimate all wood products to the bathroom environment for 72 hours.
- Apply a waterproof adhesive to all mitered joints for structural stability.
- Fasten the quarter round to the baseboards, never the floor.
- Seal the bottom edge with silicone to prevent water intrusion.
A final word on professional standards
Building a floor is a technical challenge that requires patience and an obsession with detail. If you hurry the process, the environment will punish you. The humidity will find the gaps, the wood will swell, and the finish will fail. I have spent my life learning these lessons so you do not have to. When you look at a bathroom corner, do not see a piece of wood. See a shield that protects the integrity of the entire room. If you follow the NWFA and TCNA standards, you will create something that lasts. If you cut corners, you will be calling someone like me in two years to fix it. Do it right the first time. For more information on maintaining your home, you can contact us or read our privacy policy.