
I have spent three decades with sawdust under my nails and the smell of WD-40 on my hands. Most guys in this trade skip the leveling compound. They think the underlayment will hide the dip. It won’t. I spent three days grinding concrete on a job last month just so the floor wouldn’t click like a castanet. That same level of obsessive detail applies to your shower. If you ignore the subfloor or the waterproofing, you are building a timed bomb. I once walked into a house where the homeowner thought their waterproof floor meant they could flood the bathroom. The subfloor was plywood mush within a year. You cannot trust what you cannot see. In the world of high-end flooring and custom tile work, the balloon test is the only truth. It is a primitive but effective way to ensure your shower pan is not a sieve. We are dealing with hydrostatic pressure and molecular migration. If your membrane has a pinhole, gravity will find it. If your drain flange is not sealed to the liner with the right chemistry, the wood below will rot.
The mechanics of the balloon test
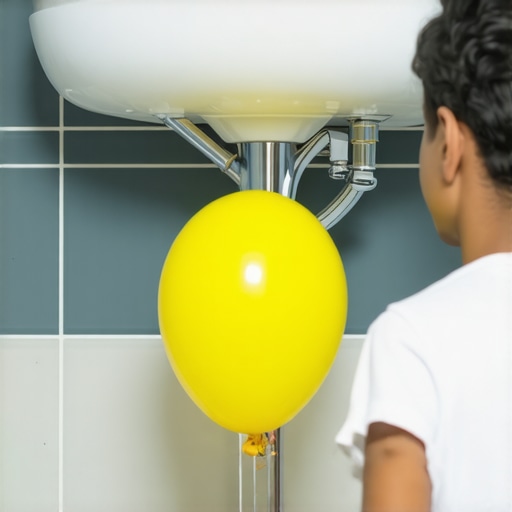
The balloon method involves inserting an inflatable test plug into the shower drain and filling the shower pan with water to detect leaks. This hydrostatic test ensures the waterproof membrane, drain flange, and liner are watertight before tile installation proceeds to prevent subfloor rot and mold growth. It is the gold standard for checking shower integrity. When we talk about the balloon method, we are actually talking about isolating the drainage system from the waterproofing system. You take a specialized pneumatic plug, often called a balloon plug, and slide it past the weep holes of the drain assembly. Once you inflate that plug, you create an airtight and watertight seal inside the pipe. You then fill the pan with two inches of water. You mark the water line. Then you wait. You wait twenty four hours. If that water level drops, you have a disaster waiting to happen. It could be the membrane. It could be the curb. It could be the corner seals. Regardless, you find it now or you pay for it later.
“A floor is only as good as the subfloor beneath it; deflection is the enemy of every joint.” – Master Flooring Axiom
The physics of hydrostatic pressure in shower pans
Hydrostatic pressure is the force exerted by standing water against the waterproofing membrane and drain seals. In a shower pan test, two inches of water creates significant weight that forces moisture through microscopic voids, unsealed seams, or faulty punctures in the liner, revealing leaks that a standard spray test would miss entirely. Water is heavy. One gallon of water weighs about 8.34 pounds. When you fill a standard thirty-six by forty-eight inch shower pan with two inches of water, you are putting over one hundred pounds of pressure on that floor. That pressure pushes downward and outward. It looks for the path of least resistance. Usually, that path is the corner where the installer got lazy with the fold. Or maybe it is the interface between the PVC liner and the clamping ring. If you have used a liquid-applied membrane, you are checking for mil-thickness consistency. A thin spot will succumb to this pressure. It is not just about the surface. It is about the bond between the substrate and the barrier. If the mortar bed was not packed tight, the membrane might stretch and snap under the weight of the water. This is why we use a balloon. It forces the system to perform under a load it was never meant to sustain daily.
The nightmare behind the shower curb
The shower curb is a frequent failure point where waterproofing membranes are often punctured or folded incorrectly during installation. A leak at the curb allows moisture to wick into the bathroom subfloor, damaging baseboards and joists. The balloon test identifies these weaknesses before thin-set and tile are applied to the surface. I have seen guys drive a nail right through the top of the curb to hold their lath. That nail is a highway for water. When you do a balloon test, the water sits against that curb for a full day. If those corners are not pre-formed or properly flashed, you will see a damp spot on the subfloor outside the shower. This is why I prefer showers that wow with both aesthetics and structural integrity. You cannot have a beautiful shower if the curb is rotting from the inside out. The capillary action of water means it can climb. It does not just sit there. It seeks out the timber of your home. If you see bubbles at the curb during the test, your liner is compromised. Stop. Do not pass go. Rip it out and do it again. I do not care if it takes another three days. I would rather spend three days fixing a curb than three months litigating a mold claim.
| Membrane Type | Material Chemistry | Standard Thickness | Acclimation Requirement |
|---|---|---|---|
| PVC Liner | Polyvinyl Chloride | 40 mil | 24 Hours |
| CPE Liner | Chlorinated Polyethylene | 40 mil | Material specific |
| Liquid Applied | Polymeric Resin | 20-30 mil (dry) | Cure time varies |
| Bonded Sheet | Polyethylene/Fleece | 8-20 mil | Immediate tile-over |
The chemistry of the PVC bond
PVC liners require a chemical solvent weld to join seams and pre-formed corners, creating a molecular bond that is impenetrable to water. If the solvent is applied in cold temperatures or on contaminated surfaces, the weld will fail, leading to leaks that only a balloon test can detect reliably. We are talking about THF (Tetrahydrofuran). This is not glue. It is a solvent that melts the plastic surfaces together. If you are working in a cold house in the middle of winter, that chemical reaction slows down. You might get a mechanical bond that looks okay, but it is not a molecular weld. Once the weight of the water hits it, the seam pops. I always tell my guys to clean the area with a damp rag first, let it dry, then apply the cement. If there is dust from the drywall guys, the weld is garbage. The balloon test puts that weld under stress. It is a binary result. It either holds or it does not. There is no middle ground in waterproofing. While you are waiting for the test to finish, you might think about how those walls will look. Check out showers with a style for inspiration on how to finish the space once you are sure it is dry. But do not even pick up a trowel until that water level stays exactly where you marked it.
“Waterproofing is not a suggestion; it is a structural mandate for the longevity of the building envelope.” – TCNA Technical Bulletin
The 1/8 inch that ruins everything
A subfloor deviation of just 1/8 inch can cause pooling water or membrane tension, which leads to cracked grout and waterproofing failure over time. The balloon test reveals if the slope to drain is consistent and if water is migrating toward low spots that could compromise the integrity of the tiled surface. I am a stickler for the level. If I see a dip, I am reaching for the grinder. Most people think the mud bed fixes everything. It does not. If your subfloor is bouncing, your tile is going to crack. If your tile cracks, your grout is going to fail. And if your grout fails, you are putting a lot of pressure on that membrane. You should check your grout restoration secrets before you think about just slapping some new grout over a leak. A leak is a structural issue, not a cosmetic one. When the pan is full of water during the test, look at the perimeter. Is the water level even all the way around? If it is deeper in one corner, your subfloor is out of level. This puts uneven pressure on the liner. Over years of thermal expansion and contraction, that uneven stress will cause a tear. I have seen it happen a hundred times. A flat floor is a happy floor.
- Ensure the subfloor is clean of all debris and drywall mud.
- Install the pre-pan or sloped mortar bed to TCNA standards.
- Lay the membrane without any tight folds that could stress the material.
- Secure the clamping ring and ensure weep holes are clear of mortar.
- Insert the balloon plug past the weep holes and inflate to the manufacturer’s PSI.
- Fill the pan to within one inch of the top of the curb.
- Mark the level and wait twenty four hours.
The ghost in the expansion gap
Expansion gaps are essential spaces left at the perimeter of flooring installations to allow for thermal movement and moisture-driven expansion. In bathrooms, failing to provide these gaps can lead to buckling tile or shearing membranes, as the subfloor and walls move at different rates during seasonal changes in humidity. Everything moves. Wood, tile, concrete, and plastic all have different coefficients of expansion. If you shove your tile tight against the wall, something has to give. Usually, it is the grout joint or the waterproofing. When the water is sitting in that pan for twenty four hours, it is also cooling or heating the floor. This causes movement. If you do not have that gap, you are building in tension. I always tell homeowners that their baseboards makeover ideas should include a way to cover that expansion gap without pinning the floor down. Use a shoe molding or a thick baseboard. Just do not caulk the floor to the wall with hard grout. It will snap. The balloon test is also a test of this stability. If the house is settling while the test is active, you might see small fluctuations. But a significant drop is always a leak. Do not let anyone tell you it just evaporated. Two inches of water does not evaporate in a day inside a house unless you are living in a sauna.
How to maintain the integrity of your grout and tile
Grout maintenance is the first line of defense against moisture penetration, although it is not a waterproof barrier on its own. Using high-performance sealers or epoxy grouts helps shed water effectively toward the drain, reducing the hydrostatic load on the underlying membrane and prolonging the life of the shower system. People ask me all the time how to refresh grout without replacing it. The answer is usually that you should have used a better grout to begin with. But if you are at that stage, you need to make sure the underlying structure is still sound. If the grout is falling out, water is getting behind the tile. If it gets behind the tile, it is sitting on the membrane. This is why the balloon test is so important during construction. You need to know that even if every grout joint in that shower fails, the water will still go down the drain and not into your kitchen ceiling. It is about redundancy. The tile is the aesthetic layer. The grout is the wear layer. But the membrane is the functional layer. Treat it with respect. Never use a sharp tool near the liner. Never drop your trowel point-down into the pan. One tiny nick is all it takes to fail the test and start over from scratch. It is a long process, but it is the only way to sleep at night. Check your tile cleaning tips to keep the surface looking good, but remember that the real work is happening underneath where the balloon once sat.