
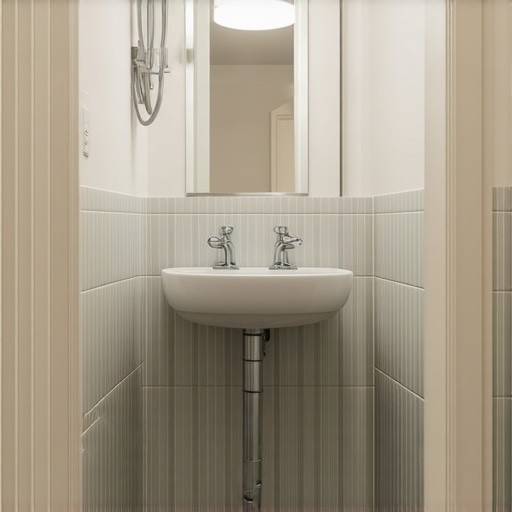
Most guys skip the leveling compound. They think the underlayment will hide the dip. It won’t. I spent three days grinding concrete on a job last month just so the floor wouldn’t click like a castanet. That job was a four by six bathroom. People think small spaces are easy. They are wrong. In a tiny room, every mistake is magnified. Every cut that is off by a sixteenth of an inch screams at you. I have spent twenty five years on my knees with a spacers and a levels. I know that a floor is not a decoration. It is a structural assembly. If you do not treat it with respect, it will fail. I smell like thin-set and knee pad sweat most days. I have seen thousand dollar tile jobs ruined by ten dollars worth of laziness.
The mathematical reality of a cramped floor
To handle tile layout for tiny bathrooms, you must establish a dominant visual axis that avoids small slivers of tile at the entrance or shower. Use large format tiles with minimal grout lines to reduce visual noise. Ensure the subfloor is flat within one eighth inch over ten feet to prevent lippage. When you work in a space the size of a closet, the grid is everything. You cannot just start at the back wall and hope for the best. You have to find the center of the room. Then you have to shift that center to ensure your perimeter cuts are at least half a tile wide. Nobody wants to see a tiny sliver of porcelain against the wall. It looks cheap. It looks like a builder-grade hack job.
“A floor is only as good as the subfloor beneath it; deflection is the enemy of every joint.” – Master Flooring Axiom
Why your subfloor is lying to you
Subfloor preparation in small bathrooms requires checking for deflection and flatness using a straightedge and a laser level. You must address high spots by grinding concrete or sanding plywood before any tile is laid. A subfloor that is out of level will cause tiles to kick up at the corners. I have seen it a hundred times. A homeowner buys beautiful Italian stone but ignores the bouncy plywood underneath. If that floor moves, your grout will crack. It is physics. You need to check the L over 360 rating. This is the industry standard for deflection. It means the floor should not bend more than the span divided by 360 under a standard load. If you are using natural stone, you need L over 720. That is twice as stiff. I often tell people to add a second layer of underlayment. Use a high quality modified thin-set. The polymers in the thin-set create a chemical bond that is far stronger than the mechanical bond of old school mud.
The ghost in the expansion gap
Expansion gaps at the perimeter of a small bathroom are mandatory to allow for the natural movement of the structure without buckling the tile. These gaps should be at least one quarter inch and will be hidden by the baseboards after installation. Without them, the tile will tent and crack. Wood moves. Concrete moves. The house breathes with the seasons. If you push your tile tight against the studs, the floor has nowhere to go when the humidity hits. It will buckle. I have walked into bathrooms where the center of the floor had popped up like a tent because there was no gap at the edges. When you install your baseboards, they cover that gap. It is a simple engineering fix that most amateurs skip.
Why bigger is sometimes better for small spaces
Large format tiles are often superior for small bathrooms because they create fewer grout lines which results in a cleaner and more expansive visual field. Using a twelve by twenty four inch tile can make a tiny floor feel significantly larger by reducing the busy grid pattern. Many people think they need tiny tiles for a tiny room. They are wrong. Tiny tiles mean more grout. Grout is the weakest part of the floor. It absorbs moisture. It gets dirty. It breaks up the visual flow. When you use a large tile, your eye travels across the room without being stopped by a hundred little lines. It creates an illusion of space. You just have to make sure the floor is perfectly flat. Large tiles do not bend. If there is a hump in the floor, one corner of the tile will sit higher than the next. We call this lippage. It is a trip hazard and it looks terrible.
| Tile Size | Grout Line Density | Installation Difficulty | Visual Impact |
|---|---|---|---|
| 2×2 Mosaic | High | Moderate | Busy/Traditional |
| 12×12 Ceramic | Medium | Low | Standard/Dated |
| 12×24 Porcelain | Low | High | Modern/Expansive |
| 24×24 Stone | Very Low | Very High | High-End/Architectural |
The invisible bond of modern grout
Modern grout selection for tiny bathrooms should prioritize epoxy or high-performance cementitious grouts that offer stain resistance and color consistency. Matching the grout color to the tile color minimizes the grid effect and helps a small bathroom feel more open and less cluttered. If you want the room to feel big, do not use dark grout with light tile. It creates a checkerboard that traps the eye. Use a color that disappears. I prefer epoxy grout for bathrooms. It is waterproof. It does not need to be sealed every year. It is a pain to work with because it gets sticky and you have to wash it off before it hardens like a rock. But once it is in, it is there forever. If your old grout is looking rough, you can learn how to refresh grout without replacing it to save the floor.
Showers and the slope of reality
Tile layout in small showers must account for the pitch of the pan toward the drain to ensure proper water evacuation and prevent pooling. This usually requires smaller tiles on the shower floor to follow the contours of the slope without creating sharp edges. You cannot put a two foot tile on a shower floor unless you have a linear drain. If you have a center drain, the floor has to slope from all four corners. A large tile cannot do that. You need mosaics or smaller squares. This is where showers that wow really come together. The transition from the main floor to the shower should be as low profile as possible. I hate big bulky thresholds. They are toe kickers.
“For tiles with any side 15 inches or longer, the subfloor must be flat within 1/8 inch in 10 feet.” – TCNA Handbook Standards
Master checklist for tiny bathroom tile
- Check subfloor for deflection and L/360 compliance.
- Dry lay tiles to check for sliver cuts at the walls.
- Verify that the shower drain is the lowest point in the room.
- Apply a waterproof membrane like Kerdi or RedGard in wet areas.
- Choose a grout color that matches the tile to expand the space.
- Leave a 1/4 inch expansion gap at all vertical surfaces.
Regional moisture and the climate factor
In humid areas like Florida or the Gulf Coast, moisture is your constant enemy. The concrete slabs stay damp. You need a moisture vapor barrier. If you trap moisture under your tile, it will eventually blow the bond. The salts in the concrete, called efflorescence, will rise to the surface and turn your grout white and chalky. In dry climates like Arizona, the wood subfloors shrink. This pulls at the tile. You need a high-flex thin-set that can handle the movement. I always check the ambient humidity before I mix my first bucket.
Information gain on underlayment thickness
Here is a contrarian point for you. Most people think the thickest underlayment is the best. They think it provides more protection. In reality, too much cushion or thickness in an underlayment is a disaster for tile. Tile is brittle. It does not want to flex. If your underlayment is too soft, the tile will crack the moment you step on it. You want a thin, rigid, but uncoupling membrane. This allows the subfloor to move horizontally without transferring that stress to the tile. It is about shear stress, not about padding.
The finishing touch with baseboards
Once the tile is set and grouted, you need to finish the perimeter. I see people use cheap plastic baseboards all the time. It ruins the whole look. Use a solid wood or high quality MDF baseboard. Look at chic baseboard designs to find something that matches the scale of your bathroom. If the room is small, do not use a seven inch baseboard. It will make the walls look short. Stick to a clean four inch profile. It keeps the lines sharp and the room feeling tall. If you have questions about your specific layout, you can always contact us for professional guidance. A bathroom floor should last fifty years. If yours is failing after five, someone skipped a step. Don’t be that guy.