
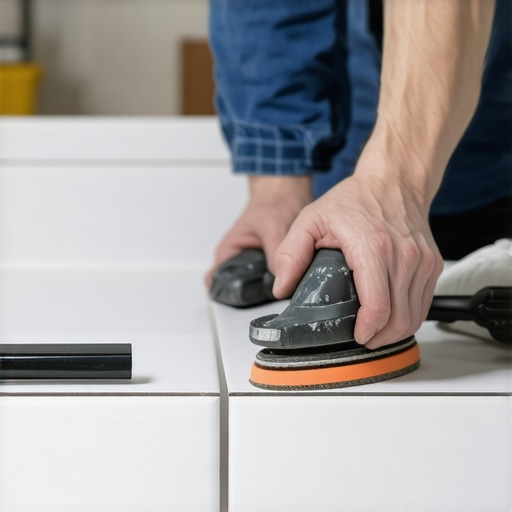
I spent three days grinding concrete on a job last month just so the floor wouldn’t click like a castanet. Most guys skip the leveling compound. They think the underlayment will hide the dip. It won’t. I saw a guy try to hide a quarter inch dip with extra thin-set and a prayer. Two weeks later, the grout was cracking and the tile sounded hollow. You cannot cheat the physics of a flat surface. When you are dealing with uneven tile edges, or lippage, you are fighting against the structural integrity of the entire floor system. If the subfloor is not dead flat, the tile will follow its contours. Sanding down those edges is a delicate operation that requires an understanding of mineral hardness and mechanical friction.
The unforgiving reality of lippage
Tile lippage occurs when the vertical displacement between adjacent tiles exceeds the industry standard of 1/32 of an inch. This structural defect creates tripping hazards, catches mop strings, and ruins the aesthetic symmetry of high-end porcelain or natural stone installations in showers and living areas. Fixing this requires mechanical abrasion with diamond-impregnated pads to create a flush transition across the grout line.
Tile is not just a surface. It is a dense, vitrified material. When you talk about sanding it, you are really talking about grinding. Most ceramic tiles have a MOHS hardness rating between five and seven. Porcelain often hits eight. You are trying to remove material from a substance that is designed to resist wear for fifty years. If you go at it with regular sandpaper, you will spend a hundred dollars on paper before you even scratch the surface. You need diamond. Specifically, you need resin-bonded diamond polishing pads that can handle the heat generated by friction. Heat is the enemy here. If the tile gets too hot, the glaze can crack or discolor. This is why pros often use wet sanding techniques to keep the surface temperature stable while the diamond grit does the heavy lifting.
The physics of the diamond wheel
Abrasive grinding uses diamond grit to shear away the molecular structure of the tile glaze or stone body. By starting with a coarse 50-grit pad and progressing to 3000-grit, you can level the surface and restore the original factory sheen to the edge profile. This process involves rotary force and constant pressure to ensure the high spot is removed without creating a divot in the neighboring tile.
“A floor is only as good as the subfloor beneath it; deflection is the enemy of every joint.” – Master Flooring Axiom
When you start the grind, you have to be mindful of the wear layer. On a through-body porcelain, you have more room for error because the color goes all the way through. On a glazed ceramic tile, you have about a millimeter of color before you hit the clay body. If you sand too deep, you will expose the biscuit. That is a point of no return. You have to feather the edge. Feathering means you aren’t just hitting the high spot. You are blending that high spot into the surrounding three or four inches of the tile so the eye cannot detect the slope. It is a game of millimeters. I use a variable speed polisher, never a standard high-speed grinder. High-speed grinders run at 11,000 RPM. That is too fast. You want something in the 3,000 to 4,500 RPM range so you can control the rate of material removal.
Essential gear for professional grinding
Variable speed polishers equipped with backfill pads allow for precise control over the grinding depth. You must use diamond resin pads, vacuum shrouds for dust containment, and hepa-rated filtration to manage the silica dust created during the sanding process. Failure to use water cooling or proper suction will lead to glaze scorching and respiratory hazards on the job site.
While most people want the thickest underlayment, too much cushion actually causes the locking mechanisms on LVP to snap under pressure. The same logic applies to tile. If your mortar bed has too much air or is too thick, it can compress or shrink. This shrinkage is what pulls one tile lower than its neighbor as it cures. You see this a lot with large format tiles. They are heavy. If you don’t use leveling clips, the tile will sag into the thin-set. By the time it is dry, you have a lippage problem that requires the diamond pads. I always keep a set of pads from 50 grit to 3000 grit in my truck. You never know when a client is going to spot a 1/16 inch lip in the light of the setting sun.
| Grit Level | Purpose | Surface Result |
|---|---|---|
| 50 Grit | Heavy stock removal | Rough, matte finish |
| 100 Grit | Scratched edge leveling | Smooth but dull |
| 400 Grit | Initial polishing | Slight satin sheen |
| 800 Grit | Honing the surface | High satin finish |
| 1500 Grit | Final polishing | Reflective gloss |
| 3000 Grit | Buffing | Factory mirror finish |
The role of grout and baseboards
Grout restoration becomes necessary after grinding tile edges because the mechanical action often erodes the grout line. Using epoxy grout or high-performance cementitious grout ensures that the repaired joint matches the newly leveled tile surface. Proper baseboard integration hides the expansion gaps at the perimeter of the leveled floor to provide a finished look.
After you have successfully sanded the edge, the grout is going to look like a mess. You likely ground some of it away or filled it with tile dust. You need to clean those joints out. For a truly professional finish, check out grout restoration secrets for long lasting results. If you don’t fix the grout, the sanded edge will stand out like a sore thumb. The shadow lines will be wrong. You want the light to pass over the joint without a break. Once the floor is level and the grout is replaced, you have to look at the perimeter. Often, when we level a floor, we find that the wall isn’t square or the floor-to-wall transition is ugly. This is where baseboards makeover ideas to elevate your space come into play. A beefy baseboard can hide a lot of sins at the edge of the room. It provides that structural frame that makes the floor look like it was meant to be there.
The steps for achieving a flush finish
- Inspect the lippage with a six-foot straight edge to identify the highest point.
- Mark the high spots with a wax pencil to define the grinding zone.
- Start with a 50-grit diamond pad on a variable speed polisher set to low.
- Move the polisher in a constant, circular motion to prevent flat spots.
- Check the level frequently with a precision square or a straight edge.
- Progress through the grits, doubling the grit number each time (100, 200, 400).
- Clean the surface with a damp sponge between every grit change to remove debris.
- Finalize the polish with a 3000-grit pad and a buffing compound if needed.
- Re-grout the affected joints to match the existing floor color.
If you are working in a bathroom, you have to be even more careful. Wet environments like showers that wow modern designs for 2025 require perfect drainage. If you sand a tile in a shower and create a birdbath, a place where water sits, you are going to have mold issues. The water must always move toward the drain. Grinding in a shower is high-stakes work. One wrong move and you’ve compromised the waterproofing membrane or created a slip hazard. Always use a water-fed polisher in these areas to keep the dust down and the tile cool. This is not a job for a weekend warrior with a palm sander. It is an engineering task. You are reshaping a structural component of the home.
Why your subfloor is lying to you
Subfloor deflection is the primary cause of uneven tile because plywood or OSB can flex under load. When the subfloor moves, the mortar bond can shear, leading to raised edges and cracked grout. Ensuring a stiff subfloor with a high L/360 rating is the only way to prevent lippage before the installation begins.
“Deflection at the joist level will manifest as a failure at the tile level; there is no substitute for structural rigidity.” – TCNA Technical Bulletin
I have seen guys try to use self-leveling underlayment over bouncy floors. It just cracks. You have to address the joists first. If the joists are spaced too far apart, the subfloor will dip between them. That dip is where your tile will sit low. When you sand that tile down, you are treating the symptom, not the disease. If the floor continues to move, your flush finish will be gone in six months. Always check the crawlspace. Look for rot or undersized lumber. A solid floor starts in the basement. Only after the structure is sound should you worry about tile cleaning tips for a sparkling bathroom in 2025. A clean floor is a happy floor, but a level floor is a permanent floor.
The chemistry of the bond is another factor. If you used a cheap, unmodified thin-set on a large porcelain tile, the bond might fail as you grind. The vibration of the polisher can be enough to pop a poorly bonded tile right off the floor. I only use high-polymer modified mortars for this reason. They have a bit of flexibility and a massive amount of grab. When I am leaning on that polisher, I need to know the tile isn’t going anywhere. This is why I tell people to avoid the clearance rack at big-box stores. You get what you pay for in this industry. Cheap tile is often warped right out of the box. We call it crown. If the tile is crowned, the middle is higher than the ends. No amount of leveling clips will fix a warped tile completely. You will be sanding for days. Buy quality material from a reputable shop and save yourself the headache of the grind.