
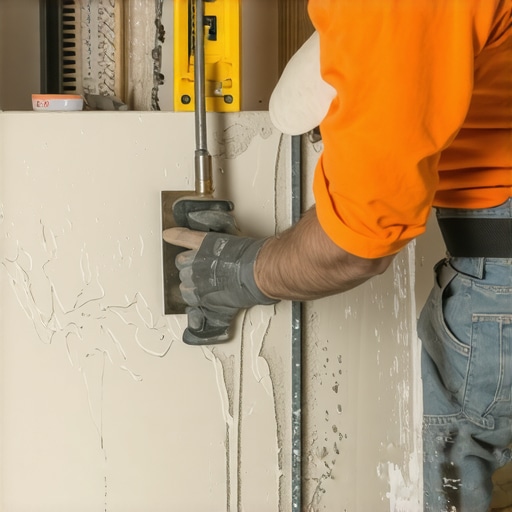
The physics of mortar and the structural reality of large format tile
The maximum thickness for standard thin-set mortar is typically 1/4 inch after the tile is fully embedded into the ridges. For large format tiles, which are defined as any tile with at least one side longer than 15 inches, you must transition to a Large and Heavy Tile (LHT) mortar, which allows for a thickness of up to 1/2 inch to account for tile warpage and substrate irregularities. I spent three days grinding concrete on a job last month just so the floor wouldn’t click like a castanet. Most guys skip the leveling compound. They think the underlayment will hide the dip. It won’t. I can still smell the WD-40 and oak dust from that site, the diamond blade screaming against the high spots because the previous installer thought he could just ‘build up’ the thin-set to three-quarters of an inch. That is where the failure begins. When you exceed the manufacturer’s specified thickness, the chemistry of the cement changes. Mortar is not a filler; it is an adhesive. As the water evaporates during the hydration process, the volume of the mortar bed shrinks. If that bed is too thick, the shrinkage is massive. It pulls on the tile, often unevenly, resulting in the dreaded lippage that ruins a high-end look. In my twenty-five years on my knees, I have seen $20,000 porcelain floors destroyed because the installer treated thin-set like it was structural concrete.
The 1/2 inch threshold that breaks tiles
Exceeding a 1/2 inch depth with Large and Heavy Tile mortar causes significant shrinkage-induced lippage and weakens the mechanical bond. Large format tiles require a specific mortar type often referred to as medium-bed or LHT mortar to support the weight and the physical dimensions of the plank or slab. Standard thin-set is comprised of Portland cement, fine sand, and water-retention agents. When you pile it high, the internal stresses of the drying cement pull at the edges of the tile. This is particularly dangerous when working on showers with modern designs where water penetration is a constant threat. If the mortar shrinks and creates a void, water will find it. I have pulled up tiles in showers where the mortar was an inch thick; the center was still wet after three years because the moisture was trapped in a tomb of cement that couldn’t breathe. This leads to mold, grout failure, and eventually, the entire system delaminating from the substrate.
“A floor is only as good as the subfloor beneath it; deflection is the enemy of every joint.” – Master Flooring Axiom
Why more mud creates more problems
Adding extra thin-set to level an uneven floor creates air pockets and reduces the contact area required for a permanent bond. A common mistake is the ‘dot-mounting’ method, where installers place blobs of mortar on the corners and center of the tile. This is a crime in the flooring world. To achieve the 95% coverage required for wet areas or 80% for dry areas, you must use the proper trowel and the back-buttering technique. When the mortar is too thick, it slumps. The heavy tile sinks into the soft bed, and by the next morning, the corners have dipped below the adjacent tile. You cannot fix this with standard tile cleaning or maintenance. It is a structural failure. The physics of the bond require ‘wetting out,’ which means the mortar must be fluid enough to transfer to the back of the tile while having enough body to hold the ridge. If the bed is too deep, the ridges collapse into a chaotic mess rather than flattening into a solid, air-free layer.
| Mortar Category | Max Cured Thickness | Primary Application |
|---|---|---|
| Standard Thin-Set | 1/4 inch | Mosaics, 12×12 tiles |
| LHT Mortar | 1/2 inch | Large Format, Heavy Stone |
| Self-Leveling Compound | 5 inches | Correcting subfloor dips |
| Epoxy Mortar | 1/8 inch | Chemical resistance areas |
The chemical trap of shrinkage
Portland cement undergoes a molecular transition where dicalcium silicate and tricalcium silicate form a crystalline structure that occupies less space than the liquid mix. This is why the depth of the bed is a hard rule, not a suggestion. When you are installing eco-friendly tile solutions, you are often dealing with dense, low-porosity materials that do not absorb water. This means the water in the mortar must either go down into the substrate or out through the grout joints. A thick bed of mortar acts as a reservoir of moisture. If the subfloor is not properly primed, the substrate might suck the water out too fast, killing the hydration process and leaving you with a chalky, weak bond. Conversely, if the substrate is non-porous, the water stays trapped, and the mortar never reaches its full compressive strength. I’ve walked onto jobs where you could pop a 24×48 tile off the floor with a putty knife because the mortar was so thick it simply never cured correctly.
The lie of the waterproof grout
Grout is not a structural component and cannot compensate for a shifting mortar bed or an overly thick thin-set layer. People think that if they use high-quality grout, it will hold the tiles together even if the mortar is substandard. This is false. Grout is the weakest link in the system. If the mortar bed shrinks and causes the tile to move even a fraction of a millimeter, the grout will crack. For those looking at grout restoration secrets, the first secret is that the mortar underneath must be stable. If you have a ‘clicking’ floor, no amount of epoxy grout will save it. You have to address the subfloor flatness. The industry standard is 1/8 inch of deviation over 10 feet. If your slab looks like a rolling hill, you don’t use more thin-set; you use a grinder and self-leveling underlayment. My hands are cracked from the alkaline burn of the cement because I refuse to cut corners on this. I would rather spend ten hours prepping a floor than ten minutes explaining to a client why their floor is falling apart.
“Large format tiles require a minimum mortar coverage of 80 percent in dry areas and 95 percent in wet areas such as showers.” – TCNA Handbook
A flat subfloor is not a suggestion
The success of large format tile is 90% preparation and 10% installation. If the subfloor is flat, the mortar depth remains consistent. When the mortar depth is consistent, the shrinkage is uniform. When shrinkage is uniform, the floor stays flat. This is the simple logic that many ‘pro’ installers ignore because it takes time. They want to rush to the part where they see the pretty tile and install the new baseboards to hide the perimeter gaps. But the perimeter is where the expansion happens. If you have packed the expansion gap with thick mortar, the floor has nowhere to go when the house shifts or the temperature changes. It will tent. It will crack. I’ve seen it happen in the dry heat of Phoenix and the humid swamps of Houston. The climate doesn’t matter as much as the physics of the expansion gap and the mortar depth.
- Verify substrate flatness with a 10-foot straightedge.
- Always use a Large and Heavy Tile (LHT) mortar for tiles over 15 inches.
- Back-butter every tile to ensure 100% transfer.
- Directional troweling: comb ridges in a straight line, not swirls.
- Use a lippage control system to hold tiles in place during the 24-hour cure.
The specific anatomy of a trowel notch
Choosing the right trowel is the only way to control the exact amount of thin-set being applied to the floor. For large format, I never use anything smaller than a 1/2 inch by 1/2 inch square notch. This trowel, when held at a 45-degree angle, leaves a ridge that is roughly 1/4 inch high. Once you set the tile and beat it in with a rubber mallet or a vibrating plate, those ridges collapse and spread. If you back-butter the tile with a 1/8 inch layer of ‘skim,’ you end up with a final bond thickness of about 3/16 to 1/4 inch. This is the ‘sweet spot.’ It is thick enough to grab the tile and thin enough to minimize shrinkage. If you use a 3/4 inch U-notch trowel because you are trying to fill a hole in the slab, you are asking for trouble. The ‘slump’ factor of the mortar will cause the tile to dive into that hole, creating a trip hazard that even the best chic baseboard designs cannot distract from. Thicker is not better. Thicker is weaker. Precision is the only metric that matters in flooring.