
The 1/8 inch that ruins everything
Most guys skip the leveling compound. They think the underlayment will hide the dip. It won’t. I spent three days grinding concrete on a job last month just so the floor wouldn’t click like a castanet. When you see grime building up under your baseboards, it is not just a cleaning problem. It is a structural signal. That gap exists because the subfloor was not flat or the baseboard was not scribed to the floor. Most installers just slam the trim down and nail it to the studs. When the house settles or the humidity changes, that gap opens up. It becomes a vacuum for hair, skin cells, and microscopic debris. If you ignore it, you are letting particulate matter sit against your floor’s expansion gap where it can trap moisture and rot your subfloor from the outside in. This is about more than aesthetics. This is about preserving the mechanical integrity of your home’s foundation and finish layers.
“A floor is only as good as the subfloor beneath it; deflection is the enemy of every joint.” – Master Flooring Axiom
The physics of the shadow line
Dust does not just sit there by accident. It settles into the baseboard crevice because of the stagnant air pocket created at the intersection of the wall and the floor. When you walk across a floating floor, whether it is LVP or engineered hardwood, the planks deflect slightly. This creates a bellows effect. It literally sucks air into the expansion gap. When the air stops moving, the heavy particulates drop out. Over time, these particulates mix with the moisture in the air and become a sticky paste. This is the grime you see. It is a chemical slurry of household dust and ambient humidity. To remove it, you cannot just use a damp rag. A damp rag will only push the sludge deeper into the gap where it can reach the raw edge of your flooring. You need to break the surface tension of the grime without introduces liquid to the subfloor. This is a delicate balance. If you saturate that gap, you risk cupping your hardwood or blowing out the edges of your laminate. I have seen thousand dollar floors ruined by people who thought they were being thorough with a mop. You must treat this area with the same precision as a surgical site.
Tools that actually reach the debris
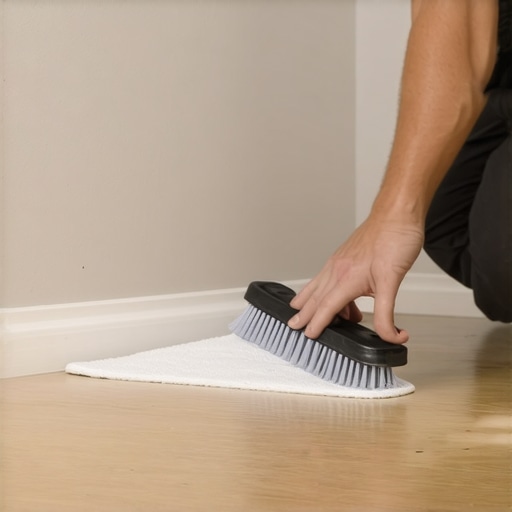
You need mechanical advantage to get under a baseboard. Your standard vacuum attachment is too wide to create the necessary static pressure within the crevice. You need a specialized crevice tool with a brush tip. The bristles break the mechanical bond of the dust while the vacuum removes the material before it can settle further back. For the truly stubborn grime, I use a plastic putty knife wrapped in a microfiber cloth dampened with a high-pH cleaner. Do not use vinegar. Vinegar is an acid that will eat the finish off your baseboards and slowly dissolve the lime in your grout. If you are working in a bathroom, you need to be even more careful. Check out tile cleaning tips for a sparkling bathroom in 2025 to understand the chemistry of the cleaners you are using. You want a neutral cleaner that suspends the dirt so it can be wiped away without leaving a residue. The goal is to lift the grime, not scrub it into the pores of the material.
| Cleaning Tool | Effectiveness Rating | Risk of Floor Damage |
|---|---|---|
| Standard Vacuum Brush | Low | None |
| High-Pressure Steam | High | Extreme |
| Microfiber Putty Knife | High | Minimal |
| Chemical Solvents | Moderate | High |
Chemical reactions in the crevice
When grime sits under a baseboard, it undergoes a slow chemical change. In rooms with high humidity like bathrooms or kitchens, the organic matter in the dust can start to support fungal growth. This is why the grime often looks black or dark green. It is not just dirt. It is a colony of microorganisms living off the skin cells trapped in the gap. If you have tile floors, this grime will migrate into the grout lines. Once it is in the grout, it is a whole different animal. You might find that the color of your grout changes permanently near the walls. If you are seeing this, look into grout restoration secrets for long lasting results. The key is to neutralize the biological growth without soaking the wood trim. Wood is hygroscopic. It wants to drink whatever you put on it. If you use too much water, the baseboard will swell, the paint will crack, and you will have created a larger gap for more grime to enter later. It is a vicious cycle that most homeowners fail to recognize until they see the wood rotting.
The structural reason for gap changes
Walls are rarely straight and floors are rarely level. As a master installer, I know that the gap under your baseboard is a breathing room for the house. However, that does not mean it should be a trash can. If the gap is wider than an eighth of an inch, your baseboards were installed poorly. They should have been scribed to the floor’s contour. In older homes, the floor might have settled, leaving a massive canyon where spiders and dust bunnies live. If you are tired of cleaning this area, you should consider adding a shoe molding or a quarter round. This second layer of trim is flexible and can be pushed down to follow the floor’s dips, sealing off the grime trap. For ideas on how to update your trim to prevent this, see chic baseboard designs that transform rooms in 2025. A properly sealed transition is the only way to truly stop the accumulation of edge grime. Without a physical barrier, you are just fighting a losing battle against physics and gravity.
“Deflection in the subfloor leads to mechanical failure of the surface finish; gaps are the first symptom.” – TCNA Handbook Insight
Protecting the transition in wet areas
In showers and bathrooms, the grime under the baseboard is often mixed with soap scum and hard water deposits. This makes it much harder to remove. You cannot just wipe it away. You need a surfactant that can break down the oils from the soap. But here is the catch. Most surfactants are slippery and can seep behind the tile or under the baseboard, where they never dry. This leads to a permanent state of dampness that will eventually eat your drywall. When cleaning near showers that wow modern designs for 2025, you must use a dry-to-the-touch method. Spray your cleaner onto the cloth, not onto the floor. This prevents the liquid from running into the expansion gap. Use a detail brush, like a stiff-bristled toothbrush, to agitate the grime in small circular motions. Then, immediately follow with a dry cloth to wick up any moisture. This staccato cleaning method is the only way to ensure you are not doing more harm than good.
The deep clean protocol
- Vacuum the perimeter with a high-efficiency particulate air filter.
- Use a dry brush to loosen the caked-on material from the gap.
- Apply a pH-neutral cleaner to a microfiber cloth, never the floor directly.
- Slide a thin tool wrapped in the cloth into the gap for mechanical extraction.
- Dry the area immediately with a clean towel to prevent wood swelling.
- Inspect the grout or caulk line for signs of failure or mold.
Regional moisture impacts on baseboard gaps
If you live in a place like Phoenix, the dry heat will shrink your baseboards until they show a gap large enough to fit a nickel. This is the desert reality. In high-humidity areas like Houston, the wood will swell, and the grime will get crushed into the fibers. You have to adapt your cleaning frequency to your local climate. In dry areas, you need to be careful not to use too much water as the wood will react violently to the sudden moisture. In humid areas, you are fighting a constant battle against mold. If your grout is starting to look dingy from the humidity and trapped grime, you might need to learn how to refresh grout without replacing it. Keeping that transition point clean is the first step in home maintenance. It is the frontline of your floor’s defense system. If the edge fails, the whole floor is at risk. I have seen it a hundred times. A small leak or a bit of trapped moisture at the wall starts the delamination of an entire room. Do not let a little bit of dust turn into a five-figure repair bill. Get on your knees and check those edges. It is the only way to know what is really going on with your house. Regular maintenance of these small details is what separates a professional-grade home from a builder-grade disaster. Spend the time now or spend the money later. The choice is yours. In the end, the integrity of your floor depends on the cleanliness of its boundaries.