
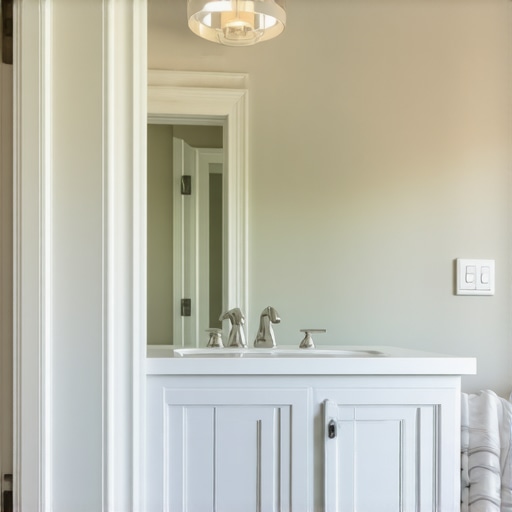
Architectural Proportions for Bathroom Baseboard and Ceiling Heights
Most guys skip the leveling compound. They think the underlayment will hide the dip. It won’t. I spent three days grinding concrete on a job last month just so the floor wouldn’t click like a castanet. This obsession with the subfloor isn’t just about the walk surface. It is about the transition. When you are matching baseboard height to your bathroom ceiling height, you are dealing with the physics of a confined space. I have seen countless five thousand dollar tile jobs ruined because the installer used a standard three inch contractor grade baseboard against a ten foot ceiling. It makes the room look squat, unfinished, and cheap. The bathroom is a high moisture environment where every vertical line is scrutinized against the horizontal plane of the grout. If your baseboard is out of proportion, the eye catches the error immediately. You need to understand the mechanical bond and the visual weight of these materials before you ever cut a piece of trim.
The golden ratio for vertical transitions
Matching baseboard height to your bathroom ceiling height requires a strict adherence to the seven percent rule of architectural proportion. For a standard eight foot ceiling, a baseboard height between five and seven inches creates a balanced visual anchor that grounds the room and complements your tile work. This isn’t just about looks. It is about the structural protection of the wall base. In a bathroom, the baseboard acts as a dam against moisture migration. When you scale up to a nine or ten foot ceiling, that tiny trim piece from the big box store looks like a toothpick. You need to move into the seven to nine inch range. I always tell my clients that the baseboard is the frame for the floor. If you have high end 2025 tile designs, you don’t want a flimsy frame. You can find more baseboards makeover ideas to elevate your space that follow these exact dimensional requirements. We are looking for a weight that feels intentional, not accidental. A heavy baseboard communicates permanence and structural integrity.
The ghost in the expansion gap
Expansion gaps in bathroom flooring are the difference between a lifetime installation and a buckling disaster within the first year of service. You must maintain a one quarter inch gap between the tile or LVP and the wall to allow for the natural movement of the subfloor. This gap is the primary reason baseboards exist. They are not just decorative. They are a functional bridge. If you are working in a climate with high humidity, like the coastal regions of the South, wood baseboards will expand and contract significantly. I prefer using a high density PVC or a moisture resistant MDF in bathrooms because they remain stable. However, if the homeowner insists on solid wood, I have to explain the chemistry of the finish. You need a back primed board to prevent the wood from cupping. I once walked into a project where the homeowner had installed solid walnut baseboards over a fresh concrete slab. The moisture vapor transmission rate was off the charts. Within two weeks, the wood was pulling the drywall screws right out of the studs because it was warping so violently. You have to respect the moisture.
“A floor is only as good as the subfloor beneath it; deflection is the enemy of every joint.” – Master Flooring Axiom
Why your subfloor is lying to you
Subfloor flatness is more important than levelness when you are trying to install high profile baseboards in a bathroom setting. A floor can be out of level but still flat, meaning the baseboard will sit flush against the tile without unsightly gaps. If your subfloor has a crown or a dip, the baseboard will follow that curve. This creates shadows. It makes your tile cleaning tips for a sparkling bathroom useless because dirt and moisture will collect in those gaps under the trim. I use a ten foot straight edge on every single bathroom job. If I find a dip greater than one eighth of an inch, I am pulling out the self leveler. There is no negotiation on this point. I have seen guys try to caulk a half inch gap under a baseboard. It looks terrible after six months when the caulk shrinks and turns yellow. You cannot fix a structural failure with a tube of silicone. The baseboard must sit tight. It must be an airtight seal against the finished floor to prevent water from reaching the plate of the wall.
| Ceiling Height | Recommended Baseboard Height | Recommended Material | Expansion Gap Requirement |
|---|---|---|---|
| 8 Feet | 5 to 7 Inches | PVC or MR-MDF | 1/4 Inch |
| 9 Feet | 7 to 8 Inches | Solid Wood (Back-Primed) | 1/4 Inch |
| 10 Feet+ | 8 to 12 Inches | Built-up Molding | 3/8 Inch |
The one eighth inch that ruins everything
Precision in measuring baseboard height against tile thickness determines the final aesthetic success of your bathroom renovation project. You must account for the height of the tile, the thickness of the thin-set, and any underlayment when calculating your vertical reveal. If you are aiming for a zero threshold look, your math has to be perfect. When I am installing showers with a style for small bathrooms, I am looking at how the baseboard terminates into the shower curb. This is the most difficult cut in the room. Most installers fail here. They leave a ragged edge or a gap that requires a mountain of grout. A professional uses a return on the baseboard. This means the profile of the trim wraps around itself, hiding the end grain or the core material. It is a small detail. It is the detail that separates a craftsman from a laborer. If your grout lines are not aligned with the center of the room, a tall baseboard will only make that mistake more obvious. The symmetry must be absolute.
- Measure the ceiling height in at least four corners of the room.
- Check subfloor flatness using a six foot level or straight edge.
- Select a baseboard material that matches the humidity profile of the bathroom.
- Ensure the baseboard thickness covers the required expansion gap of your flooring.
- Verify that the baseboard height does not interfere with electrical outlets.
- Pre-paint or pre-stain all trim before installation to ensure full coverage.
Engineering the vertical transition
The relationship between baseboard height and the vertical tile on your shower walls creates a visual horizon line that can either expand or shrink the room. A taller baseboard creates a sense of luxury and height in a bathroom with a tall ceiling. Many people think that big trim in a small bathroom will overwhelm the space. This is a myth. A tall, clean baseboard can actually make a small bathroom feel more expensive and well designed. It creates a bold border. When you are looking at showers that wow, the transition from the baseboard to the tile is where the design lives. I prefer to match the baseboard height to the first or second row of tile grout lines. This creates a sense of mathematical order. It feels like the room was engineered rather than just assembled. You have to think about the shear strength of your adhesives here too. If you are gluing baseboards to tile, you need a high tack polymer that won’t fail when the shower gets steamy.
“Standardization is the death of craft; every room has a unique moisture profile and structural requirement.” – Master Flooring Axiom
Humidity and the structural bond
Moisture vapor in a bathroom environment attacks the bond between the baseboard and the wall, leading to warping, mold growth, and paint failure. You must use high quality adhesives and fasteners that are rated for wet areas to ensure longevity. In regions with extreme humidity, like the swampy air of Florida or the Gulf Coast, I never use standard MDF. It acts like a sponge. Even if you paint it, the moisture finds a way in through the bottom edge. I always recommend eco-friendly tile solutions paired with PVC trim in these areas. For the installation, I don’t just rely on finish nails. I use a bead of construction adhesive on the back of every board. This prevents the trim from pulling away when the house settles. If you are struggling with old, stained grout near your baseboards, you can learn how to refresh grout without replacing it to match your new trim. The goal is a unified surface. No gaps, no cracks, and no movement. If the floor moves, the baseboard should be independent of it. If you nail the baseboard into the floor, you are inviting a disaster. The floor will pull the baseboard down, or the baseboard will buckle the floor. Always nail to the studs, never the subfloor.
The final alignment of form and function
Finalizing the baseboard installation involves a meticulous process of caulking and sealing every joint to create a water resistant barrier for your bathroom walls. This is the last line of defense against the structural rot that destroys millions of dollars in property every year. I see people skip the caulk at the top of the baseboard. They think it is just for looks. It is not. It keeps steam from getting behind the trim where it can condense and feed mold. Use a high grade acrylic caulk with silicone. It has the flexibility to handle the expansion we talked about earlier. If you have done your job right, the proportions will look effortless. The height of the trim will complement the ceiling without dominating it. The grout will be clean and the lines will be sharp. For those who want more professional results, grout restoration secrets for long lasting results can help maintain that crisp look between the tile and the baseboard. Remember, a floor is a performance surface. Every choice you make, from the height of the trim to the chemistry of the adhesive, dictates how long that performance will last. Do not settle for builder grade. Build for the next fifty years, not the next five.