
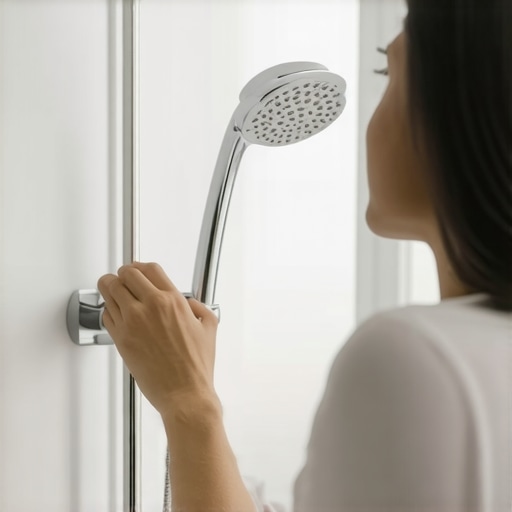
I once walked into a house where a custom five thousand dollar tile job was ruined because the installer did not check the wall substrate before mounting a sliding bar. Most guys skip the leveling compound and they definitely skip the structural blocking. They think the underlayment will hide the dip or the tile will support the weight of a heavy brass handheld unit. It will not. I spent three days grinding concrete on a job last month just so the floor would not click like a castanet, and I apply that same level of scrutiny to every shower wall I touch. If you do not hit a stud or a solid piece of blocking, that bar is going to pull through the tile and turn your expensive porcelain into a pile of jagged shards. A floor is only as good as the subfloor beneath it, and a shower wall is only as strong as the wood behind the waterproofing. I have spent twenty five years with thin-set under my nails and a level in my hand, and I can tell you that a shower is a performance surface, not a decoration. You need to treat it like a structural engineering project if you want it to last more than a year without leaking or cracking.
The standard height for a handheld shower bar
Handheld shower bar installation height should typically center at 48 inches from the finished shower floor for accessibility or 66 to 72 inches for general use. The vertical slide bar allows the shower head to adjust for different user heights while maintaining waterproofing integrity through stainless steel fasteners and silicone sealant in the grout lines. Most installers prefer a middle-ground mounting point that accommodates the tallest and shortest members of the household without forcing the hose to kink or the user to reach uncomfortably high. You have to consider the arc of the water and the spray pattern against the tile cleaning requirements of the space. If the bar is too low, you are constantly fighting the hose. If it is too high, you risk the water splashing over the top of the enclosure. It is a game of inches that dictates the daily comfort of the user.
“A floor is only as good as the subfloor beneath it; deflection is the enemy of every joint.” – Master Flooring Axiom
The physics of the slide bar mount
When you screw a bracket into a wall, you are creating a point of tension. If that point of tension is only supported by the brittle body of a ceramic tile, it will fracture under the torque of someone tightening the adjustment knob. You need to understand the molecular density of the tile you are drilling through. Grade 5 porcelain has a Vickers hardness that will eat through cheap drill bits in seconds. You need diamond tipped hole saws and a constant flow of water to keep the bit cool. If the bit overheats, the thermal shock will crack the tile glaze and then you are looking at a full replacement of the piece. I never use plastic anchors in a shower. They are a sign of a lazy installer who does not care about the long term survival of the wall. I always insist on 2×6 blocking installed between the studs during the framing phase. This allows me to drive three inch stainless steel screws directly into solid timber. That bar will not move even if a person slips and grabs it for support. It is about safety as much as it is about aesthetics in showers that wow.
Why your subfloor is lying to you
Even in a shower, the floor height dictates everything. If your subfloor is not level, your drain is not centered, and your tile layout is off, the height of your shower bar will look crooked relative to the grout lines. I see guys measure from the subfloor before the mud bed is in. That is a rookie mistake. You have to account for the thickness of the pre-slope, the liner, the final mortar bed, and the tile itself. That can be a difference of three inches. If you mount your bar at 48 inches from the subfloor, it ends up at 45 inches from the finished floor, and suddenly your tall clients are stooping just to get their hair wet. You have to visualize the entire assembly from the joists up to the ceiling. Every layer has a coefficient of expansion and a specific density that affects how the final fixtures sit. This is the same logic we use when installing chic baseboard designs in a bathroom. You have to know where the floor ends and the wall begins to the millimeter.
| User Category | Recommended Center Height | Technical Reasoning |
|---|---|---|
| Standard Adult | 66 to 72 inches | Provides overhead spray for 95th percentile height |
| Handicap or ADA | 48 inches max | Ensures reachability from a seated position or bench |
| Children | 36 to 44 inches | Allows for independent use and manageable hose reach |
| Pet Wash Station | 24 to 30 inches | Directs water flow to the lower third of the enclosure |
The 1/8 inch that ruins everything
If you are off by an eighth of an inch when drilling through a grout line, you have just created a path for moisture to migrate into the wall cavity. Capillary action is a powerful force. Water will find that tiny gap around the screw and travel behind the tile, into the thin-set, and eventually into the backer board. If you did not use a high quality waterproofing membrane like Kerdi or Wedi, that moisture will rot the studs within five years. I always pack the screw holes with 100 percent silicone before I drive the fastener. It is not enough to just caulk around the escutcheon plate. You have to seal the penetration itself. Most people want the thickest underlayment or the flashiest fixtures, but it is these small invisible details that prevent a catastrophe. I have seen showers with a style that looked like a magazine cover but smelled like a swamp because the installer did not understand moisture management. You have to be a scientist and a surgeon at the same time.
The ghost in the expansion gap
Every vertical surface meets a horizontal surface at a change of plane. In a shower, that is where the wall meets the floor or where two walls meet in a corner. You must never fill these gaps with hard grout. They must be filled with a color matched 100 percent silicone sealant. Houses move. They breathe. The wood expands and contracts with the seasons. If you grout that corner, it will crack within months. The same logic applies to where the shower bar mount meets the tile. If you do not leave a microscopic gap for movement and seal it correctly, the pressure of the house settling will push the bar against the tile and cause a pressure crack. I have seen it happen in a hundred high end homes. It is the same reason why baseboards makeover ideas require a gap at the bottom for flooring expansion. If you lock a material in place too tightly, it will find a way to break free.
- Verify the location of internal plumbing lines before drilling any holes in the tile.
- Use a level to ensure the vertical bar is perfectly plumb to avoid visual dissonance with grout lines.
- Apply a generous bead of silicone to the back of the mounting brackets to create a secondary water barrier.
- Ensure the sliding mechanism moves freely without hitting any decorative tile accents or listellos.
- Tighten fasteners by hand to avoid cracking the tile with excessive drill torque.
Grout integrity and fixture mounting
The relationship between the shower bar and the grout restoration process is often overlooked. If you are mounting a bar over old grout, you are asking for trouble. The vibration of the drill can cause old, brittle grout to crumble and fall out of the joints. I always recommend refreshing the grout before installing new hardware. It provides a stable environment for the escutcheon plates to sit against. If the grout is soft, the plate will eventually dig into the joint and create a leak point. It is all about the chemistry of the bond. Modern high performance grouts are fortified with polymers that resist cracking, but they still require a solid substrate. You cannot build a skyscraper on a foundation of sand, and you cannot mount a heavy shower fixture on a wall with failing grout. It is a recipe for a callback that I do not have time for.
“A floor is only as good as the subfloor beneath it; deflection is the enemy of every joint.” – Master Flooring Axiom
Environmental factors in specific regions
If you are working in a high humidity environment like New Orleans or Houston, your shower bar installation needs even more care. The moisture in the air will find any unsealed wood and cause it to swell. This swelling can actually push the tile off the wall from the inside out if the bar is screwed in too tight. In dry climates like Phoenix, the wood shrinks and can leave your shower bar feeling loose or wobbly after a few years. You have to account for these environmental swings by using the right adhesives and sealants. I always look at the local building codes for moisture barriers and radiant heat trends because they affect how the wall behaves. Even the choice of eco-friendly tile solutions can change the installation strategy because some recycled materials have different absorption rates than traditional ceramics.