
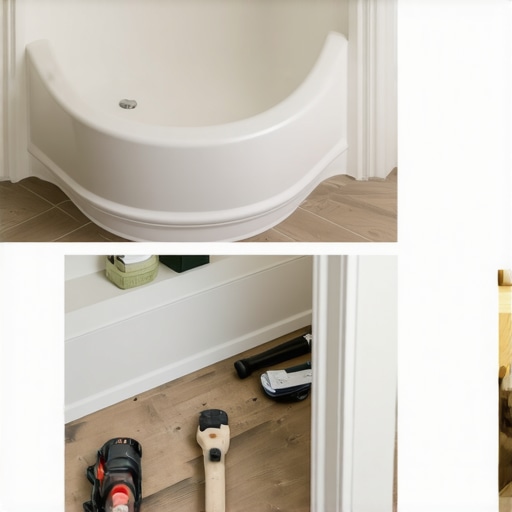
Mastering the Curve: How to Handle Baseboards Around a Round Tub
I once spent three days grinding concrete on a job last month just so the floor wouldn’t click like a castanet. That job had a massive round tub, a freestanding soaking beast that the previous installer had tried to trim with straight MDF baseboards. It looked like a series of broken bones. They thought the underlayment would hide the dip and the caulk would hide the gaps. It didn’t. Most guys skip the leveling compound and the radius math because they are lazy. If you want a floor that performs like a structural engineering marvel, you have to respect the physics of the curve. A round tub creates a unique geometry that standard linear trim cannot handle without specific intervention. We are talking about the intersection of moisture-resistant materials and structural flexibility.
The ghost in the expansion gap
To solve the ghost in the expansion gap, you must maintain a consistent perimeter space of at least one-quarter inch around the round tub. This allows the flooring material to expand without hitting the tub shroud or subfloor obstructions, preventing buckling or joint failure in the future. Many installers think they can tight-fit the flooring to the tub and cover it with a baseboard. They are wrong. Floating floors move with every change in relative humidity. If you lock that floor against a round tub, the planks will peak at the joints. You need a baseboard that covers that gap while following the radius precisely. This requires a material that can bend without snapping its molecular bonds. Wood fibers have a limit. PVC has a memory. Understanding these material properties is what separates a master from a handyman.
Why your subfloor is lying to you
Before you even look at a piece of trim, you have to acknowledge that subfloor levelness is the most essential factor in a successful installation around bathroom fixtures. If the floor has a one-eighth inch dip, your baseboards will show a shadow line that no amount of caulk or grout can truly hide. When I walk onto a site, the first thing I do is pull out a ten-foot straightedge. If I see light under that bar, the grinder comes out. In bathroom environments, we also deal with hydrostatic pressure. Moisture moves through concrete slabs as a gas, and if you trap it under a non-breathable surface around a tub, it will condense. This water will eventually find its way to the back of your baseboards, causing mold or rot if you didn’t choose the right material. Always check your moisture levels with a calcium chloride test or a pinless meter before proceeding.
“A floor is only as good as the subfloor beneath it; deflection is the enemy of every joint.” – Master Flooring Axiom
Materials that survive the splash zone
Selecting the correct trim material for a round tub involves weighing the flexibility of polyurethane against the rigidity of wood or medium-density fiberboard. In high-moisture areas, PVC baseboards or flexible resin moldings are the only logical choices to prevent water damage and warping. If you are looking for baseboards makeover ideas to elevate your space, you must consider how the material handles the radius. Solid wood can be kerf-cut, which involves making several vertical cuts on the backside to allow it to bend. However, this leaves the end grain exposed to moisture. In a bathroom, that is a recipe for disaster. I prefer flexible polyurethane. It is molded with a resin that mimics the look of wood but bends like rubber. It handles the humidity of showers that wow without flinching.
| Material Type | Flexibility Rating | Moisture Resistance | Best Use Case |
|---|---|---|---|
| Solid Oak | Low | Medium | Dry areas, custom kerfing |
| MDF | Very Low | Very Low | Do not use near tubs |
| PVC | High | High | Standard wet rooms |
| Polyurethane Resin | Extreme | High | Tight radius round tubs |
The physics of the radius cut
To execute a perfect radius cut, you must calculate the circumference and the arc length of the tub base to ensure your baseboard sections meet at logical transition points. Use a template made of cardboard or thin luan to trace the exact curve before cutting your expensive molding. The molecular structure of flexible molding allows it to stretch on the outer face and compress on the inner face. If the radius is too tight, you will see ‘ghosting’ where the finish starts to stress. To avoid this, pre-heat the molding in a warm room or with a heat gun. This softens the polymers. When you apply it to the tub, start from the center of the curve and work your way out to the straight runs. Use a high-tack, moisture-cured adhesive. Standard wood glue will not bond to the non-porous back of resin molding. You need something that creates a chemical bond, like a modified silane polymer.
The grout and tile intersection
When installing tile around a round tub, the grout joints must be symmetrical and the cuts should follow the radius with a one-eighth inch gap for color-matched sealant. Never run grout directly against the tub shroud, as the vibration and weight of the water will crack the joint instantly. This is a common failure point. People think grout is a filler. It is not. It is a rigid cementitious product. Tubs move when they fill with hundreds of pounds of water. You need a soft joint. This is where grout restoration secrets come in handy, because most people have to fix this after a year. Use a 100 percent silicone caulk that matches your grout color. This allows the tub to settle without tearing the baseboard off the wall or cracking your beautiful tile work. If you are maintaining the area, check out tile cleaning tips for a sparkling bathroom to keep those radius joints free of mildew.
“Moisture vapor emission rate must not exceed three pounds per one thousand square feet per twenty-four hours.” – Tile Industry Standard
A checklist for the perfectionist
- Verify subfloor flatness within 3/16 inch over 10 feet.
- Check moisture content of the subfloor with a calibrated meter.
- Acclimate flexible molding to the room temperature for 48 hours.
- Create a physical template of the tub radius using scribe tools.
- Apply a continuous bead of moisture-cured adhesive to the molding back.
- Secure with 18-gauge brad nails into studs, not just the drywall.
- Seal the bottom edge with silicone to prevent water wicking.
The anatomy of a perfect radius cut
The technical execution of scribing baseboards involves using a compass or divider to transfer the irregularities of the floor and tub onto the trim surface. This ensures a tight fit that requires minimal caulking and provides a professional aesthetic. If you are using wood, the kerf cuts on the back should be spaced roughly one-half inch apart. You must cut through two-thirds of the material thickness. If you go too shallow, the wood snaps. If you go too deep, the face of the board telegraphs the cuts. It is a delicate balance of tension and compression. Once the board is bent, the gaps in the kerfs should be filled with wood epoxy to regain structural integrity. This prevents the board from trying to spring back to its original straight shape, which would eventually pull the nails out of the wall. Professionalism is found in these hidden steps. It will buckle if you don’t respect the tension.
Final field notes
Handling baseboards around a round tub is not about vanity. It is about protecting the structural integrity of the home. By using flexible materials and respecting expansion gaps, you ensure that the water stays where it belongs and the floor remains stable for decades. Don’t be the guy who relies on a tube of caulk to fix a bad cut. Do the math, check your moisture, and treat every curve like an engineering challenge. This approach is how you build a reputation that lasts longer than the house itself.