
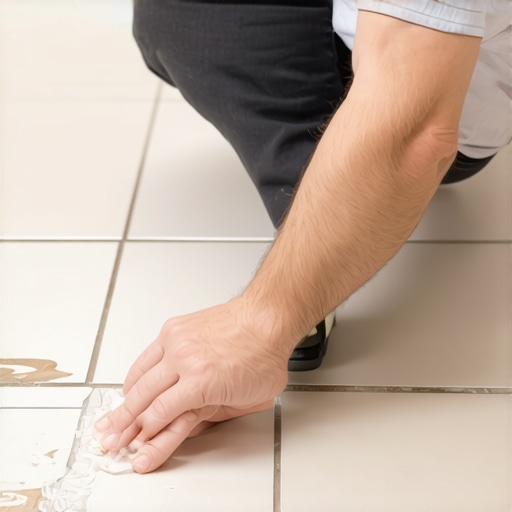
I have spent twenty five years on my knees with a moisture meter and a level. I am the guy who gets the phone call after a cut-rate handyman leaves your kitchen sounding like a haunted house. Most installers skip the leveling compound. They think a thick layer of underlayment or a bit of extra thin-set will hide the dip in the concrete. It will not. I spent three days grinding concrete on a job last month just so the floor would not click like a castanet. That job was a reminder that flooring is not a cosmetic choice. It is a structural engineering challenge. When a tile squeaks or clicks, it is a signal of structural failure at the molecular level. The bond between the ceramic and the substrate has broken. You are now walking on a floating piece of stone that is rubbing against the dried ridges of mortar. This friction creates the noise. You do not always have to rip the whole thing out to fix it. You just have to be smarter than the physics of the floor.
The physics of the ceramic chirp
Fixing squeaky tiles without removing grout requires injecting high-strength low-viscosity adhesives directly into the void between the tile and the subfloor. This process stabilizes the assembly by filling air pockets and re-establishing a mechanical bond between the thin-set and the substrate. The squeak happens because of deflection. If your subfloor moves more than the Tile Council of North America allowable limit of L/360 of the span, the tile will de-bond. When you step on a loose tile, it moves downward. The grout acts as a hinge until it eventually cracks. If the grout is still intact but the tile clicks, you have a hollow spot. This is often caused by the installer not back-buttering the tiles or allowing the mortar to skin over before laying the piece. The result is a microscopic air gap. When you step on it, the tile flexes. That flex is what you hear. It is the sound of failure. You can solve this by introducing a liquid bridge that cures into a solid support.
Why your subfloor is lying to you
Subfloor instability is the primary cause of noisy tile installations and usually stems from improper joist spacing or moisture-induced swelling in the plywood layers. Structural movement translates through the mortar bed and snaps the rigid bond of the tile adhesive. I have seen houses where the floor was technically level but the OSB was so saturated with humidity it had the structural integrity of a wet cracker. In the swampy humidity of Houston, solid wood or rigid tile on a bad subfloor is a death wish. You need to understand the moisture vapor transmission rate. If the concrete slab is breathing too much vapor, it will push the tile right off the bed. This is why a moisture barrier is not optional. It is a requirement. Most guys ignore the expansion gap at the perimeter too. They jam the tile tight against the wall. When the house settles or the temperature shifts, the floor has nowhere to go. It bunches up. It heaves. It squeaks. You must leave that quarter inch gap under your baseboards. If you are looking to hide those gaps properly, check out these chic baseboard designs that transform rooms in 2025 to ensure your expansion zones are covered but functional.
“A floor is only as good as the subfloor beneath it; deflection is the enemy of every joint.” – Master Flooring Axiom
The injection method for hollow tiles
The drill and fill technique uses a masonry bit to create access points in the grout lines through which a specialized floor repair adhesive is pumped to fill the void. This method preserves the aesthetic of the floor while providing a permanent structural fix. You start by identifying every loose tile. I use a heavy plastic mallet or a golf ball. You bounce it off the floor. A solid tile sounds like a thud. A loose tile sounds like a hollow drum. Once you find the hollow spots, you take a 1/16 inch or 1/8 inch masonry bit. You drill into the grout line, not the tile itself. You want to hit the air pocket. You will feel the drill bit drop once it clears the grout. This is your target. You vacuum the dust out of the hole. This is vital. If you leave dust in there, the adhesive will just bond to the dust and not the subfloor. You then take a cartridge of low-viscosity epoxy or specialized acrylic floor adhesive. You pump it in until it starts to resist or until it comes out of a secondary vent hole you drilled. This liquid flows into the ridges left by the original trowel and creates a new foundation. After you inject the resin, you must weigh the tile down with something heavy like a bucket of water or a stack of bricks for at least twenty four hours. If you do not weight it, the adhesive might actually lift the tile slightly as it expands or settles, making the floor uneven.
| Adhesive Type | Viscosity Level | Cure Time | Best Use Case |
|---|---|---|---|
| Epoxy Resin | Very Low | 24 Hours | Concrete slabs and heavy traffic |
| Acrylic Latex | Medium | 12-24 Hours | Plywood subfloors and flexible joints |
| Polyurethane | High | 4-8 Hours | Small localized voids and quick fixes |
The role of moisture and regional climate
Environmental humidity levels directly dictate the expansion and contraction cycles of flooring materials and the subfloor substrates they sit upon. Regional climate variations require specific adhesive selections to maintain a long-term bond. If you live in a dry climate like Phoenix, your subfloor will shrink. This creates gaps. If you are in a humid coastal area, everything expands. I have seen tiles pop off the floor like popcorn because the installer did not account for the local dew point. You have to acclimate your materials. Even tile needs to be at the same temperature as the room. If you are dealing with a bathroom, moisture is your constant enemy. The steam from showers that wow modern designs for 2025 can permeate into the grout if it is not sealed. Once water gets under the tile, it starts to rot the thin-set. This leads to the clicking sound. It also leads to mold. If your grout is already showing signs of wear from this moisture, you should look into grout restoration secrets for long lasting results to ensure the structural integrity of your repair holds up against the humidity.
“Standard ceramic tile installations should not exceed a deflection of L/360 under a concentrated load of 300 pounds.” – TCNA Handbook
Essential tools for structural silence
Successful tile stabilization requires precision tools that allow for localized repair without compromising the integrity of the surrounding floor. Using the wrong equipment can lead to cracked tiles and ruined aesthetics. You cannot just use a standard wood drill bit. You will shatter the ceramic. You need carbide-tipped masonry bits. You also need a high-pressure adhesive gun. A standard caulk gun often does not provide the consistent pressure needed to force the resin into the microscopic gaps of a de-bonded thin-set bed. Here is the checklist for a professional repair job.
- Carbide-tipped masonry bits (1/16 inch and 1/8 inch sizes)
- High-viscosity shop vacuum with a HEPA filter to pull dust from the voids
- Floor repair adhesive specifically rated for injection
- Weighted buckets or sandbags for pressure during the curing phase
- Color-matched grout caulk to seal the injection holes after the repair
- A moisture meter to ensure the subfloor is not currently saturated
The myth of the thick underlayment
While most people want the thickest underlayment, too much cushion actually causes the locking mechanisms on flooring to snap and tiles to crack under pressure. A floor needs a firm foundation. If you put a soft, squishy layer under a rigid material like tile, you are building on a sponge. Every time you step, the tile bends. Ceramic is not designed to bend. It is designed to be compressed. When you give it room to flex, it breaks. This is why self-leveling underlayment is superior to foam pads or thick rubber mats. You want the substrate to be as flat as a pool table. If you find that your tile is squeaking because the subfloor itself is moving, you might have to go into the crawlspace and sister the joists. No amount of glue will fix a floor that is bouncing because the joists are undersized. If you want to improve the overall look after the repair, consider some baseboards makeover ideas to elevate your space which can help tie the room together once the floor is finally quiet. If the grout looks dingy after the repair, you can learn how to refresh grout without replacing it to complete the transformation. A quiet floor is a sign of a healthy home. It means the physics are working for you instead of against you. Stop ignoring the clicks. Fix the bond. Save the floor.