
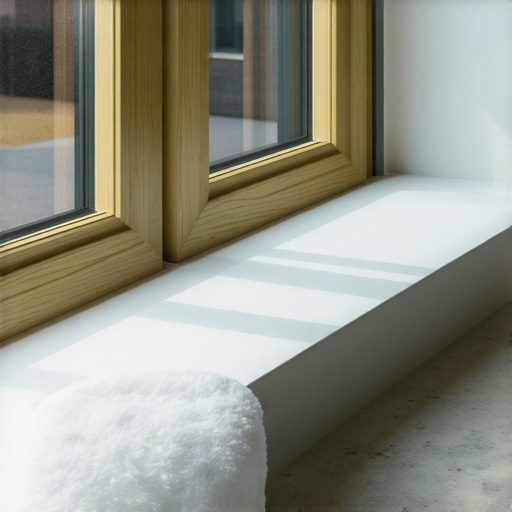
I spent three days grinding concrete on a job last month just so the floor wouldn’t click like a castanet. That job taught me that most guys skip the leveling compound because they think the underlayment will hide the dip. It won’t. I apply that same logic to bathroom windowsills. I have walked into too many bathrooms where the homeowner thinks a coat of semi-gloss paint is enough protection against the steam of a hot shower. Within two years, that paint is bubbling. Within three, the wood underneath is a soft, black mess of rot and mold. After 25 years in the trade, I have seen every shortcut in the book, and none of them work as well as a properly engineered tile surface. If you want a windowsill that survives a decade of humidity, you have to stop thinking about it as a piece of furniture and start treating it as a structural drainage element. It is about the physics of water and the chemistry of the bond. I have my moisture meter in my back pocket and sawdust under my nails, and I am here to tell you that if you do not tile that sill, you are just waiting for the rot to set in.
The myth of the waterproof paint
Waterproofing a bathroom windowsill requires more than just a surface coating because moisture infiltration occurs at the microscopic level through joint failure and capillary action. Most people assume that exterior grade paint will seal the wood. It does not. Wood is a living, breathing material that expands and contracts with the fluctuating humidity levels of a bathroom. When you take a hot shower, the air saturates. That moisture finds the smallest crack in the paint, often where the sill meets the window frame, and it settles there. Once water is behind the paint, it cannot escape. It sits against the cellulose fibers of the wood, feeding fungal spores that lead to rot. I have pulled up sills that looked perfect on top but were nothing but mush underneath. You need a non-porous barrier that does not move. Tile is that barrier. Using a high-quality ceramic or porcelain tile creates a surface that is impervious to the steam and splashes that are inevitable in a wet environment.
Why gravity always wins on a flat sill
Slope and drainage are the most overlooked aspects of windowsill installation because pooling water will eventually degrade even the best epoxy grout or silicone sealant. Here is a contrarian truth for you. Most people think a windowsill should be perfectly level. If you do that, you have already failed. A level sill allows water to sit. Surface tension keeps that water in a puddle, and that puddle sits against your window track. Over time, that water will find a way through the sealant. I always install my sills with a 1/16th inch pitch toward the room. It is a slight angle that you cannot see with the naked eye, but it is enough to ensure that gravity pulls every drop of condensation away from the window frame and down toward the floor. This is basic structural engineering. If water is moving, it is not rotting your house. When you are prepping your substrate, you use thin-set to create this pitch before the tile even touches the surface.
“A floor is only as good as the subfloor beneath it; deflection is the enemy of every joint.” – Master Flooring Axiom
The chemistry of the bond
Polymer-modified thin-set and hydrostatic pressure resistance are the technical foundations of a waterproof tile installation because they prevent delamination in high-moisture zones. You cannot just slap some mastic on a piece of wood and call it a day. Wood and tile have different expansion coefficients. The wood wants to move, and the tile wants to stay still. If you use a rigid adhesive, the bond will snap. You need a high-latex, polymer-modified mortar that offers a degree of flexibility. This mortar creates a mechanical and chemical bond that can withstand the vibration of the house and the thermal expansion caused by the sun hitting the window. I always use a 1/4 inch square-notch trowel to ensure I get 95 percent coverage. Anything less creates air pockets. In a bathroom, an air pocket is just a tiny room for mold to grow in. You want a solid bed of mortar that leaves no space for moisture to hide.
| Material Type | Moisture Absorption Rate | Expansion Coefficient | Recommended Use |
|---|---|---|---|
| Solid Red Oak | High (8-12%) | Very High | Avoid in Wet Areas |
| Porcelain Tile | < 0.5% | Very Low | Best for Windowsills |
| Ceramic Tile | 3-7% | Low | Good for Walls |
| Natural Marble | Moderate | Medium | Requires Frequent Sealing |
Tiling the windowsill like a professional
Substrate preparation for a bathroom window involves removing all organic materials and replacing them with cementitious backer board to prevent wicking. If you are starting with a wood sill, rip it out. I do not care how much you like the look of the wood. Rip it out down to the studs. I then install a piece of 1/2 inch cement board, or better yet, a high-density foam waterproof board. This material will not rot, even if it gets wet. Once the board is in, I apply a liquid waterproofing membrane. I paint it on thick. It looks like blue or red rubber when it dries. This creates a continuous, hole-free skin over the entire window opening. Only then do I start my tile layout. I always center my tiles so the cuts on the left and right are identical. It is about the craftsmanship. You want the eye to see symmetry, not a sloppy sliver of tile at one end because you were too lazy to measure the midpoint.
Grout is the weak link
Grout joints are the most vulnerable part of any tile assembly because they are porous and prone to micro-cracking under stress. Even the best tile is useless if the grout fails. For a windowsill, I never use standard sanded grout. It is too porous. I use an epoxy grout or a high-performance cement-grade grout that has built-in sealers. Epoxy is a pain to work with. It is sticky, it smells like a chemical plant, and you have about 20 minutes before it turns into a rock. But once it is in, it is bulletproof. It does not absorb water, it does not stain, and it does not crack. If your current grout is looking rough, you should look into grout restoration secrets for long lasting results to prevent water from getting into the wall cavity. A windowsill is essentially a small roof. If the roof leaks, the house dies. Treat your grout lines like the shingles on your house.
Matching your sill to your baseboards
Architectural transitions between the windowsill and the bathroom baseboards define the aesthetic durability of the room. A tiled sill should not look like an afterthought. It should integrate with the rest of the trim. I often see people do a beautiful tile job on the sill and then ruin it with a cheap, MDF baseboard underneath. MDF in a bathroom is a crime. It is basically compressed paper that swells the moment a towel hits it. When you are looking for chic baseboard designs that transform rooms in 2025, choose materials that can handle a splash. I like to run my tile from the sill down the wall to meet the baseboard, or use a matching stone slab for the sill that echoes the color of the base trim. This creates a unified look that feels intentional and high-end. It makes the window look like it was carved out of the room rather than just cut into it.
“Water is a patient thief; it will find the one hole you forgot to seal.” – Master Flooring Axiom
Integrating with shower designs
Wet zone coordination ensures that showers and windowsills function as a continuous moisture management system. If your window is actually inside the shower, the stakes are even higher. I have seen guys try to use a standard window in a shower stall. That is a disaster. You need a vinyl window with no wood components. The tile must wrap into the return of the window, and every single joint must be filled with 100 percent silicone caulk, not grout. Grout in a corner will crack because the window and the wall move at different rates. Silicone is flexible. It acts like a gasket. For inspiration on how to handle these tricky areas, check out showers that wow modern designs for 2025. You will see that the best designs use large format tiles to minimize grout lines, which is exactly what I recommend for windowsills. The fewer lines you have, the fewer places for water to attack.
The final word on water management
Long term maintenance of tiled surfaces involves regular inspection of sealants to ensure the waterproof integrity remains intact. Once the tile is set and the grout is cured, you are not done forever. Every year, you need to check the silicone bead around the window frame. If it is peeling, scrape it out and redo it. Cleaning is also vital. You can find excellent tile cleaning tips for a sparkling bathroom in 2025 that will help you keep the mineral deposits from building up on your new sill. Hard water can eat away at sealers over time. If you notice your grout is starting to look dingy but is still structurally sound, you can learn how to refresh grout without replacing it to save yourself a full teardown. Maintenance is the difference between a floor that lasts ten years and one that lasts fifty. I build things to last fifty.
- Remove all existing wood trim and the apron.
- Check the rough framing for moisture with a meter.
- Install a cement-based backer board with a slight pitch.
- Apply two coats of liquid waterproofing membrane.
- Use polymer-modified thin-set for maximum adhesion.
- Back-butter each tile to ensure 100% coverage.
- Fill the window-to-tile gap with 100% silicone caulk.
- Seal the grout if you are not using epoxy.