
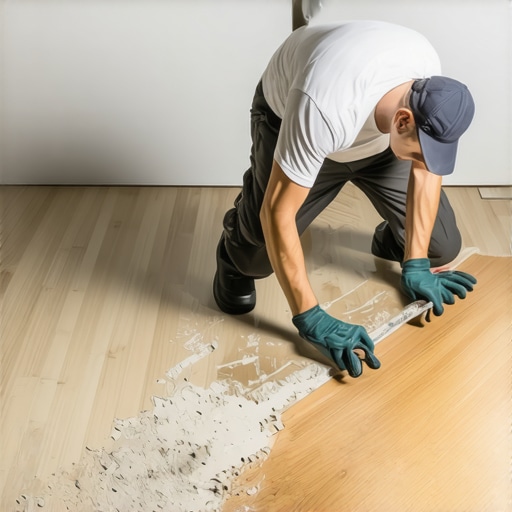
I spent three days grinding concrete on a job last month just so the floor wouldn’t click like a castanet. Most guys skip the leveling compound. They think the underlayment will hide the dip. It won’t. I have seen countless DIY attempts where the homeowner used a massive jackhammer on a 3/4 inch plywood subfloor, only to find they had vibrated the nails loose and splintered the top veneer to the point of structural failure. When you are dealing with showers or old tile installations, the bond between the thinset and the substrate is often stronger than the substrate itself. This is a mechanical reality that requires surgical precision rather than brute force. You are not just cleaning a floor; you are prepping a performance surface that must remain flat to within 1/8 inch over a 10 foot radius. If you gouge that wood or crack that slab, your new floor is doomed before the first box is even opened.
The mechanical bond that breaks plywood
Removing thinset from a wood subfloor requires a shallow angle of attack and a sharp blade to shear the cementitious bond from the wood fibers. You must avoid vertical impact which causes delamination of the plywood layers. Using a floor scraper with a replaceable carbon steel blade is the most effective manual method for preserving the wood. Thinset is designed to migrate into the pores of the substrate. In wood, this means the cement anchors itself into the grain. If you try to pry it up, you will take the wood grain with it. I always tell my crew to keep the scraper at a 15 degree angle. Anything steeper and you are digging a grave for your new underlayment. We are talking about the chemistry of ANSI A118.4 modified mortars. These products contain polymers that act like glue. When they cure, they create a bridge between the sand and the wood cellulose. To break this bridge without destroying the island, you need to use the right vibration frequency or a very sharp edge. If you are prepping for baseboards and new flooring, the edge of the room is where most people get lazy. They leave chunks of thinset near the drywall, which prevents the baseboard from sitting flush, leading to gaps that even the best caulk cannot hide.
Why your chisel angle determines the future of the floor
The angle of your tool is the single most important factor in preventing subfloor damage during thinset removal. A low angle of 10 to 20 degrees allows the tool to slide between the mortar and the substrate, while a high angle of 45 degrees or more will drive the energy into the subfloor, causing cracks or gouges. If you are using an SDS Max or an SDS Plus rotary hammer, do not use a standard pointed chisel. You need a wide, thin scaling bit. I have seen rookies go at a floor with a point, and they end up making the concrete slab look like the surface of the moon. This is especially vital when you are working on showers where the waterproofing membrane might be just below the surface. You want to skip the hammer mode if the thinset is soft enough and use a manual floor scraper. The weight of the tool should do most of the work. If you are fighting it, your blade is dull. I go through a pack of ten blades on a standard kitchen floor. It is a small price to pay to avoid the nightmare of floor leveling compound later. When the subfloor is concrete, the heat generated by the friction can actually bake the thinset further into the pores. You have to keep the tool moving. It is a dance between the machine and the masonry.
“A floor is only as good as the subfloor beneath it; deflection is the enemy of every joint.” – Master Flooring Axiom
The chemical reality of modified thinset mortars
Chemical thinset removers or softeners work by breaking down the polymer chains within the mortar, but they are rarely effective on high-performance, modified thinsets used in modern installations. Physical abrasion or mechanical shearing remains the industry standard for ensuring a clean substrate for new tile or hardwood. Most of the stuff you find in big box stores is basically just expensive water when it comes to twenty year old mortar. If you are dealing with a grout-heavy installation, the grout often comes up easier than the thinset. You can learn more about how to refresh grout if the structure is still sound, but for a full tear out, you are looking at sweat equity. The polymers in modern thinset are designed to be water resistant. This means soaking the floor with water usually just creates a muddy mess without actually softening the bond. I prefer the dry method with a heavy duty HEPA vacuum attached to a shroud. It keeps the dust down and allows you to see the exact point where the thinset meets the wood or concrete. If you cannot see the transition, you are guessing, and guessing leads to holes in the subfloor.
| Removal Method | Speed Rating | Subfloor Risk | Best Substrate |
|---|---|---|---|
| Manual Floor Scraper | Slow | Very Low | Plywood / OSB |
| SDS Rotary Hammer | Fast | Moderate | Concrete Slab |
| Angle Grinder with Cup Wheel | Very Fast | High | Concrete Only |
| Oscillating Multi-Tool | Very Slow | Zero | Tight Corners / Wood |
The hidden dangers of moisture in subfloor prep
Moisture levels must be monitored before and after thinset removal to ensure the subfloor has not absorbed water during the process, which can lead to mold or floor failure. A wood subfloor should never exceed 12 percent moisture content before a new floor is installed. I once walked into a house where the homeowner had used a pressure washer to remove thinset. It was a disaster. The plywood had swollen so much that the seams were peaking like mountain ranges. They had to wait three weeks with industrial dehumidifiers running just to get the house back to a baseline. If you are working in showers, moisture is already your enemy. You need to ensure that the area is bone dry before you even think about applying a new membrane or tile. Check the modern designs for 2025 to see how clean the prep needs to be for those large format tiles. Any bump in the subfloor will cause a lippage issue that you will feel every time you walk barefoot. The tile itself is rigid; the subfloor must be perfectly flat to support that rigidity. I use a 6 foot straight edge to check every square inch. If I find a dip, it gets feather finish. If I find a hump, it gets ground down. No exceptions.
- Inspect the entire perimeter for hidden nails or staples that will nick your scraper blade.
- Check the subfloor thickness to ensure it meets the L/360 deflection standard for tile.
- Remove all baseboards carefully to avoid damaging the drywall or the subfloor edge.
- Vacuum the floor three times; if you still see dust, you are not ready for thinset.
- Mark any soft spots in the plywood that might indicate rot from old leaks.
The strategy for corners and baseboard transitions
Detail work around the perimeter and under baseboard lines requires a smaller, more controlled tool like an oscillating multi-tool with a carbide grit blade. This prevents damage to the wall framing and allows for a zero-threshold transition for the new flooring material. People always ask me why their tile is cracking near the walls. Usually, it is because the installer left a mountain of old thinset in the corner and tried to bridge it with new mortar. That creates a pivot point. When the house settles or the seasons change, the floor flexes, and the tile snaps. You have to get that floor clean all the way to the sill plate. If you are interested in keeping your existing tile, look into grout restoration secrets instead of a full demo. But if the demo is happening, you need to be thorough. I use a hammer and a 1 inch cold chisel for the corners. It is slow, tedious work. My knees hurt just thinking about it, but it is the only way to do it right. You cannot fit a big scraper into a 2 inch gap. You have to get down there and earn it. The goal is a substrate so clean you could eat off it, though I wouldn’t recommend it with all that silica dust.
“Substrate preparation is 90 percent of the job; the remaining 10 percent is just showing off.” – TCNA Installation Handbook
The physics of the dustless environment
Managing silica dust during thinset removal is a safety requirement that also protects the mechanical integrity of your tools and the clean bond of your new adhesive. High-velocity HEPA filtration systems should be used whenever mechanical grinding or hammering is performed on concrete. You don’t want that gray flour-like dust getting into your HVAC system or your lungs. It also settles back onto the floor and acts as a bond breaker for your new tile. If you are working in a bathroom, seal the vents and the doors with plastic. I have seen guys ruin a whole house of carpet because they didn’t seal the room where they were pulling up old showers. The dust is microscopic. It gets everywhere. Use a vacuum with a shaking filter to keep the suction high. If the suction drops, you are just blowing dust around the room. This is the part of the job that separates the professionals from the hacks. A professional leaves the site cleaner than they found it. A hack leaves a layer of white powder on the ceiling fans. Which one do you want to be? Keeping a clean site also helps you see those small cracks in the slab that might need an anti-fracture membrane before the new tile goes down.
Tactical advice for the final subfloor inspection
Before you consider the thinset removal complete, you must perform a sound test by tapping the subfloor with a tool to identify hollow spots or delaminated wood. Any area that sounds like a drum must be reinforced or replaced to prevent future floor movement. If you are installing on a slab, look for spiderweb cracks. If you are on wood, check the joist spacing. You might think you are done once the old mortar is gone, but you are just starting the most important phase. This is when you check for levelness and flatness. They are not the same thing. Level is horizontal; flat is a plane. You need a flat plane. If you have a hump in the middle of the room, your baseboards will have a gap at the ends. Check out chic baseboard designs to see how a perfectly flat floor makes the trim work pop. If you skip this, you will be fighting the trim the whole way. My final check is always a damp sponge. If the sponge picks up any gray residue, the floor isn’t clean enough. The thinset needs a pristine surface to grab onto. Anything less and you are just floating a floor on a layer of dirt. It will fail. It is just a matter of when. Work hard on the prep and the rest of the job is a breeze.”,”image”:{“imagePrompt”:”A close up shot of a professional floor installer using a heavy duty manual floor scraper at a 15 degree angle to remove gray thinset from a plywood subfloor, showing the clean wood grain underneath, high detail, industrial lighting.”,”imageTitle”:”Professional Thinset Removal Technique”,”imageAlt”:”Installer removing thinset from plywood with a floor scraper”},”categoryId”:1,”postTime”:”2025-05-22T09:00:00Z”}