
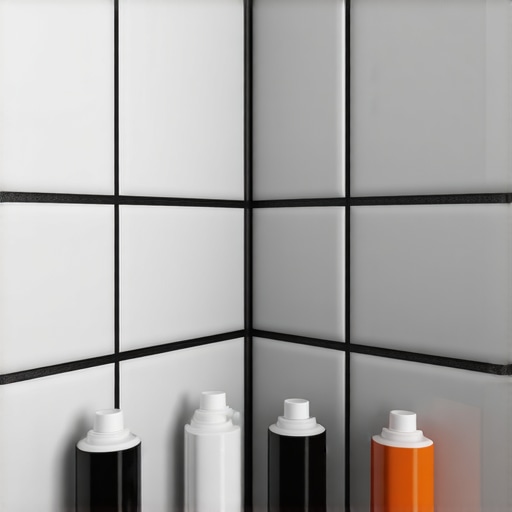
Most guys skip the leveling compound. They think the underlayment will hide the dip. It won’t. I spent three days grinding concrete on a job last month just so the floor wouldn’t click like a castanet. That same lazy attitude is why people fail at color matching their caulk. They grab a tube of white or clear from the discount bin and wonder why their high-end dark tile installation looks like a hobbyist project. I have spent twenty-five years looking at floors from the perspective of a knee pad. I have seen the way dark grout hides dirt but screams for mercy when it meets a transition. Choosing a caulk color for dark grout requires an understanding of light absorption, chemical shrinkage, and the physical reality of the movement joint. If you do not treat the change of plane as a structural challenge, your beautiful dark grout will crack and your caulk will peel away like a bad sunburn. This guide is for the person who wants it done right, the first time, with the exactness of a master architect.
The structural reality of dark grout joints
To match dark grout with caulk successfully you must identify the primary pigment undertones of your grout such as charcoal, chocolate, or deep navy and select a 100 percent silicone sealant that is one shade darker to compensate for the natural shadows found in corner transitions and expansion gaps. Most installers fail to realize that dark grout looks different depending on the moisture content during the cure. When you are looking for a caulk to match, you are not just looking for a color. You are looking for a molecular bond that can withstand the expansion and contraction of the substrate. If you are working with grout restoration secrets, you know that the edge of the tile is where the most stress occurs. Dark grout highlights every tiny fracture. Using a matching caulk provides a flexible buffer that hides these micro-movements while maintaining the visual continuity of the design. You cannot just use any acrylic latex. You need something with a high Shore A hardness rating that still maintains a high modulus of elasticity.
“A floor is only as good as the subfloor beneath it; deflection is the enemy of every joint.” – Master Flooring Axiom
The chemistry of pigment and light in deep tones
Dark caulk colors like raven, charcoal, and espresso absorb more light than lighter tones which means they often appear flatter and less reflective than the surrounding glazed tile surface. This creates a visual disconnect if you do not understand the refractive index of the sealant. When light hits a dark grout line, the texture of the sand creates shadows. Most caulks are smoother than grout. To fix this, you must choose a sanded caulk if you want to mimic the texture, or a high-grade silicone if you want longevity. I have seen guys try to paint over white caulk to match dark grout. It is a disaster. The paint lacks the elasticity to move with the sealant and it flakes off within weeks. If you are learning how to refresh grout, you must understand that the caulk is the only thing protecting your subfloor from water intrusion at the corners. In a shower, the dark grout meets the corner, and if that joint is not flexible, the water will find the path of least resistance through the inevitable cracks. Dark colors show soap scum and mineral deposits more than light colors, so the chemical resistance of the sealant is paramount. You need a product that is specifically formulated to resist the fungal growth that thrives in the humid microclimate of a dark shower corner.
The physics of the three point bond failure
Three point bonding occurs when caulk adheres to the back of a joint and both sides of the tile which prevents the sealant from stretching properly and leads to premature tearing along the dark grout line. To prevent this, you need a backer rod. I do not care if the gap is only a quarter inch. A backer rod ensures the caulk only sticks to the two sides of the joint, allowing it to act like a rubber band. When you are dealing with dark colors, a tear is visible from across the room. It looks like a bright white scar against the deep charcoal or black. This is especially true when transitioning from tile to chic baseboard designs. The wood moves differently than the tile. The wood expands with humidity while the tile is relatively stable. If the caulk color does not match the dark grout perfectly, that movement will highlight the gap. I always tell my apprentices that the caulk is a bridge, not a filler. You are building a structural component that happens to be colored. Using a high quality tool to profile the joint is also necessary. A flat profile is less likely to trap water and debris than a concave joint, which is a detail most people miss when they are focused only on the color.
| Caulk Type | Pigment Stability | Elasticity Factor | Typical Use Case |
|---|---|---|---|
| 100% Silicone | Excellent | High | Showers and wet areas |
| Siliconized Acrylic | Moderate | Medium | Baseboard transitions |
| Polyurethane | Low | Very High | Exterior expansion joints |
| Sanded Acrylic | High (Texture) | Low | Low-movement dry joints |
How to prepare the substrate for dark sealants
Preparing the area for dark caulk involves removing all old residue and using isopropyl alcohol to ensure a sterile surface because dark pigments will not bond to oils or soap scum. You cannot just wipe it with a rag. You need to scrub it. If there is even a trace of old silicone left, the new dark caulk will bead up and fail to wet the surface. This is what I call the ghost in the expansion gap. It looks fine for a week, then it starts to pull away. When working with tile cleaning tips, always remember that the chemicals you use to clean the tile can interfere with the caulk bond if they are not neutralized. I use a vacuum to suck out every bit of dust from the joint. Dark grout dust is incredibly fine. If it sits in the joint, it acts as a bond breaker. You also have to consider the temperature. If the room is too cold, the caulk will be too thick to tool properly. If it is too hot, it will skin over before you can get a smooth finish. Dark colors are unforgiving. A smudge of charcoal caulk on a white tile is a nightmare to clean up, so I always use blue painter’s tape to mask off the lines. It takes longer, but it is the difference between a professional look and a hack job.
- Select a caulk brand that offers a color match kit for specific grout manufacturers.
- Test a small bead of caulk and let it dry for twenty four hours to see the final color shift.
- Ensure the joint depth is exactly half the joint width for optimal mechanical performance.
- Use a neutral cure silicone for natural stone to avoid staining the edges of the tile.
- Avoid using soapy water for tooling as it can trap moisture behind the dark sealant.
The chemistry of dark pigments and UV exposure
Darker caulk pigments contain higher concentrations of carbon black or iron oxide which can absorb heat from direct sunlight and cause the sealant to expand more than lighter colors. If you have a dark tiled floor near a large window, that caulk is going to get hot. This thermal expansion can cause the bond to shear if the caulk is not rated for high movement. Many people do not realize that the Janka hardness of the floor underneath also plays a role. A soft wood subfloor will flex more than a concrete slab, putting more stress on those dark joints. I have seen espresso colored caulk turn gray over time because of UV degradation. You have to buy a sealant that has integrated UV stabilizers. This is especially true for showers that wow where high-intensity lighting might be used. The color needs to stay true. I have spent too many hours replacing faded caulk that was supposed to match the grout but ended up looking like old chewing gum. When you match the color, you are matching the future of that floor, not just what it looks like the day you finish. If you use a cheap product, you are just setting yourself up for a callback in six months. And I hate callbacks more than I hate unacclimated hardwood.
“Consistency in the joint width is the difference between a floor that breathes and a floor that buckles.” – Tile Council Standards
Mastering the transition to baseboards and trim
Matching dark grout to the caulk at the baseboard line requires a decision on whether to follow the color of the floor or the color of the wall to maintain a clean visual break. Usually, you want the caulk to match the dark grout. This creates a seamless look where the floor appears to tuck neatly under the trim. If you use a light colored caulk there, it creates a distracting border that ruins the depth of the dark tile. I have seen people try to use clear caulk at these transitions. Clear caulk is never actually clear. It has a blue or yellowish tint and it shows every bit of dust that gets trapped behind it. For a professional finish, you want a solid, opaque dark caulk. This is vital when working with baseboards makeover ideas. The junction between a dark tile floor and a crisp white baseboard is a high contrast area. Any wobbles in your caulk line will be magnified. I use a specialized profiling tool to ensure the bead is perfectly uniform. A finger is not a precision instrument. A finger leaves a concave dip that catches light differently than the flat plane of the tile. If you want it to look like an architect designed it, you need to treat that line like a structural component. The goal is to make the caulk disappear, not to make it a feature. It should be the silent partner to your dark grout, doing the heavy lifting of movement while staying out of the spotlight.
Final inspection and maintenance of dark joints
Maintaining dark caulk is different than maintaining white caulk. You cannot just blast it with bleach. Bleach will eventually break down the polymer structure of the silicone and cause the dark pigments to leach out. You need a pH-neutral cleaner. If you see white spots on your dark caulk, it is likely hard water deposits or soap scum. These need to be cleaned gently with a soft brush. Never use a scouring pad on dark caulk. It will create micro-scratches that dull the finish and make the color look uneven. If the caulk starts to pull away, do not just smear more on top. You have to cut it out and start over. Layering caulk is a cardinal sin in this trade. It will never bond correctly and it will look like a mess. I always tell homeowners that a floor is a living thing. It moves, it breathes, and it reacts to the environment. The dark grout and its matching caulk are the joints that allow that movement to happen without destroying the beauty of the installation. If you pay attention to the physics and the chemistry, your floor will stay solid and beautiful for decades. If you take shortcuts, you will be back on your knees with a scraper sooner than you think. Build it once, build it right, and use the right color of goop to hold it all together.