
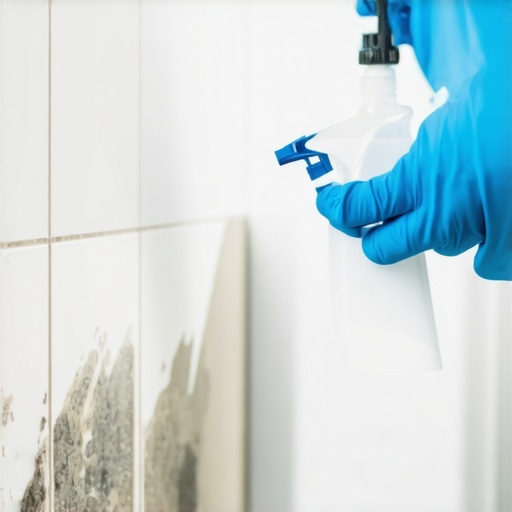
How to Remove Black Mold from Silicone Caulk Lines Safely
I smell like WD-40 and oak dust most days, a byproduct of twenty-five years spent inspecting subfloors and tile grids. Most homeowners see a black spot in their shower and reach for a spray bottle of bleach. That is a mistake that usually ignores the structural reality of the installation. I once spent three days grinding concrete on a job last month just so the floor would not click like a castanet, all because the previous installer ignored a small moisture leak behind a baseboard. Mold is not just a stain, it is a biological sign of a failure in your moisture barrier. When you see black growth on your silicone, you are looking at the result of organic material like skin cells and soap scum getting trapped in the microscopic pitting of the sealant. To fix it, you have to understand the chemistry of the bond and the physics of the surface. Cleaning it involves more than just scrubbing; it requires a systemic approach to sanitation and moisture control.
The biological reality of your shower corners
Removing black mold from silicone caulk requires high-concentration hydrogen peroxide or specialized commercial fungicides to penetrate the non-porous surface of the silicone. You must ensure the area is completely dry before application to stop the spores from migrating into the wall cavity or adjacent tile grout lines and baseboards. If you ignore the underlying moisture, the mold will return within weeks. The silicone itself is inorganic, meaning the mold is not eating the caulk. Instead, the mold is feeding on the biofilm that accumulates on top of the caulk. Over time, the mold hyphae can actually push into the structural matrix of the sealant if it is a lower-grade product. This is why showers that use cheap, builder-grade silicone often fail faster than those using high-solids, 100 percent RTV silicone. If you want a deeper look at maintenance, you can check out tile cleaning tips for a sparkling bathroom in 2025 to keep your surfaces pristine. Real professionals know that the battle is won in the prep stage, not the cleaning stage.
“A floor is only as good as the subfloor beneath it; deflection is the enemy of every joint.” – Master Flooring Axiom
The chemistry of structural moisture and mold growth
Mold thrives in environments with relative humidity above 60 percent and limited airflow. In the context of a bathroom, the silicone caulk acts as a flexible dam that prevents water from reaching the subfloor or wall studs. When this dam develops micro-fissures, moisture gets trapped behind the bead. This trapped water creates a stagnant microclimate. I have seen baseboards rot from the inside out because a single inch of caulk failed in a shower corner. The chemistry of mold remediation involves breaking down the cellular wall of the fungus without dissolving the acetic acid or neutral-cure bonds of the silicone. If you use harsh chemicals like pure industrial bleach too often, you can actually cause the silicone to become brittle and pull away from the tile. This creates a larger gap for water to enter. You should also look at grout restoration secrets for long-lasting results to ensure the rest of your installation is as resilient as your caulk lines. The goal is to create a hydrophobic environment where water beads and rolls away rather than sitting and soaking into the substrate.
A checklist for mold remediation and safety
Safety is the primary concern when dealing with Stachybotrys chartarum, commonly known as black mold. You need to wear a respirator with an N95 or P100 rating and utilize nitrile gloves to prevent skin contact with concentrated cleaning agents or fungal spores. The process of removal is mechanical and chemical. You cannot just spray and walk away. You have to physically agitate the surface to break the biofilm. Many people ignore the fact that mold spores are airborne. When you scrub, you are releasing those spores into the room. If the mold has penetrated behind the grout, simple cleaning will not suffice. In those cases, you are looking at a full tear-out of the affected area. Here is a professional checklist for the job:
- Identify if the mold is on the surface or behind the caulk bead
- Seal the bathroom vents to prevent spore spread to the HVAC system
- Apply a thick paste of baking soda and hydrogen peroxide to the affected line
- Let the mixture sit for at least forty-five minutes to oxidize the organic matter
- Use a soft-bristled brush to remove the debris without scratching the tile glaze
- Dry the area completely using a high-velocity fan or heat gun
- Inspect the bond of the silicone to ensure no delamination occurred
This process ensures that you are not just whitening the mold but actually killing the colony.
The 1/8 inch gap that ruins everything
Movement joints in tile installations must be a minimum of 1/8 inch wide to accommodate the expansion and contraction of the building materials. If the joint is too narrow, the silicone will be compressed and eventually shear away from the tile edge, creating a pocket for mold. This is a common error in modern showers. When the caulk shears, it creates a microscopic flap. Water enters that flap through capillary action and stays there. It never dries. This is why your caulk looks black from behind. It is not on the surface; it is growing between the silicone and the tile. If you are planning a renovation, look at showers that wow modern designs for 2025 to see how professional layouts handle these transitions. A properly sized joint allows the silicone to stretch and compress without breaking the seal. If your joints are too tight, no amount of cleaning will keep the mold away because the physical bond is doomed to fail. We see this often in high-end builds where the architect wanted tight lines but ignored the physics of thermal movement.
| Material Type | Moisture Resistance | Movement Capability | Mold Susceptibility |
|---|---|---|---|
| 100% Silicone | High | 25 to 50 percent | Low (with additives) |
| Siliconized Acrylic | Medium | 12.5 percent | High |
| Polyurethane | Very High | 25 percent | Low |
| Cementitious Grout | Low | 0 percent | Very High |
Why your subfloor is lying to you
The moisture you see on your caulk lines is often the tip of the iceberg regarding what is happening underneath your flooring. If the silicone seal at the floor-to-wall transition fails, water can seep into the subfloor and travel several feet from the source of the leak. I have torn up perfectly good looking tile only to find the plywood underneath was the consistency of oatmeal. This happens because water follows the path of least resistance. It travels along the baseboards and pools in low spots. This is why I always use a moisture meter before I even think about starting a repair. If the subfloor is wet, the new caulk will not stick. You will be right back here in three months with more mold. For those looking to upgrade their trim after a repair, chic baseboard designs that transform rooms in 2025 can offer a fresh start. You must address the moisture at its source, which often means checking the plumbing behind the wall or the slope of the shower floor to ensure proper drainage toward the weep holes.
“Movement joints should be filled with a flexible sealant, not grout, to accommodate the thermal expansion of the tile assembly.” – TCNA Handbook Standards
The final word on structural integrity
While most people want the thickest underlayment or the heaviest bead of caulk, too much material actually causes the system to fail by trapping moisture and preventing the assembly from breathing. In professional flooring, less is often more when it comes to adhesives and sealants, provided the application is precise. If you find that cleaning the mold is not working, it is time to remove the old silicone entirely. Use a plastic scraper to avoid damaging the tile or the tub surface. Clean the joint with denatured alcohol to remove all oils. Only then should you apply a new bead of high-quality silicone. If you need professional help or have a leak that won’t quit, you can always reach out via our contact us page. Remember that a bathroom is a machine for managing water. If any part of that machine fails, the whole structure is at risk. Keep your lines clean, your joints flexible, and your subfloors dry. That is the only way to beat mold for good. “