
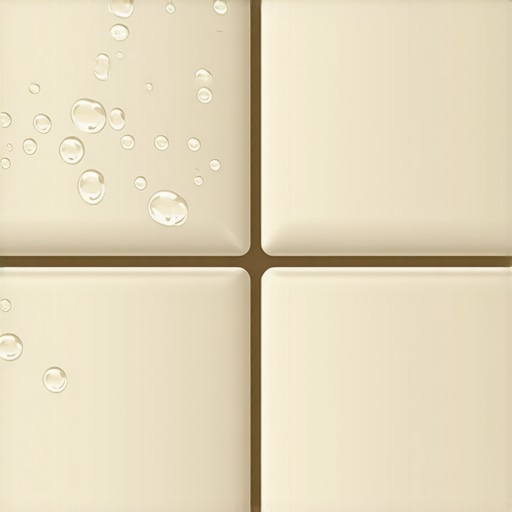
I once walked into a luxury master bath where a homeowner had spent three weeks of their life installing intricate marble tile. They were proud of the work. It looked like a million bucks until they applied the sealer. By the time I arrived, the grout lines looked like they were covered in a layer of tiny, white blisters. They had used three coats of a high-gloss topical sealer over grout that was still damp from a cleaning session just two hours prior. The moisture was trapped, the chemistry was fighting back, and the only solution was a complete strip and redo. It was a $20,000 lesson in patience. This is the reality of flooring. If you treat your shower like a weekend craft project instead of a structural assembly, the physics of moisture will win every single time. Bubbling grout sealer is not a manufacturing defect. It is a sign that the installer ignored the microscopic reality of the surface they were trying to protect.
The hidden moisture trap inside your shower walls
Trapped moisture is the leading cause of grout sealer bubbles because it creates vapor pressure that the sealer cannot withstand. When you apply a liquid sealer over a grout joint that contains residual water, that water eventually attempts to evaporate. The sealer film acts as a barrier, causing the evaporating gas to lift the product away from the cementitious surface, resulting in surface bubbling or a cloudy finish.
Grout is essentially a rigid sponge. It is a mixture of portland cement, sand, and pigments that contains a massive network of capillary pores. When you wash your tile or even if you just live in a high-humidity environment like Houston or Miami, those pores fill with liquid. Most people think grout is dry because the surface feels hard. I tell my clients that grout is like a sponge that takes 72 hours to truly dry out. If you seal it before that window, you are essentially shrink-wrapping a puddle. The water has nowhere to go but up. As it transitions from a liquid to a gas, it expands. This expansion creates thousands of microscopic pressure points. If your sealer has already begun to skin over, these pressure points manifest as bubbles. This is especially prevalent in showers where the backing material, like cement board or a waterproof membrane, also holds onto moisture. For a deep dive on keeping things clean before you seal, look at tile cleaning tips for a sparkling bathroom in 2025 to avoid early failures.
“A floor is only as good as the subfloor beneath it; deflection is the enemy of every joint.” – Master Flooring Axiom
The chemistry of solvent evaporation and skinning
Solvent based sealers and water based grout sealers rely on evaporation rates to form a protective bond with the tile assembly. If the surface temperature is too high or if the application layer is too thick, the top layer of the sealer dries faster than the bottom layer. This differential drying traps solvent vapors or air pockets beneath a prematurely cured skin, leading to blistering and delamination.
Think about the molecular structure of a sealer. It is composed of resins, carriers (solvents or water), and additives. When you apply the sealer, the carrier is supposed to evaporate into the atmosphere while the resins dive into the grout pores. If you apply the product too heavily, the resins at the surface link up and form a solid film before the carriers at the bottom have a chance to escape. This is a common mistake when people try to get a high-gloss look on a porous surface. They keep pouring it on. Instead of penetrating, the product sits on top. In a shower environment, the heat from the room can accelerate this surface drying. You end up with a layer of hardened resin that is sitting on a layer of liquid solvent. As that solvent tries to leave, it pushes up on the resin skin, creating a dome. It is the same principle as a blister on your hand. There is fluid or air trapped under a layer of skin that should have stayed attached to the base. This is why following the manufacturer instructions for thin, multiple coats is non-negotiable. If you need to recover a surface that has already gone south, read our grout restoration secrets for long lasting results.
The ghost in the expansion gap
Expansion gaps around the perimeter of a room or at baseboard transitions often harbor excess sealer that leads to bubbling and peeling. Because these gaps are wider than standard grout lines, they act as reservoirs for liquid product. When the sealer pools in these deep crevices, it fails to cure evenly, resulting in a spongy texture or surface bubbles that eventually flake off.
I see this all the time near the floor and wall transition. A guy is working his way across the floor and when he gets to the baseboards, he gets sloppy. He lets the sealer run into the 1/4 inch gap that is supposed to be filled with caulk or left open for expansion. That pool of sealer is now 10 times thicker than it should be. It stays wet for days. Meanwhile, the homeowner is walking on the floor and the baseboard might be vibrating slightly from footsteps. This introduces air into the wet pool of sealer. The result is a messy, bubbly foam that hardens into a white, crusty ridge. This ruins the clean lines of chic baseboard designs. You should always use an applicator brush near the edges to ensure you aren’t leaving standing liquid in the joints. If you are planning a renovation, check out chic baseboard designs that transform rooms in 2025 to see how to properly integrate these elements with your tile work.
Surface tension and the failure of over application
Over application of impregnating sealers creates excess surface tension that prevents the product from wicking into the grout. When the grout joint is saturated, any additional sealer sits on the surface as a bead. These beads trap atmospheric air as they dry, resulting in a pockmarked surface that looks like tiny bubbles frozen in the finish.
You have to understand the difference between a topical sealer and an impregnating sealer. Impregnators are designed to live inside the grout, not on top of it. If you keep applying an impregnator after the grout has reached its saturation point, the liquid has nowhere to go. It sits on the surface of the tile and the grout. Because the sealer is designed to repel liquids (hydrophobic), it starts to bead up like water on a freshly waxed car. If you leave those beads to dry, they don’t flatten out. They stay as little domes. This is why every single pro will tell you to wipe off the excess sealer after 10 or 15 minutes. If you don’t, you aren’t adding more protection. You are just adding more mess. This is particularly true for showers with a style that use non-porous tiles like porcelain or glass. The tile won’t absorb any of it, so all that extra sealer just sits there, waiting to bubble and turn hazy. For inspiration on tile layouts that actually work, see showers with a style trendy ideas for small bathrooms.
Comparison of Sealer Types and Bubble Risk
| Sealer Category | Application Method | Drying Time | Bubble Risk Level | Common Failure Cause |
|---|---|---|---|---|
| Penetrating (Impregnator) | Wipe on, Wipe off | 24 Hours | Low | Failure to wipe excess |
| Topical (Film Forming) | Rolled or Brushed | 48 Hours | High | Trapped moisture/vapor |
| Solvent Based | Spray or Applicator | 12 Hours | Medium | High humidity/Heat |
| Water Based | Brush or Sponge | 24 Hours | Medium | Over-application/Foaming |
The 1/8 inch that ruins everything
Grout joint width plays a massive role in sealer performance because narrow joints often bridge over with liquid sealer rather than absorbing it. When a sealer bridges a 1/16 inch joint, it creates a hollow air pocket beneath the cured film. Any downward pressure or thermal expansion will cause this bridge to collapse or bubble, exposing the unprotected grout beneath.
Most modern designs, especially those featured in showers that wow modern designs for 2025, use very thin grout lines for a seamless look. While this is aesthetically pleasing, it is a nightmare for sealing. If the sealer is too viscous, it won’t fall into the narrow crack. Instead, it spans the gap like a bridge. You think the joint is sealed, but in reality, there is a tiny cavern of air underneath a thin film of resin. The first time someone steps on that tile or the first time the shower gets hot, that air expands and pops the bridge. Now you have a jagged, bubbly edge that catches dirt and looks terrible. The fix is to use a high-quality, low-viscosity sealer and to work it into the joints with a dedicated grout brush. Don’t just spray and pray. You have to mechanically force the sealer into the pores. If your grout is already looking tired because of this, you might need to know how to refresh grout without replacing it before you try to seal it again.
Environmental factors and the regional climate expert
In regions with high humidity, such as the Gulf Coast, the ambient moisture in the air can interfere with the chemical curing of the sealer. When the relative humidity exceeds 70 percent, the evaporation of carriers slows down significantly. This prolonged wet state allows the sealer to emulsify with atmospheric water, creating a white, bubbly haze that is structurally weak.
I always tell guys that if you are working in a house without the AC running in the summer, you might as well not seal the floor. The moisture in the air will settle on the wet sealer and turn it into a milky mess. This is why we see so many failures in new construction. The builders haven’t turned on the HVAC yet, but they want the tile sealed so the cleaners can come in. It is a recipe for disaster. You need a controlled environment. If you are in a dry climate like Phoenix, you have the opposite problem. The sealer dries too fast and doesn’t have time to penetrate. You have to work in small sections to keep the product wet long enough to dive into the grout. It is about managing the physics of the room. This applies to baseboards and tile alike. Every component of the room reacts to the climate. If you are looking for long-term durability, especially in sustainable homes, consider eco friendly tile solutions for sustainable homes in 2025 which often feature more stable, less reactive materials.
Checklist for a Bubble Free Sealer Application
- Verify grout has cured for at least 72 hours since last wetting.
- Ensure room temperature is between 65 and 80 degrees Fahrenheit.
- Use a pH-neutral cleaner and allow to dry completely before starting.
- Apply sealer in thin, even coats using a microfiber applicator.
- Wipe off all excess liquid from the tile and grout after 10 minutes.
- Avoid using the shower or walking on the floor for 24 to 48 hours.
- Check for any pooling in the expansion gaps or near baseboards.
The final word on grout integrity
Fixing bubbly sealer is a labor-intensive process. You generally have to use a chemical stripper to dissolve the old resin. If you used a solvent-based sealer, you need a solvent-based stripper. If you used water-based, a standard alkaline stripper might work. Once the old product is gone, you have to neutralize the floor, wash it, and wait another three days for it to dry. It is a massive waste of time that can be avoided by following one simple rule. Less is more. A floor is a performance surface. It needs to breathe and it needs to be treated with respect for the chemistry involved. If you rush the process, you will be staring at those bubbles every time you brush your teeth. Take your time. Check your moisture levels. Wipe your excess. Your grout will thank you for it. If you have more questions about your specific project, don’t hesitate to contact us for expert guidance.