
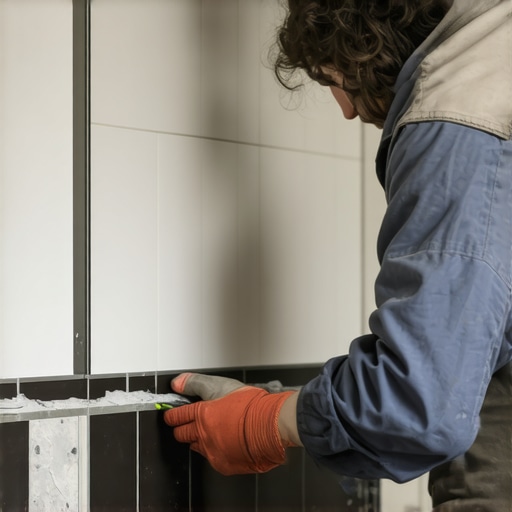
I spent three days grinding concrete on a job last month just so the floor wouldn’t click like a castanet. Most guys skip the leveling compound. They think the underlayment will hide the dip. It won’t. I have seen countless $20,000 bathroom remodels ruined because an installer wanted to save four hours of prep work. When it comes to the walls, the same lazy habits lead people to rely on metal schluter strips to hide ugly cuts. If you want a master-level finish, you have to stop hiding your edges. You have to learn the physics of the miter. This is not about being fancy. This is about structural integrity and the geometry of a clean joint. I have been doing this for 25 years. I smell like WD-40 and ceramic dust. I can tell you that a mitered corner is the only way to prove you actually know how to handle a wet saw.
The myth of the flat wall
To achieve a perfect mitered corner without metal trim, you must first ensure your wall studs are perfectly plumb and the backer board is flat within 1/8 inch over 10 feet. Any wall deflection will cause the mitered edges to lip, creating a sharp edge that ruins the visual flow. Most houses are built like trash. The studs are twisted. The drywall is wavy. If you just slap tile on a bad wall, your corners will look like a staircase. I carry a six-foot level and a box of composite shims on every job. I strip the wall back to the studs if I have to. You cannot build a skyscraper on a swamp, and you cannot build a mitered corner on a crooked wall. We are talking about the sub-structure of the installation. If the cement board isn’t flat, the thin-set mortar will vary in thickness. This causes uneven shrinkage during the curing process. When the mortar shrinks, it pulls the tile. On a flat run, you might not notice it. At a 45-degree corner, that movement will open a gap that no amount of grout can fix.
“A floor is only as good as the subfloor beneath it; deflection is the enemy of every joint.” – Master Flooring Axiom
Anatomy of the forty five degree miter cut
A mitered tile corner is created by grinding the edge of two tiles at a 45-degree angle so they meet to form a 90-degree corner without exposing the unfinished biscuit. This technique requires a high-speed wet saw and a continuous rim diamond blade to prevent chipping or spalling of the glaze. The secret is not to cut all the way to the edge. If you bring the blade right to the very tip of the glaze, it will chip. Every single time. You leave a small flat spot, about 1/16th of an inch, called a feather edge. Then you take a diamond hand-polishing pad, maybe a 200 grit, and you manually work that edge down until it is sharp but stable. This is where the 25 years of experience comes in. You have to feel the heat of the tile. If the tile gets too hot, the glaze can crack. This is particularly true with porcelain tile which is much denser than ceramic. Porcelain has a water absorption rate of less than 0.5 percent. It is brittle. It is unforgiving. But it is the only thing I recommend for showers that wow in modern homes.
The chemistry of the bond
To secure mitered corners, you must use a high-performance polymer-modified thin-set that meets ANSI A118.15 standards for bond strength and flexibility. Standard unmodified mortar does not have the tensile strength to hold a mitered joint under structural vibration or thermal expansion. Most homeowners think glue is glue. It isn’t. The chemicals in a professional-grade mortar are designed to create a molecular bridge between the tile and the substrate. When you are doing a miter, the surface area for the bond is smaller than a flat install. You need that extra stick. I also back-butter every single piece. This means I take the flat side of my trowel and I force a thin layer of mortar into the back of the tile before I set it. This ensures 100 percent coverage. If you leave a void behind a mitered corner, that corner is weak. If someone bumps it with a heavy shampoo bottle, the tile will snap. You have to treat the adhesive like it is part of the tile itself.
Why epoxy grout is a requirement for outside corners
Using epoxy grout on mitered corners provides superior compressive strength and stain resistance compared to cementitious grout. Because a mitered edge is more exposed to impact, the grout joint must act as a structural filler that prevents the sharp edges from chipping over time. Cement grout is porous. It absorbs water. It shrinks. Epoxy is a two-part chemical reaction. Once it sets, it is essentially plastic. It doesn’t move. It doesn’t stain. For someone looking for grout restoration secrets, the best secret is to never use the cheap stuff in the first place. I have seen miters held together with cheap grout fall apart in three years. I have seen miters done with epoxy look brand new after twenty. It is harder to work with. It is sticky. It ruins your sponges. But if you want a corner that lasts, you pay the price in labor.
| Metric | Ceramic Miter | Porcelain Miter | Natural Stone Miter |
|---|---|---|---|
| Blade Speed | Medium | High | Low/Constant |
| Chipping Risk | High | Moderate | Low |
| Bond Strength | High | Extreme | Variable |
| Polishing Difficulty | Low | High | Medium |
| Janka Hardness | 1000-2000 | 3000-5000 | Variable |
The one eighth inch that ruins everything
Expansion joints are the most overlooked aspect of tile installation, especially at the perimeter where the floor meets the wall or at inside corners. You must maintain a 1/8 inch gap to allow for building movement. If you butt the tiles tight against a hard surface, the stress will cause the tile to tent or the corners to shear. I see guys cram grout into the inside corners of a shower. That is a failure. Inside corners must be caulked with a 100 percent silicone sealant that matches the grout color. Why. Because houses breathe. They expand in the summer and shrink in the winter. If your tile doesn’t have room to move, it will find its own room by cracking. This applies to the floor too. I always tell people to look at their chic baseboard designs not just as trim, but as a cover for the essential expansion gap required for the flooring system.
Environmental factors in modern shower construction
A waterproof shower system requires a topical membrane like liquid-applied waterproofing or bonded sheet membranes to prevent moisture migration into the subfloor. The TCNA Handbook dictates that vapor management is essential in steam showers and high-use bathroom environments to avoid efflorescence and mold growth. I don’t trust the old way of doing things. The old school guys used to put plastic behind the cement board. That just creates a mold sandwich. Today, we put the waterproofing right under the tile. This keeps the backer board dry. When you are doing a mitered corner, this is even more vital. You are creating a junction that is inherently more prone to micro-cracks than a flat surface. If water gets into that miter, you want it to stop at the membrane, not soak into your 2x4s. I use a moisture meter on every slab and every stud. If the wood is over 12 percent moisture, I don’t install. Period.
“A miter is a testament to the installer’s patience; a metal strip is a testament to their schedule.” – Master Flooring Axiom
- Check wall plumbness with a 6-foot level
- Use a 200-grit diamond pad for hand-honing the edges
- Back-butter every mitered tile for 100% coverage
- Leave a 1/16th inch feather edge to prevent glaze chipping
- Apply color-matched 100% silicone in all inside corners
- Use epoxy grout for outside mitered joints
The geometric reality of the layout
Tile layout should always be centered on the most visible wall to ensure symmetrical cuts at the mitered corners. A sliver cut at a corner is a sign of poor planning and creates a structural weakness where the thin-set cannot provide adequate lateral support. I spend at least two hours just marking lines before I even open a bag of mortar. I want to know exactly where every cut is going to land. If I see a two-inch piece landing in a corner, I shift the whole layout. Small pieces are hard to miter. They are hard to hold against the saw fence. They vibrate more. That vibration leads to chips. A professional layout is about more than just looking good. It is about making sure every piece of tile is large enough to maintain its own structural integrity. I have seen people try to miter a half-inch strip of marble. It is a nightmare. It will break if you look at it wrong.
Technical specifications for grout and thin-set
Choosing the correct mortar depends on the tile size and substrate type. Large format tiles (any side longer than 15 inches) require Medium Bed Mortar to support the weight and prevent lippage. For mitered corners, the shear strength of the mortar is the most critical variable in long-term durability. If you are using a 12×24 porcelain, you can’t use the cheap stuff. You need a mortar that can hold that weight on a vertical surface without sagging. If the tile sags even a millimeter, your miter is ruined. I use spacers, but I also use a leveling system. Those little plastic clips that pull the tiles flush. They are not a crutch for bad installers. They are a tool to ensure the physics of the drying mortar don’t pull your perfect corner out of alignment. I have seen the best miters in the world get ruined overnight because the mortar dried unevenly and pulled the tiles apart.