
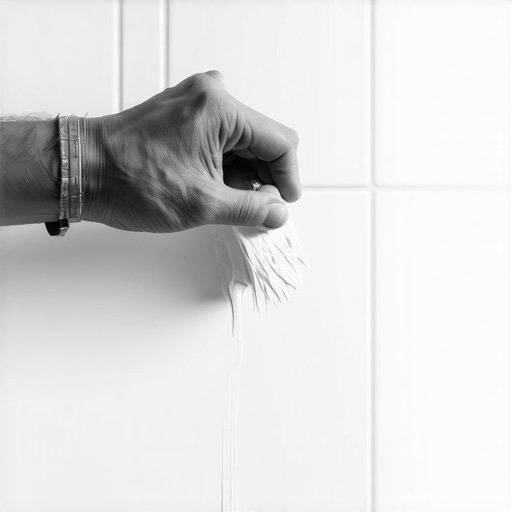
Why your grout looks like a crime scene
Grout lines often become discolored due to capillary action in porous cement which absorbs dirty water and organic oils. Professional grout painting or colorant application provides a topical barrier that resists staining and moisture penetration while restoring the aesthetic uniformity of the tile installation. This process is a cost-effective alternative to regrouting. I spent three days grinding concrete on a job last month just so the floor wouldn’t click like a castanet, and it reminded me why shortcuts never work. Most guys skip the prep. They think the paint will hide the dirt. It won’t. If you don’t strip the old sealers and oils out of that grout, your new color is going to peel off like a cheap sunburn within six months. I’ve seen it a thousand times. Homeowners think they can just slap some craft paint in the lines and call it a day. That is the quickest way to ruin a perfectly good floor. Real grout colorant is an epoxy based resin, not just pigment in water. It is designed to bond to the microscopic nooks and crannies of the sand and cement. When you look at grout under a magnifying glass, it looks like a moonscape. If those craters are filled with soap scum, your colorant has nothing to grab onto. It is like trying to glue two pieces of wood together while they are covered in grease. You have to be a stickler for the details if you want a result that doesn’t look like a DIY disaster.
“A floor is only as good as the subfloor beneath it; deflection is the enemy of every joint.” – Master Flooring Axiom
The chemistry of grout colorants
Epoxy grout colorants are specialized coatings containing acrylic resins and urethane binders that create a non-porous surface over cementitious grout. These professional-grade products are different from standard latex paint because they are engineered to withstand alkaline cleaners and constant foot traffic. Using a high-quality colorant ensures a long-lasting bond on sand-sanded or unsanded grout. Most people don’t understand that grout is essentially just a hard sponge. When you walk across your floor after mopping, that grey water is being sucked right into the center of the grout joint. Over years, those minerals and dirt particles build up. A real colorant doesn’t just sit on top. It penetrates the surface layer and then hardens into a plastic-like shield. This is why you need to research grout restoration secrets for long-lasting results before you start buying materials. You want a product that has a high solids content. If the bottle feels light, it is mostly water. You want the heavy stuff. The chemistry involves a cross-linking polymer that activates as it dries, creating a surface that is harder than the original grout itself. This makes the floor much easier to clean in the future because the dirt just sits on top of the epoxy instead of sinking into the pores. This is the same principle we use when sealing high-end tile in commercial settings.
Preparation determines the bond
Surface preparation for grout painting requires the removal of all existing sealers using a heavy-duty alkaline cleaner or a phosphoric acid solution. The pH balance of the grout surface must be neutralized and the moisture content must be low to ensure the epoxy colorant adheres to the cement matrix. If the grout is damp, the chemical bond will fail. I smell WD-40 and oak dust every morning, and that smell tells me things are being done right. When I walk into a bathroom and smell perfume or scented candles, I know the grout is probably full of wax. You have to scrub. And then you have to scrub again. Use a stiff nylon brush. Don’t use steel wool because it can leave behind tiny metal shards that will rust inside your new paint. If you are dealing with showers, you have to be even more careful. The soap scum buildup in a shower is like armor. You need an emulsifier to break it down. If you don’t, the colorant will just flake off the first time you take a hot shower. This isn’t about making it look pretty for a photo. This is about structural integrity. You are building a new wear layer. Treat it like you are painting a car engine. Clean, dry, and etched.
Managing the shower environment
Shower grout restoration involves managing hydrostatic pressure and moisture vapor transmission within the tiled assembly. Because showers are high-moisture zones, the grout colorant must be vapor-permeable yet hydrophobic to prevent mold growth and delamination. Ensuring the weep holes are clear and the sub-pan is dry is essential for a permanent fix. I’ve seen guys try to paint grout in a shower that was used an hour before. That is a recipe for failure. You need that shower bone dry for at least 48 hours. I’m talking fans, dehumidifiers, the whole nine yards. If there is moisture trapped behind the tile, it will try to escape through the grout. If you’ve sealed the grout with a cheap paint, that vapor will push the paint right off the surface. It’s called hydrostatic pressure, and it doesn’t care about your budget. For a real refresh without replacing it, you have to respect the physics of the room. This is especially true in older homes where the waterproofing might be questionable. You might even want to look at modern designs for 2025 to see how they handle drainage before you commit to a color.
The intersection of grout and baseboards
Transition joints where tile floors meet baseboards should be handled with color-matched caulk rather than hard grout to accommodate structural expansion. Painting the grout line at the perimeter requires a steady hand to avoid contaminating the wood molding or PVC baseboards. Proper masking techniques protect the wall base while allowing for a clean finish. Most homeowners ignore the perimeter. They think the baseboard is just there to hide the gap. Well, it is. But that gap is there for a reason. Your house moves. It breathes. If you jam grout into that corner, it will crack. When you are painting your grout, stop about 1/8th of an inch from the wall. Use a high-quality siliconized acrylic caulk for that last bit. It stays flexible. While you are at it, check your baseboards makeover ideas. A fresh coat of paint on the trim makes the new grout color pop. If your baseboards are rotting because of moisture, no amount of grout paint is going to save the look of that room. You have to address the rot first. I’ve seen beautiful chic designs ruined because the installer didn’t leave an expansion gap. Don’t be that guy.
Comparing Grout Restoration Methods
| Method | Longevity | Difficulty | Chemical Resistance |
|---|---|---|---|
| Grout Pens | Low (6-12 months) | Easy | Poor |
| Acrylic Paint | Medium (1-2 years) | Moderate | Low |
| Epoxy Colorant | High (5-10 years) | High Prep | Excellent |
| Total Regrouting | Permanent | Extreme | N/A |
While most people want the thickest underlayment or the thickest coat of paint, too much material actually causes issues. In grout painting, a thick layer will peel. You want thin, multiple passes. The goal is to dye the grout, not plate it in plastic.
Grout Painting Essential Checklist
- Deep clean with an alkaline stripper to remove grease and old wax.
- Neutralize the surface with a clean water rinse and let dry for 24 hours.
- Mask off baseboards and adjacent surfaces using low-tack painter’s tape.
- Apply epoxy colorant using a small toothbrush or specialized applicator.
- Wipe excess colorant from the tile face within 10 minutes using a damp chamois.
- Allow to cure for 48 hours before exposing to heavy moisture or foot traffic.
The ghost in the expansion gap
Structural movement in subfloors often manifests as cracks in grout lines which cannot be fixed with paint alone. If the deflection in the floor joists exceeds L/360 standards, the tile assembly will continue to fail regardless of the topical finish. You must address the underlying mechanics before applying aesthetic upgrades. I once walked into a house where the owner had painted his grout three times in a year. He couldn’t figure out why the paint kept cracking. I took a level to the floor and found a 1/2 inch dip. The subfloor was bouncing like a trampoline. Painting grout on a moving floor is like painting a bridge made of rubber. It won’t stay. You have to be realistic about what a budget fix can do. If your grout is crumbling and turning into sand, paint isn’t the answer. You need to look into eco-friendly tile solutions and maybe start over. But if the grout is solid and just ugly, then the colorant is your best friend. It’s about knowing the difference between a cosmetic blemish and a structural failure. One costs fifty bucks, the other costs five thousand. Don’t get them confused.
“A floor is only as good as the subfloor beneath it; deflection is the enemy of every joint.” – Master Flooring Axiom
The final step is always the cleanup. Use a microfiber cloth. Do not use a rough sponge or you will pull the colorant right out of the joint before it has a chance to set. Be patient. This isn’t a race. It’s an engineering project on a microscopic scale. You are creating a chemical bond that has to withstand years of walking, cleaning, and spills. Treat it with respect, and it will look like a professional did it. Cut corners, and you’ll be back on your knees next weekend.