
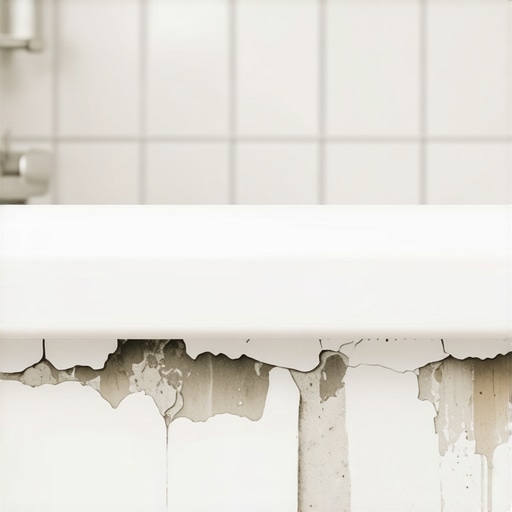
I spent three days grinding concrete on a job last month just so the floor wouldn’t click like a castanet. Most guys skip the leveling compound because they think the underlayment will hide the dip. It won’t. I carry that same mindset into every shower and bathroom project I touch. When a homeowner calls me complaining that their caulk is peeling away from the tub just six months after a renovation, I already know the culprit. It is rarely the caulk itself. It is the structural physics and the lazy preparation that happened before the first bead was even squeezed out. You see, a bathroom is a machine of moving parts. If you treat it like a static painting, you are going to fail. I have spent twenty five years with my knees on the tile and my hands in the grout. I know the smell of a failing subfloor and the sight of a poorly bonded silicone line. We are going to look at the microscopic reasons your bathroom is literally spitting out its sealant.
The structural lie of the empty bathtub
Caulk pulls away from tubs because of structural deflection caused by the weight of water and the human body. When you fill a standard bathtub, you are adding hundreds of pounds of hydraulic weight to the floor joists. If the sealant was applied while the tub was empty, the joint expands too far when the tub is full. This causes the bond to snap under the pressure of the movement.
You have to understand the modulus of elasticity. Every sealant has a limit to how much it can stretch before the internal polymer chains break. This is called cohesive failure. If the sealant stays stuck to the tub but rips in the middle, it is a cohesive failure. If it peels off the tile or the tub flange entirely, that is an adhesive failure. Most of the time, homeowners are dealing with a mix of both because they installed the floor or the tub without accounting for the live load. I have seen 3/4 inch plywood subfloors that flex like a trampoline because the installer didn’t add enough blocking underneath. When that tub drops even 1/16 of an inch, your sealant is screaming. To fix this, you must fill the tub with water before you apply the caulk. This pre-stresses the joint. You leave the water in until the sealant has fully cured. This ensures that the material is in its neutral state when the tub is under its heaviest load.
“A floor is only as good as the subfloor beneath it; deflection is the enemy of every joint.” – Master Flooring Axiom
The microscopic war on the tub flange
Poor adhesion often stems from invisible soap scum and chemical residues left on the tub flange during the cleaning process. Even if a surface looks clean to the naked eye, microscopic layers of body oils and surfactant film from cheap cleaners act as a bond breaker. This prevents the silicone from creating a molecular grip on the substrate.
I have a rule on my jobsites. If you do not wipe the joint with 91 percent isopropyl alcohol or denatured alcohol, you are not ready to caulk. Some guys use mineral spirits, but that leaves an oily residue that is just as bad as the soap scum. We are looking for a chemically clean surface. Think about the chemistry here. Silicone needs to form a bond with the silica in the glaze of your tile or the acrylic of your tub. If there is a single layer of fatty acids from your last shower in the way, the bond is doomed. This is why many people find their caulk pulling away after only a few months of use. The moisture gets behind the loose flap and starts a colony of mold that further degrades the adhesive. This is especially true in showers that wow modern designs for 2025, where large format tiles create fewer joints but put more stress on the ones that remain.
Why your grout choice ruins your sealant line
Grout is porous and holds moisture that can attack the bond of the caulk from the backside. If the grout in your shower is not properly sealed or if it is crumbling, water will migrate through the tile assembly and settle behind the caulk bead. This constant state of saturation causes the sealant to lose its grip over time.
Many people make the mistake of running grout all the way down to the tub. This is a violation of industry standards. Every change of plane, such as where the wall tile meets the tub, must be a movement joint filled with flexible sealant. If you put hard grout in that corner, it will crack within weeks. Once that grout cracks, it acts like a sponge. It pulls water into the wall cavity where it can rot your studs and soften your subfloor. This is why understanding grout restoration secrets for long lasting results is so important. You need to clear out any hard grout from that transition joint before you apply your flexible caulk. If you are looking to fix an old mess, you might want to learn how to refresh grout without replacing it before you tackle the sealant line. A dry, stable grout line is the only way to ensure your caulk stays put.
| Sealant Type | Movement Capacity | Adhesion Strength | Cure Time |
|---|---|---|---|
| Pure Silicone | 25 to 50 percent | High | 24 Hours |
| Siliconized Acrylic | 12.5 percent | Moderate | 4 to 12 Hours |
| Polyurethane | 50 percent plus | Very High | 48 to 72 Hours |
The physics of the movement joint
The width and depth of the sealant bead determine its ability to handle the natural expansion and contraction of your home. A bead that is too thin will snap like a rubber band, while a bead that is too deep will lose its flexibility and pull away from the edges. You must maintain a proper depth to width ratio for the sealant to function as a bridge.
This is where most DIY installers fail. They think more is better. They shove as much caulk as possible into the gap. This creates what we call tri-lateral adhesion. The caulk sticks to the tub, the tile, and the back of the joint. When the tub moves, the caulk is pulled in three different directions at once. It has no room to stretch. It will rip. The secret is using a backer rod. A backer rod is a foam rope that you shove into the gap first. It does two things. It prevents the caulk from sticking to the back of the joint, and it helps you maintain a consistent depth. With a backer rod, the caulk only sticks to the tub and the tile. It acts like a bridge that can stretch and compress freely. If your gap is wider than 1/4 inch, a backer rod is not optional. It is a structural requirement. If you ignore this, the humidity in places like Florida or the Pacific Northwest will expand your framing members and rip that seal apart in one season.
How baseboards and trim hide deeper moisture issues
Baseboards that meet the tub often absorb moisture through capillary action, leading to swelling and the eventual failure of the sealant. When wood or MDF baseboards are installed right up against a wet area without a proper gap or sealant, they act as a wick for every splash of water that escapes the tub.
I have seen beautiful chic baseboard designs that transform rooms in 2025 get absolutely ruined because the installer didn’t leave a 1/8 inch expansion gap at the floor. If the baseboard is tight against the tile, any moisture on the floor gets sucked up into the trim. This causes the wood to expand, which then pushes against the tub and the tile, breaking the caulk seal. If you are doing a baseboards makeover to elevate your space, make sure you seal the bottom edge of the trim before installation. Use a high quality primer on all six sides of the wood. This creates a moisture barrier that prevents the wood from moving as much. When the trim is stable, the caulk around it stays stable. It is all connected. You cannot have a failing floor and expect a perfect caulk line at the tub.
- Remove 100 percent of the old sealant using a plastic scraper and chemical remover.
- Clean the joint with 91 percent isopropyl alcohol to remove all oils.
- Check the subfloor for deflection and reinforce if necessary.
- Insert a foam backer rod into gaps wider than 1/4 inch.
- Fill the bathtub with water to pre-stress the joint before application.
- Apply a high quality 100 percent silicone sealant in a continuous bead.
- Tool the joint with a finger dipped in soapy water or a specialized tool.
- Allow the sealant to cure for a full 24 hours before draining the tub.
The three minute rule for surface preparation
The time you spend cleaning the surface determines the lifespan of the repair more than the price of the caulk. Most people rush the cleaning phase and spend all their energy on the application. This is a fundamental mistake that leads to early failure.
I tell my guys that the preparation should take five times longer than the actual caulking. You need to be aggressive. If there is old silicone left behind, new silicone will not stick to it. Nothing sticks to silicone, not even silicone. You have to get every last microscopic bit off the surface. I use a specialized silicone digester chemical that softens the old bond. Then I scrub it with a non-scratch pad. Finally, the alcohol wipe. If you skip any of these steps, you are just wasting your Saturday. I have seen jobs where the homeowner used tile cleaning tips for a sparkling bathroom in 2025 but forgot to rinse the vinegar or bleach off the joint. Those acidic or basic residues will eat the bond from the inside out. This is even more critical when using eco friendly tile solutions for sustainable homes in 2025, as some green materials have different surface energies that require specific primers.
The final word on durable seals
Caulk failure is a symptom, not the disease. The disease is usually movement, moisture, or poor preparation. If you want a seal that lasts for years instead of months, you have to respect the physics of the bathroom. Stop buying the $4 tube of acrylic caulk and hoping for the best. Invest in 100 percent silicone or a high grade polyurethane. Respect the expansion gaps. Fill the tub before you work. If you do these things, you won’t be calling me in six months to ask why your bathroom is leaking. You will be enjoying a dry, mold free home. If you are ever in doubt about the materials you need for your specific climate or tile type, you can always contact us for expert guidance. Your floor is a performance surface. Treat it with the respect it deserves, and it will take care of you.