
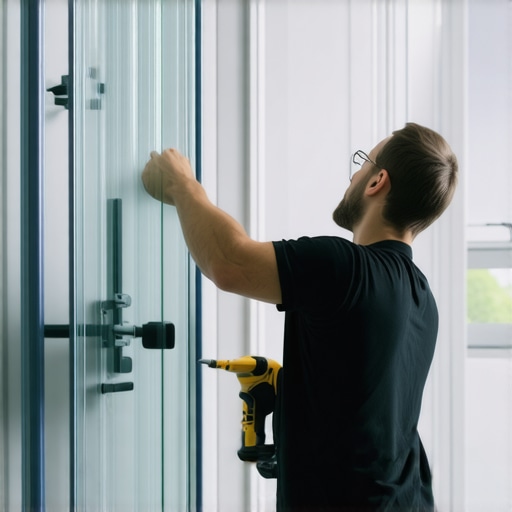
Most guys skip the leveling compound. They think the underlayment will hide the dip. It won’t. I spent three days grinding concrete on a job last month just so the floor wouldn’t click like a castanet. That same philosophy applies to your bathroom. If your shower curb is off by even an eighth of an inch, that expensive piece of tempered glass becomes a ticking time bomb. I have seen guys spend thousands on custom glass only to have it explode in their hands because they did not understand the physics of a hinge or the structural reality of a tile wall. You do not need a second person if you have the right mechanical advantage and a deep respect for gravity. This is about engineering, not muscle. We are going to talk about the molecular stress of glass and why your grout joints are the silent killers of a successful installation.
The structural lie of the shower pan
To install a glass shower door solo you must verify that the curb is perfectly level and the wall studs are structurally sound. Tempered glass cannot be trimmed or adjusted once it leaves the factory. If your tile surface is not plumb, the hinges will bind, creating internal tension that eventually leads to a catastrophic failure of the glass panel. You must use a four foot level to check every plane before even unboxing the hardware.
Before you even think about lifting that glass, you need to understand what is happening behind the tile. Most modern showers that wow are built on a foundation of waterproofing membranes and thin-set. If the installer did not put a double stud or a 2×6 blocking behind the tile where the hinges go, you are in trouble. A standard ten millimeter glass door weighs between sixty and eighty pounds. That weight is not just hanging there; it is a lever. Every time you open that door, it pulls on the screws. If those screws are only grabbing into tile and plastic anchors, they will pull out. I have seen it happen a dozen times. The door sags, hits the curb, and turns into ten thousand pebbles of glass.
Why your subfloor is lying to you
Subfloor deflection and uneven joists are the primary reasons shower doors fail to align after six months of use. If the floor beneath your shower pan moves, the pan moves. If the pan moves, the curb shifts. Even a movement of one sixteenth of an inch at the base translates to a half inch gap at the top of a seventy inch glass panel. Structural rigidity is the only thing that matters.
I always tell people to check the basement or the crawlspace before they start a bathroom remodel. If you see two by eight joists spanning fifteen feet, your floor is a trampoline. You can put the most beautiful eco friendly tile solutions on top of it, but the glass door will never stay adjusted. You need to sister those joists or add a mid-span beam. When I walk into a bathroom and the grout lines are cracking, I know the glass door is going to be a nightmare. You cannot fix a structural problem with a better hinge. You fix it from the bottom up.
| Glass Thickness | Weight per Square Foot | Recommended Support | Vibration Dampening |
|---|---|---|---|
| 6mm (1/4 inch) | 3.1 lbs | Full Frame | High |
| 10mm (3/8 inch) | 5.0 lbs | Semi-Frameless | Medium |
| 12mm (1/2 inch) | 6.3 lbs | Heavy Frameless | Low |
The physics of the solo lift
Successful solo glass installation relies on high quality vacuum suction cups and a system of non-marring plastic shims. You should never attempt to lift the glass by its edges with your bare hands because oils from your skin make it slippery and the edges are the most vulnerable points of the pane. Using a double-cup suction handle allows you to control the center of gravity while your other hand guides the alignment into the hinges.
The secret is the shim. I use horseshoe shims, the hard plastic ones, not the soft wood ones that compress. You set two shims on the curb exactly where the glass will sit. This creates a gap. Why a gap? Because you need to get your fingers out from under the glass, and you need room for the bottom sweep. If you set the glass directly on the tile, any vibration from the house will send a shockwave through the glass. The tile cleaning tips you see online never mention that grit in the grout can act like a glass cutter if the door is resting directly on it. Always maintain a gap.
“A floor is only as good as the subfloor beneath it; deflection is the enemy of every joint.” – Master Flooring Axiom
The ghost in the expansion gap
Expansion gaps in shower installations are not suggestions but requirements to handle the thermal expansion of the glass and tile. When you run hot water, the glass expands. The aluminum channels expand. Even the grout expands. If you have jammed your door tight against a wall with no room for movement, the pressure will eventually exceed the tensile strength of the glass. Always leave a three millimeter gap between the glass and the wall.
People get obsessed with making things look tight. They want zero gaps. That is how you break things. Professional installers know that a small bead of high quality silicone is better than a tight fit. Silicone is flexible. It acts as a shock absorber. When I am working on showers with a style that requires a minimalist look, I still insist on that gap. It is the difference between a door that lasts thirty years and one that lasts thirty days. You also have to consider the transition to the rest of the room. I often see people mess up the chic baseboard designs near the shower by not allowing for the water spray that escapes during the installation process. Everything must be integrated.
- Check the wall for plumb using a laser level across three points.
- Locate the center of the wall studs using a deep-scan stud finder.
- Pre-drill tile using a diamond-tipped core bit kept wet with a sponge.
- Install the wall-side hardware first to act as a guide.
- Set the glass on plastic horseshoe shims to prevent edge contact with tile.
- Tighten hinge bolts to the exact Newton-meter specification provided by the manufacturer.
The 1/8 inch that ruins everything
Precision in drilling the hinge holes determines whether the door will swing freely or bind against the strike jamb. If your drill bit wanders even two millimeters, the entire geometry of the door is compromised. This is why you never use a standard masonry bit for tile. You use a diamond hole saw. You start at an angle to bite into the glaze, then slowly level it out. If you crack the tile now, you are looking at a full grout refresh or worse, a tile replacement.
Once the holes are drilled, I blow the dust out with a straw. If there is dust in the hole, the plastic anchor won’t seat properly. I then inject a little bit of silicone into the hole before I push the anchor in. This creates a waterproof seal so moisture doesn’t rot the studs behind your beautiful tile. Most guys skip this. They are in a hurry. But water finds a way. If that stud rots, the hinge gets loose. If the hinge gets loose, the glass drops. It is a chain reaction that starts with a single unsealed hole. While you are at it, check the baseboards makeover ideas in the adjacent area to ensure no water is wicking into the drywall from the curb edge.
The chemistry of the final seal
Curing times for silicone and grout sealants are non-negotiable if you want a leak-proof shower enclosure. Most homeowners are too eager to use their new shower. They see the glass is up and they want to jump in. But the silicone needs a full twenty four hours to cross-link and bond to the glass and tile surfaces. If you get it wet early, the bond fails at a molecular level and you will be fighting mold for the rest of the door’s life.
I recommend using a structural grade silicone, not the cheap stuff from the bargain bin. You want something with high elasticity. While the silicone is curing, do not move the door. Do not even test the swing. Let it sit. This is a good time to look at the rest of your bathroom. If your grout looks dingy, you might want to look into grout restoration secrets to match the clean look of your new glass. A new door next to old, moldy grout looks terrible. It is about the whole package, the structural integrity and the final aesthetic finish.