
The ghost in the expansion gap
Grout repair in high moisture areas requires removing damaged material, drying the substrate completely, and applying high performance epoxy or polymer modified grout to ensure a waterproof seal. Successful repairs depend on mechanical bonding and the elimination of latent moisture within the tile assembly. Most failures occur because the installer ignored the structural movement of the building or used the wrong chemical composition for a wet environment. I spent three days grinding concrete on a job last month just so the floor would not click like a castanet because the previous guy thought underlayment could hide a half inch dip. It did not work for him and it will not work for you. Most guys skip the leveling compound. They think the underlayment will hide the dip. It won’t. I have seen countless shower floors fail because someone used standard sanded grout where a flexible sealant or epoxy was required at the change of plane. Moisture is a patient enemy. It finds the smallest hairline fracture and begins the slow process of delamination. When we talk about showers and showers that wow modern designs for 2025, we are really talking about the integrity of the waterproofing membrane and the grout joints that protect it. If your grout is crumbling, the damage is often already beneath the surface. You cannot just smear new paste over the old. You must excavate the failure. This is about physics and chemistry, not just appearance.
Why your subfloor is lying to you
The integrity of grout depends entirely on the rigidity of the subfloor and the moisture content of the setting bed before the repair begins. Deflection in the subfloor causes grout joints to crack under minimal load, making any surface level repair temporary unless the structural movement is addressed. In high moisture areas like bathrooms, the subfloor often hides rot that softens the entire assembly. You might think your tiles are solid, but a moisture meter often tells a different story of saturated backer board and failing thinset.
“A floor is only as good as the subfloor beneath it; deflection is the enemy of every joint.” – Master Flooring Axiom
Moisture moves through grout via capillary action. If you have a leaky valve behind the wall, your grout will never stay in place. I have pulled up tiles where the grout looked fine on top but was the consistency of wet sand underneath. This happens when the vapor drive pushes water from the slab upward through the tile. To fix this, you must understand the perm rating of your materials. It is not enough to look for grout restoration secrets for long lasting results if you are ignoring the wet plywood underneath. You need a stable, dry foundation or the new grout will pop out within six months. The industry standards set by the TCNA are not suggestions. They are the laws of physics written in ceramic and stone. If the subfloor moves more than 1/360th of the span, your grout will fail. It is that simple.
The 1/8 inch that ruins everything
Proper joint width and depth are the most critical factors in grout longevity within wet environments such as showers and steam rooms. Grout must be packed to the full depth of the tile to resist water pressure and provide structural support to the tile edges. Narrow joints often suffer from pinholes while wide joints can shrink and crack if the water to powder ratio is incorrect. People often want tiny joints for a modern look, but if those joints are in a shower, you are begging for trouble. Without enough mass, the grout cannot hold its bond.
| Grout Type | Minimum Width | Moisture Resistance | Best Use Case |
|---|---|---|---|
| Sanded Grout | 1/8 inch | Medium | Floor tiles and large joints |
| Unsanded Grout | 1/16 inch | Low | Polished marble and glass |
| Epoxy Grout | 1/16 inch | High | Showers and commercial kitchens |
| High Performance Cement | 1/8 inch | Medium-High | Residential wet areas |
The chemistry of the mix matters. While most people want the thickest underlayment, too much cushion actually causes the locking mechanisms on LVP to snap under pressure, and the same logic applies to tile. Too much flex in the system kills the grout. You need a balance of rigidity and the right chemical bond. If you are working near chic baseboard designs that transform rooms in 2025, remember that the joint between the floor and the wall must be caulk, not grout. Grout does not flex. Walls move. If you grout that corner, it will crack. Every single time. Use a color matched 100 percent silicone sealant for those transitions.
Chemistry of the modern bond
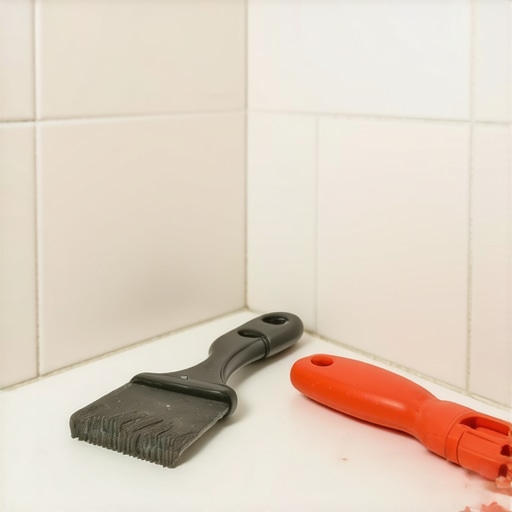
Modern grout repair relies on epoxy resins and high grade polymers that create a non porous surface resistant to mold and mildew. Unlike traditional cement grout, epoxy grout is waterproof throughout its entire mass and does not require a separate sealer to prevent water absorption. This makes it the superior choice for high moisture areas where traditional grout frequently fails. When you are looking for how to refresh grout without replacing it, you might consider a grout colorant which is essentially an epoxy coating for your existing joints. However, if the grout is soft, a coating is just a band aid on a bullet wound. You have to scrape out at least 2/3 of the depth of the joint. I use a carbide tipped rake or an oscillating tool with a diamond blade. It is dusty and miserable work. I smell like ground stone for a week after these jobs. But it is the only way. You need clean tile edges for the new material to grab onto. If there is soap scum or body oil left on the tile edge, the new grout will peel off like a scab. Clean the joints with denatured alcohol before you even think about opening a bag of grout. The molecular bond depends on a pristine surface.
The nightmare of hidden efflorescence
Efflorescence is the migration of salts to the surface of porous materials, indicating that water is moving through the tile assembly and dissolving minerals. In high moisture zones, this often appears as a white powdery crust on the grout lines that returns shortly after cleaning. To fix this, the source of the moisture must be blocked and the grout must be replaced with a low absorption alternative. This is a common issue in basement showers where the concrete slab is wicking moisture.
“Water will always follow the path of least resistance, and often that path is right through your grout joints.” – TCNA Handbook Reference
You cannot just wash it away. You have to stop the water. If you are considering eco friendly tile solutions for sustainable homes in 2025, look for materials that have low porosity. Dense porcelain is far better than natural stone in a wet environment because it does not allow the salts to travel. When you repair grout in these areas, use a fortifier instead of plain water in your mix. It reduces the porosity and increases the density of the final cure. It makes the grout harder to work with, but the result lasts for decades instead of months.
Precision steps for a permanent fix
Executing a professional grout repair involves a systematic approach of mechanical removal, thorough sanitization, and precise application of new material. Skipping any of these steps results in a repair that looks good for a week and fails once the shower is used regularly. Here is the checklist I use for every high moisture repair:
- Inspect the tile for hollow sounds indicating debonding from the substrate.
- Remove old grout to a depth of at least 3 millimeters using a diamond tipped tool.
- Vacuum all debris and scrub the tile edges with a stiff brush and alcohol.
- Ensure the area is bone dry using a heat gun or fan for at least 24 hours.
- Mix the grout to a peanut butter consistency, avoiding excess water which weakens the cure.
- Force the grout into the joints at a 45 degree angle to ensure no air pockets remain.
- Clean the surface with a damp, not dripping, sponge to prevent washing out the pigment.
Following these steps is the difference between a hack job and a professional result. Many homeowners ignore the drying phase. They see a dry surface and think it is ready. It is not. Moisture trapped in the thinset will turn the new grout into mush from the inside out. If you need help with the finishing touches or specific product recommendations, you can always contact us for expert advice. Don’t forget that tile cleaning tips for a sparkling bathroom in 2025 only work if your grout is structurally sound to begin with.
Beyond the tile surface
Maintaining grout in high moisture areas requires ongoing attention to the surrounding elements such as baseboards and shower enclosures to prevent water intrusion. Moisture often enters the wall assembly through the gap between the floor tile and the baseboard, leading to mold growth behind the walls. If you are looking at baseboards makeover ideas to elevate your space, ensure you are using moisture resistant materials like PVC or high density resins in bathrooms. Wooden baseboards in a wet room will swell and pull the grout away from the floor. I always recommend a small bead of translucent silicone at the bottom of the baseboard where it meets the tile. It is a tiny detail that saves the floor. Also, check your showers with a style trendy ideas for small bathrooms to ensure the glass partitions are sealed properly. A small leak at the corner of a glass door can saturate the grout in the entire bathroom over time. It is about creating a cohesive, water tight system from the drain to the ceiling. If you follow the rules of the trade, use the right chemicals, and respect the drying times, your grout will stay exactly where you put it. It is not magic. It is engineering.