
I spent three days last month fixing a master bath where the previous guy tried to nibble a hole for the shower valve with a pair of dull nippers and a prayer. The result was a jagged, spider-webbed mess hidden behind a loose escutcheon plate that eventually failed. It looked fine for a week until the vibration from the plumbing rattled the tile enough to snap it in half. That is the difference between a handyman and a mechanic. If you want a floor or a wall to last, you have to respect the material. A shower valve cutout is not just an opening for water, it is a structural modification to the tile itself. One wrong move and you have wasted a thirty dollar porcelain plank and half a day of labor. We are going to talk about how to do this with the precision of a machinist.
The physics of porcelain and mechanical stress
Porosity and density dictate the method of cutting because every tile reacts differently to the friction and heat of a diamond bit. When we talk about porcelain, we are looking at a material with a water absorption rate of less than 0.5 percent. This density means the material is incredibly brittle. Unlike ceramic, which has a softer biscuit and can be scored easily, porcelain requires constant cooling and a high RPM to prevent the crystalline structure from shattering. If you are aiming for showers that wow, you cannot afford a hairline fracture. These fractures often start at the microscopic level during the cutting process and expand over months of thermal cycling as the hot water expands the pipes and the tile remains rigid. This discrepancy in expansion coefficients is what usually kills a bad tile job.
“A floor is only as good as the subfloor beneath it; deflection is the enemy of every joint.” – Master Flooring Axiom
Tools you actually need for the job
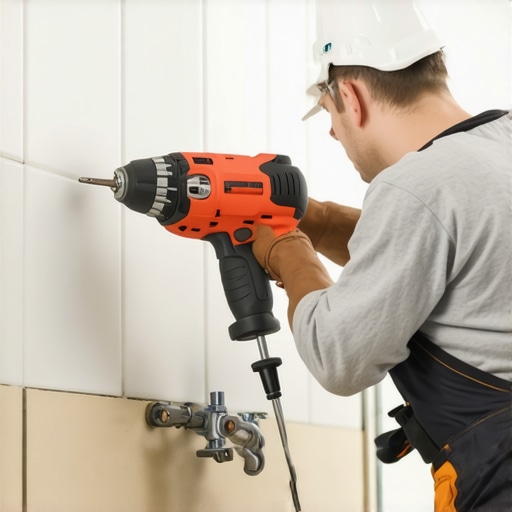
A professional grade diamond hole saw is the only tool that should be touching your high end tile for a circular cutout. Forget the old school carbide tipped bits that skip across the surface like a flat stone on a pond. You need a bit with a continuous diamond rim or a vacuum brazed diamond coating. These tools do not cut the tile so much as they grind it away at a molecular level. I prefer using a 4.5 inch angle grinder for larger valve bodies, but for a standard mixing valve, a hole saw mounted on a cordless drill is more manageable for most installers. You also need a template. Never try to freehand a hole saw onto a glazed surface. It will skate across the tile and leave a permanent scar that even the most aggressive tile cleaning tips cannot fix. Use a piece of scrap plywood with a pre-drilled hole to act as your guide. This keeps the bit centered until it bites into the glaze.
The geometry of the perfect layout
Measuring the exact center point of the valve is the most critical step before the first spark flies. You must measure from the edge of the previous tile, accounting for the grout joint width. I have seen guys measure from the wall and forget that they have an eighth of an inch of thinset and tile thickness to account for. You need to mark your center on a piece of blue painter tape stuck to the tile. This tape does two things. It provides a visible surface for your pencil and it helps prevent the edges of the hole from chipping. If you are working on trendy ideas for small bathrooms, your layout is likely tight, and a mistake of even a quarter inch means the valve plate will not cover the hole. That is a mistake you cannot hide with grout.
| Cutting Method | Precision Level | Heat Generation | Best Use Case |
|---|---|---|---|
| Diamond Hole Saw | High | High (Needs Water) | Standard circular valves |
| Angle Grinder | Medium | Very High | Large or irregular shapes |
| Tile Nippers | Low | Low | Hidden edges only |
| Carbide Bit | Low | Medium | Soft ceramic wall tile |
The danger of dry cutting and thermal shock
Managing the heat signature of the cut is what separates the pros from the guys who break every third tile. When a diamond bit spins at 2,000 RPM, it generates enough friction to turn the porcelain dust into a slurry of glass. If that heat builds up too fast, the tile will undergo thermal shock and crack right down the middle. This is why I always use a wet sponge or a constant drip of water. If you are cutting dry, you must use a pulsing motion. Cut for five seconds, pull back for five seconds. This allows the air to cool the diamond segments. The dust is also a major health hazard. Crystalline silica is no joke for your lungs. If you are not using water, you better be wearing a P100 respirator. I have seen too many old timers with a cough because they thought a bandana was enough protection.
The secret of the pilot hole
Starting the cut at an angle is a technique that takes practice but prevents the bit from wandering. Instead of holding the drill flat against the tile, you start at a 45 degree angle. This allows the edge of the hole saw to create a crescent moon shaped groove in the glaze. Once that groove is deep enough to hold the bit, you slowly rotate the drill upright. This eliminates the need for a pilot bit, which I usually find to be more trouble than they are worth. Pilot bits tend to vibrate and can actually cause more chipping on the exit side of the cut. If you are installing eco friendly tile solutions, remember that these materials are often made from recycled glass and are even more sensitive to vibration than standard porcelain.
“Ensure that all cut edges are smooth; a micro-crack is the progenitor of a structural failure under load.” – Tile Council Standards
Integrating the valve with the tile plane
The depth of the valve relative to the finished tile surface is a common point of failure in modern bathrooms. If the plumber set the valve too deep in the wall, your escutcheon plate will not reach the threads. If it is too far out, the plate will rattle. You need to know your total stack height. This includes the substrate, the waterproofing membrane, the thinset, and the tile itself. I always tell people to check their baseboards makeover ideas for inspiration on how trim should meet a surface. Just like a baseboard hides the expansion gap of a floor, the valve plate hides the expansion gap of the tile. Yes, you need a gap. Do not grout the tile right up to the brass valve body. The valve will vibrate and expand with heat. If it is locked in with grout, it will crack the tile. Fill that small gap with 100 percent silicone sealant instead.
- Mark the center point using a square and a tape measure.
- Apply blue painter tape to the cut zone to prevent surface scratching.
- Clamp a plywood template to the tile to guide the diamond bit.
- Use a spray bottle to keep the cutting surface wet and cool.
- Drill at a consistent speed without applying heavy downward pressure.
- Smooth the inner edges with a diamond hand pad after the hole is complete.
Final fit and waterproofing protocols
Sealing the penetration point is the final line of defense against mold. Once the hole is cut and the tile is set, you must ensure the waterproofing membrane behind the tile is properly integrated with the valve. If you are using a topical membrane, use the manufacturer provided gasket. If you are relying on the tile, you are doing it wrong. Water will eventually get behind that chrome plate. When it does, it needs to hit a waterproof barrier, not your drywall. I have seen beautiful jobs ruined because someone forgot to caulk the top three quarters of the valve plate. Leave the bottom open so any water that gets in can drain out. This is the kind of detail that preserves the grout restoration secrets you worked so hard to implement. For more information on maintaining your tile, you can contact us for expert advice on bathroom longevity.