
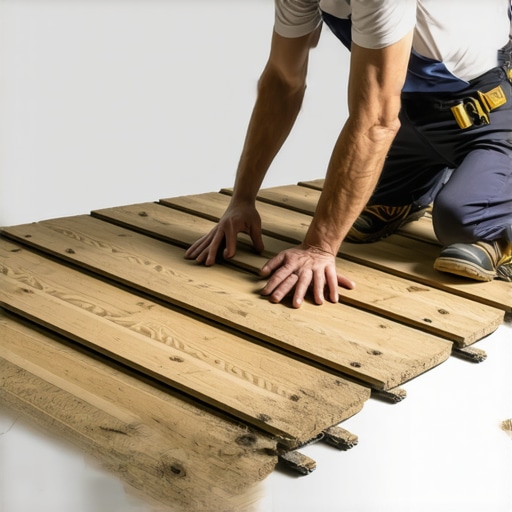
I spent three days grinding concrete on a job last month just so the floor wouldn’t click like a castanet. Most guys skip the leveling compound because they are lazy. They think the underlayment or the mortar will hide the dip. It won’t. I have seen fifteen thousand dollar wide-plank installations turn into potato chips because the installer didn’t check the crawlspace humidity or the subfloor flatness. When we talk about large format planks in a shower environment, we are not talking about aesthetics. We are talking about engineering a waterproof vessel that handles thermal expansion and constant hydrostatic pressure. If you think you can just slap a 12×24 inch tile on a pre-sloped pan without understanding the geometry of the envelope cut, you are in for a structural failure that will rot your subfloor and grow mold in your walls. I have been on my knees with a moisture meter and a level for twenty-five years. I smell like PVC primer and thin-set dust. I know that the concrete does not care about your design dreams. It only cares about the laws of physics. If the subfloor is not within one eighth of an inch over ten feet, your large format tile will fail. Period.
The drainage physics of sloped flat surfaces
Shower floor drainage requires a specific slope of one quarter inch per foot toward the drain assembly to ensure water evacuation. In the world of large format planks, this creates a geometric impossibility because flat rigid planes cannot bend to follow a four-way slope without structural modification. To solve this, professional installers use the envelope cut method, which involves making diagonal relief cuts from each corner of the shower to the corners of the drain. This allows the large planks to sit on four distinct triangular planes that meet at the drainage point. Without these cuts, you will experience lippage, where the edge of one tile sits higher than the next, creating a trip hazard and a place for stagnant water to pool. Stagnant water leads to efflorescence and the breakdown of your grout joints. You can see how this works in showers that wow when they are executed by a master who understands that the water path is the most important factor in the room. A floor is a performance surface. It must move water as efficiently as a gutter system. If you ignore the slope, you are essentially building a very expensive bathtub that never empties.
“A floor is only as good as the subfloor beneath it; deflection is the enemy of every joint.” – Master Flooring Axiom
Why your subfloor is lying to you
Subfloor flatness is the absolute baseline for large format tile installation because any deviation over one eighth of an inch will cause the tile to bridge over the low spot. When a tile bridges, it leaves an air pocket underneath. In a shower, that air pocket is a void where moisture can collect, leading to the growth of bacteria and the eventually weakening of the polymer bond. I have pulled up tiles from ten year old showers that smelled like a swamp because the installer used the spot-bonding method to save time. You must use a self-leveling underlayment or a manual mortar bed to achieve a perfectly flat substrate before you even think about opening a box of tile. The ANSI A108.19 standards are clear on this. Large format tiles, which are defined as any tile with at least one side longer than fifteen inches, require ninety five percent mortar coverage in wet areas. You do not get that coverage if your floor has dips and humps. If you find a low spot, you grind the high spots and fill the lows. There are no shortcuts. I have spent more time with a diamond cup wheel on a grinder than I have with a trowel, and that is why my floors do not crack. If you want to see how this translates to overall room design, look at showers with a style that prioritize structural integrity over cheap fast fixes.
Thin-set chemistry and the molecular bond
Modified thin-set mortar is the only acceptable adhesive for large format planks in a shower because it contains polymers that allow for a tiny amount of flexibility and a much stronger grip. You must use a Large and Heavy Tile Mortar, which was formerly known as medium bed mortar. This stuff is engineered to hold the weight of a heavy plank without slumping into the ridges. If you use a standard thin-set, the weight of a 12×48 inch porcelain plank will push the mortar down, and by the morning, your tile will be lower than the one next to it. We call this subsidence. To prevent this, you trowel the mortar in straight lines, not swirls. Swirls trap air. Straight lines allow air to escape when you collapse the ridges by sliding the tile into place. This is basic fluid dynamics. You also need to back-butter every single plank. This means you apply a thin, flat coat of mortar to the back of the tile before setting it. This ensures that the bond is tile-to-mortar-to-substrate. If you skip back-buttering, you are gambling with the longevity of the installation. I have seen the results of dry-bonding, and it always ends with a sledgehammer and a dumpster.
| Metric | Large Format Plank (15in+) | Standard Tile (12in and under) |
|---|---|---|
| Maximum Subfloor Variation | 1/8 inch in 10 feet | 1/4 inch in 10 feet |
| Mortar Coverage Required | 95% in wet areas | 85% in dry areas |
| Trowel Shape | Slant notch or 1/2in U-notch | 1/4in to 3/8in Square notch |
| Minimum Grout Joint | 1/8 inch minimum | 1/16 inch allowed |
| Back-Buttering | Mandatory | Optional |
The ghost in the expansion gap
Expansion joints are the most overlooked part of shower floor engineering because people think grout is enough to hold the room together. It is not. Every shower moves. The house settles, the wood studs expand with the ambient humidity, and the temperature of the water causes the tile to grow and shrink. If you butt your tile tight against the wall, it has nowhere to go. It will tent or crack the grout. You must leave a perimeter gap of at least one quarter inch at all change-of-plane transitions. This gap should never be filled with hard grout. It must be filled with one hundred percent silicone sealant. Silicone is flexible. It acts like a shock absorber for your floor. I see guys cramming grout into the corners all the time. Six months later, the homeowner is calling because the grout is crumbling and falling out. Use the right materials for the right job. If you are worried about how those gaps look, you can hide them with clever transitions or baseboards in the dry areas of the bathroom, as seen in chic baseboard designs. For more tips on finishing touches, baseboards makeover ideas can help blend the structural gaps into the aesthetic design of the room.
“Movement joints are not an option; they are a requirement for any tile assembly that intends to last more than a year.” – TCNA Handbook
Grout joints and the myth of zero gap
Grout selection for large format planks involves balancing the joint width with the water absorption rate of the material. People always want zero-joint installations. They want the floor to look like a solid sheet of wood or stone. That is a recipe for disaster. Large format tiles have a manufacturing tolerance, meaning they are never perfectly straight. A 1/8 inch joint is the minimum you can safely use to hide the slight variations in the tile size. I recommend high-performance cementitious grout or epoxy grout for shower floors. Epoxy is waterproof and stain-resistant, which is great, but it is a nightmare to work with if you are slow. It sets up fast and can ruin a tile surface if you don’t wash it off in time. If you go with a standard grout, you need to ensure it is properly sealed and maintained. You can learn about keeping these joints clean at tile cleaning tips. If your grout is already failing, you might need grout restoration secrets or look into how to refresh grout to save the floor without a full tear-out.
The ten step installation checklist
- Inspect the subfloor for deflection and ensure it meets L/360 or L/720 standards.
- Grind down high spots and fill low spots with Portland cement-based leveler.
- Install a waterproofing membrane, such as a topical sheet or liquid-applied system.
- Perform a twenty four hour flood test to ensure the vessel is watertight.
- Layout the large format planks to determine the envelope cuts for the drain.
- Mix the Large and Heavy Tile Mortar to the exact manufacturer specifications.
- Apply mortar using a slant-notch trowel to maximize ridge collapse.
- Back-butter each plank to achieve ninety five percent coverage.
- Use a mechanical lippage tuning system to keep tile edges perfectly flush.
- Fill all change-of-plane joints with ASTM C920 compliant silicone.
Regional moisture and the climate factor
Regional humidity plays a massive role in how your shower floor cures and performs over time. In a swampy environment like Houston or Miami, the evaporation rate of the water in your thin-set is much slower than in the dry heat of Phoenix. This means you cannot rush the grouting process. If you seal the moisture into the mortar bed by grouting too early, you will end up with latex leaching, which shows up as white streaks on your dark grout. I have seen guys in the South try to grout a shower twelve hours after setting large format tile. That is a mistake. Those big planks don’t let the moisture escape through the surface. It all has to come out through the grout joints. Give it at least twenty four to forty eight hours. If you are in a dry climate, your thin-set might skin over too fast, which ruins the bond. You have to work in smaller sections and keep the subfloor damp to prevent it from sucking the life out of your mortar. If you have questions about specific regional requirements, you can always contact us for professional guidance on local building codes and climate-specific installation techniques.
The final inspection
Large format planks on a shower floor are a high-stakes installation. You are dealing with the physics of drainage, the chemistry of polymers, and the mechanics of structural movement all in one square. It is not just about the look of the tile. It is about the waterproof integrity of your home. If you cut corners on the subfloor or the mortar, the floor will fail. It might take a year, or it might take five, but water always finds the weakness. Do the work right the first time. Grind the floor. Check your slopes. Back-butter your tiles. Use silicone in the corners. A master floor is a silent one that does its job without you ever thinking about it. When you walk into your shower and the water disappears instantly, and there isn’t a single edge to stub your toe on, you know it was done by someone who respects the trade. For more information on our standards, feel free to review our privacy policy regarding our technical guides and consumer advice.