
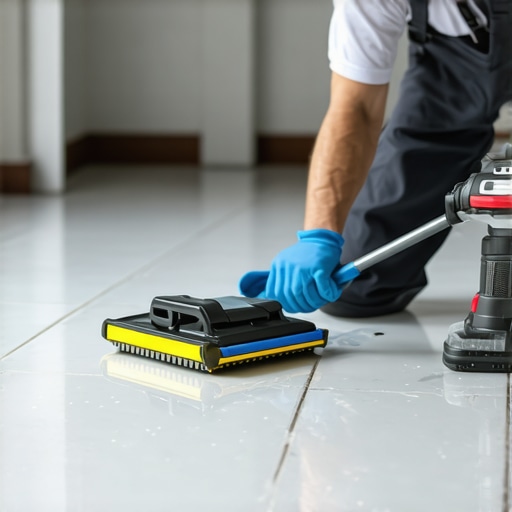
I once walked into a luxury master bathroom where a contractor had just finished a high-end installation of glass mosaics and stone. The owner spent twenty thousand dollars on materials alone. The installer used a high-performance epoxy grout but didn’t know the golden rule of the resin window. He walked away for lunch before doing the final wash. By the time I arrived, the entire shower looked like it had been shrink-wrapped in a cloudy, greasy plastic film. It wasn’t just a stain. It was a chemical bond. We spent three days with white pads and heavy-duty surfactants just to save the glaze. If you don’t treat epoxy with respect, it will punish your wallet and your back. Removing epoxy haze requires an understanding of polymer chemistry and mechanical patience. You cannot simply scrub it away with a bucket of warm water and a prayer. You are dealing with a two-part thermosetting resin that is designed to stay put forever. This is not the cement-based stuff your grandfather used. This is industrial-grade adhesive disguised as a joint filler.
The chemical reality of epoxy resin
Removing epoxy grout haze requires specialized solvents or alkaline cleaners that break the molecular cross-linking of the resin. You must use a white nylon abrasive pad to mechanically lift the polymer film from the tile glaze without causing surface scratching or damaging the integrity of the joint. This is a delicate chemical operation. Unlike standard grout, which is porous and water-soluble until it cures, epoxy is a chemical reaction in progress. When you mix the resin and the hardener, you start a clock. That clock doesn’t care about your coffee break. The haze you see on the surface is the residual resin that didn’t make it into the joint. It is a thin layer of plastic that has bonded to the microscopic imperfections of the tile. On a polished porcelain or a dense natural stone, this film creates a dull, oily appearance that catches the light and reveals every footprint. If you try to use acidic cleaners meant for cement, you will do nothing but waste your time and potentially etch the stone or damage nearby chic baseboard designs that border the floor.
“A floor is only as good as the subfloor beneath it; deflection is the enemy of every joint.” – Master Flooring Axiom
Why your sponge is actually your enemy
Traditional yellow sponges are often too soft and absorbent to effectively remove epoxy haze because they simply redistribute the resin across the tile. You need hydrophilic sponges and white non-woven pads to create enough mechanical friction to lift the sticky film while the solvent works its magic. Most guys make the mistake of using too much water. When you flood the surface of a fresh epoxy job, you aren’t cleaning. You are emulsifying the resin and spreading it thinner. A thin layer of epoxy is actually harder to remove than a thick one because it cures faster. You need to use a dedicated epoxy stripper if the haze has been sitting for more than twenty-four hours. These strippers often contain benzyl alcohol or other powerful agents that soften the resin. You apply it, let it dwell for fifteen to thirty minutes, and then start the slow, rhythmic scrubbing. If you are working in showers that wow, you have to be extra careful with the vertical surfaces. Gravity pulls the solvent down, meaning the top tiles might not get enough dwell time while the bottom tiles get soaked. You have to manage the application with a steady hand and constant monitoring.
The microscopic battle for the tile surface
Surface tension and capillary action dictate how epoxy haze interacts with your tile finish during the curing phase. If the tile porosity is high, the resin molecules will sink into the micro-pores, making chemical extraction a requirement rather than an aesthetic choice. This is why we always recommend a grout release agent for porous stones like travertine or slate. If you skipped that step, you are in for a fight. The resin wants to stay in those pores. You have to use a brush with stiff nylon bristles to reach into those microscopic valleys. For polished surfaces, the danger is scratching. A green scrub pad will ruin a polished marble finish in seconds. Always use white pads. They are designed to provide friction without the aggressive abrasives found in darker pads. You can find more tile cleaning tips that focus on maintaining these sensitive surfaces without using harsh chemicals that strip the factory sealers. The goal is to break the bond of the haze while leaving the tile beneath it untouched. It is a game of millimeters and chemistry.
| Removal Method | Effectiveness on Haze | Risk to Tile Finish | Recommended Dwell Time |
|---|---|---|---|
| Warm Water and Vinegar | Very Low | Low | None |
| Commercial Epoxy Remover | Very High | Moderate | 15-30 Minutes |
| Steam Cleaning | Medium | Low | Instant |
| Acetone Rub | High | High | Under 1 Minute |
| Benzyl Alcohol Gel | Extreme | Moderate | 20 Minutes |
Safe solvents for sensitive finishes
Benzyl alcohol and soy-based strippers are the industry standard for removing hardened epoxy resin from delicate surfaces like ceramic and glass. These agents work by swelling the polymer chain, which loosens the grip of the epoxy on the substrate without the corrosive power of strong acids. You have to be careful with acetone. While it is a great solvent for uncured epoxy, it evaporates too quickly to be useful for thick haze. It also has a nasty habit of melting the finish on some modern baseboards makeover ideas if you aren’t careful with your drips. If you are working on a shower floor, ensure the drain is plugged or protected. You don’t want these concentrated chemicals sitting in your p-trap. Always work in small sections. I usually suggest a three-by-three foot area. Apply the gel, wait for the resin to soften, and then use your white pad. You will feel the resistance change as the resin lifts. It goes from a sticky, rubbery drag to a smooth glide. That is the moment you know the bond is broken. Then you must rinse. And rinse again. If any residue remains, it will just re-harden and you will be back to square one. This is why grout restoration secrets always emphasize the importance of the final neutral rinse.
“Epoxy grout is a structural component of the tile assembly; its chemical resistance is matched only by its difficulty to clean.” – TCNA Guide Excerpt
Protecting the baseboards and transitions
Blue painter’s tape and plastic sheeting are mandatory when using epoxy haze removers near painted baseboards or natural wood transitions. The solvents required to dissolve epoxy will liquefy paint and strip wood stains on contact, leading to expensive repairs that negate the beauty of the new tile floor. I have seen guys ruin a beautiful set of chic baseboard designs because they were sloppy with the scrub brush. When you are scrubbing the perimeter, the slurry of dissolved epoxy and solvent splashes. It is inevitable. Tape your baseboards off with at least two layers of tape. Use a plastic drop cloth for the rest of the room. If the solvent gets under the tape, it will sit there and eat the finish off your wood. If you are working in showers with a style that includes intricate tile patterns near the doorway, pay extra attention to the transition strip. Metals like aluminum or brass can react with certain heavy-duty cleaners, leading to tarnishing. Always test a small, inconspicuous spot first. It is the only way to be sure you aren’t trading one problem for another.
The 24 hour cleanup protocol
If you catch the haze within the first twelve to twenty-four hours, you might not need the heavy artillery. A mixture of dawn dish soap and very hot water can sometimes emulsify the remaining oils if the cross-linking hasn’t finished. This is the sweet spot. Follow this checklist for the best results.
- Mix two gallons of hot water with a quarter cup of degreasing dish soap.
- Apply the solution with a microfiber mop and let it sit for five minutes.
- Scrub the tiles with a white nylon brush in a circular motion.
- Use a wet-dry vacuum to suck up the dirty water immediately.
- Rinse the entire floor with distilled water to prevent mineral spots.
- Buff the surface dry with a clean cotton towel.
If the floor still feels tacky after this, you have passed the point of simple cleaning. You are now in the realm of chemical stripping. You might want to look into how to refresh grout if you find that the stripping process has also lightened the color of your joints or made them look inconsistent. This happens when the solvent stays on the joint for too long and starts to break down the pigment on the surface of the epoxy. It won’t hurt the structural integrity of the grout, but it can make it look splotchy. Proper maintenance is the only way to keep the floor looking like the day it was installed.
Mechanical versus chemical removal techniques
Mechanical removal involves using heat guns or steam cleaners to soften the epoxy, while chemical removal relies on molecular breakdown via surfactants and alcohols. Most professionals prefer a hybrid approach that uses targeted heat for thick deposits and chemical solvents for the ghosting haze left behind. Heat is a double-edged sword. If you get the tile too hot, you risk thermal shock, which can crack the tile or pop it loose from the thin-set. I only use heat for the big chunks where the installer was really lazy. For the haze, steam is a safer alternative. A professional-grade steam cleaner can reach temperatures that soften the resin without the concentrated intensity of a heat gun. Once the resin is soft, it can be wiped away with a microfiber cloth. This is often the best way to handle eco-friendly tile solutions because it reduces the need for harsh VOCs in the home. However, it is slow. If you have five hundred square feet of haze, you aren’t going to do it with a hand-held steamer. You need the chemicals. Just make sure the room is well-ventilated. Fans are your best friend here. They keep the fumes moving and help the rinse water evaporate before it can leave spots.