
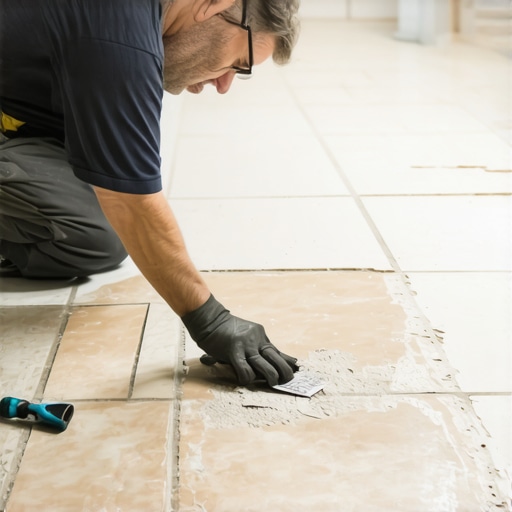
Most guys skip the leveling compound. They think the underlayment will hide the dip. It won’t. I spent three days grinding concrete on a job last month just so the floor wouldn’t click like a castanet. When you walk across a room and hear that hollow, rhythmic thud, you are hearing the death rattle of a bond failure. A loose tile is more than an aesthetic annoyance. It is a structural hazard that threatens the integrity of the entire floor assembly. In my twenty five years of handling masonry and ceramic installations, I have seen five hundred dollar repairs turn into five thousand dollar replacements because someone ignored a single loose square. You do not always have to rip the whole thing out. There is a surgical way to save the floor without destroying the grout lines, but it requires understanding the physics of why that bond broke in the first place.
The physics of the hollow sound
A hollow sound in your tile signifies a total delamination between the tile underside and the mortar bed or the mortar bed and the subfloor. This occurs when the adhesive bond fails due to shrinkage, structural movement, or improper troweling techniques. To fix it without removing grout, you must use low-viscosity adhesives. These specialized resins migrate through tiny holes to fill the void, restoring the mechanical lock without requiring a sledgehammer. This process relies on capillary action to distribute the material across the entire underside of the tile, ensuring no air pockets remain to cause future cracking.
When we talk about the chemistry of a bond, we are looking at the interface between the thin-set and the substrate. Standard thin-set is a cementitious product that creates a mechanical bond by interlocking with the pores of the tile and the subfloor. If the tile was installed on a dusty slab or if the mortar skinned over before the tile was set, that mechanical lock never formed. The result is a tile that sits in place like a coaster on a table. It stays there until vertical pressure from a footstep causes it to shift. This movement creates friction, which eventually grinds the mortar into a fine powder, increasing the hollow sound and eventually cracking the surrounding grout.
Why your subfloor is lying to you
Subfloor deflection and moisture vapor emission rates are the primary culprits behind loose tiles that seemingly fail for no reason. A plywood subfloor that flexes even a fraction of an inch more than the L over 360 standard will cause the rigid bond of the tile to snap. On concrete, moisture rising through the slab can cause hydrostatic pressure that pushes the tile upward. Before attempting a fix, you must verify that the floor is not moving due to structural rot or excessive humidity levels in the crawlspace, as no amount of adhesive will stabilize a floor that is constantly shifting or soaking in water.
“A floor is only as good as the subfloor beneath it; deflection is the enemy of every joint.” – Master Flooring Axiom
I have seen it in high end showers that wow and in simple kitchen layouts. If the substrate is not flat within one eighth of an inch over ten feet, the tile is bridging a gap. That bridge will eventually collapse under the weight of a refrigerator or even just consistent foot traffic. In my experience, homeowners often overlook the role of humidity. In regions with high seasonal shifts, the subfloor expands and contracts at a different rate than the ceramic material. This differential movement is why we leave expansion gaps at the perimeter. If your tile is tight against the wall, it has nowhere to go but up. Before you start drilling, check your chic baseboard designs to ensure there is a proper gap behind them for the floor to breathe.
Chemical bond mechanics of injection resins
The injection method utilizes high strength acrylic or epoxy resins that feature a lower viscosity than water to penetrate the failed bond area. These resins are engineered to have high surface tension once cured, creating a permanent bridge between the tile and the substrate. Unlike standard mortar, these adhesives do not shrink as they dry, which is essential for maintaining the level of the tile. This chemical approach allows for a permanent repair that is often stronger than the original cement bond because it penetrates deep into the pores of both surfaces simultaneously.
| Adhesive Property | Injection Resin (Acrylic) | Epoxy Injection | Standard Thin-set Mortar |
|---|---|---|---|
| Viscosity Level | Ultra Low | Medium to Low | High Paste |
| Cure Time | 12 Hours | 24 Hours | 24 to 48 Hours |
| Flexibility | High | Moderate | Low |
| Bond Strength | 900 PSI | 2500 PSI | 350 pounds per square inch |
Choosing the right resin is a matter of understanding the environment. For a dry hallway, an acrylic based injection glue is sufficient. However, if you are dealing with a loose tile in a wet area, you might need something more robust. For those looking at grout restoration secrets, keeping the original grout intact during this process is the main goal. The resin must be thin enough to flow through a 1/16 inch hole but thick enough to provide structural support once the solvent evaporates. It is a delicate balance of chemistry that many DIY enthusiasts get wrong by trying to use standard wood glue or construction adhesive, which will never flow deep enough to solve the problem.
The surgical approach to tile stabilization
To stabilize a tile without removing grout, you must drill small holes into the grout lines and inject the adhesive directly into the hollow space. This requires a steady hand and a high speed masonry bit to avoid chipping the edges of the ceramic or porcelain. Once the adhesive is injected, the tile must be weighted down for at least twenty four hours to ensure it cures in a perfectly flat position. This method preserves the visual continuity of the floor while addressing the underlying structural failure with minimal mess and no dusty demolition.
- Identify all hollow spots by tapping the floor with a plastic mallet or a heavy coin.
- Mark the injection points at the corners of the affected tiles within the grout joints.
- Vacuum all dust from the holes using a HEPA filter to ensure the adhesive bond is clean.
- Inject the resin slowly until it starts to resist or back up through the hole.
- Wipe away excess adhesive immediately with a damp cloth to prevent staining the grout.
- Place heavy weights like buckets of water or sandbags on the tile while it cures.
Precision is everything here. If you drill too deep, you might hit a radiant heating wire or a PEX pipe. If you drill too shallow, the resin won’t reach the void. I always tell my apprentices that they are surgeons in this moment. You are not just a floor guy. You are performing a localized graft. If you notice the grout is looking tired after the repair, you can look into how to refresh grout without replacing it to finish the job. The goal is a floor that looks like it was never touched. No one should ever know there was a hollow spot there once you are finished.
When the shower floor fights back
Showers present a unique challenge because moisture trapped under a loose tile can lead to mold growth and subfloor rot. In a wet environment, a loose tile is a gateway for water to bypass the waterproofing membrane if the grout has cracked. If you find a loose tile in your shower, you must ensure the area is bone dry before attempting an injection repair. Using a moisture meter is not optional here. It is a requirement. If you trap water under the tile with a resin seal, you are effectively creating a Petri dish for black mold that will eventually rot the joists beneath the pan.
“Deflection is the enemy of every joint, especially when water is the medium of transport for failure.” – Master Flooring Axiom
I have seen beautiful showers with a style fall apart because of a single loose floor tile near the drain. The constant thermal expansion from hot water and the weight of the user creates a pumping action. This action sucks water into the void and then pushes it out, slowly eroding the thin-set. If you are fixing a shower tile, use an epoxy based resin that is rated for submerged or wet environments. After the repair, follow up with tile cleaning tips to keep the surface pristine. A clean surface ensures that your new sealer or grout touch up will bond correctly to the existing material.
The 1/8 inch that ruins everything
The most common reason tiles come loose is the lack of a perimeter expansion gap. Many installers run the tile right up against the drywall or the framing. When the house settles or the humidity rises, the entire floor expands. Since the tile has no room to move outward, it moves upward. This creates a tenting effect where the tiles pop off the subfloor. Even if you fix the loose tile with injection, it will pop again if you do not create relief somewhere in the floor. This is where your baseboards makeover ideas come into play. You can hide a significant expansion gap behind a thick baseboard and a piece of shoe molding.
Think of your floor as a living organism. It needs to breathe and move. If you lock it down too tight, it will find a way to break free. Using eco-friendly tile solutions often involves using materials that are more sensitive to temperature changes. You must account for this. A repair is only as good as the diagnosis. If you inject resin into a floor that is under massive compression, the next tile over will likely pop next week. Sometimes the fix involves pulling the baseboards and cutting back the tile at the wall with a diamond blade to give the floor the 1/8 inch of breathing room it desperately needs. It is gritty work, and it is not glamorous, but it is the difference between a floor that lasts a lifetime and one that falls apart every season. For more info on our standards, check out our privacy policy or contact us for professional consultations.