
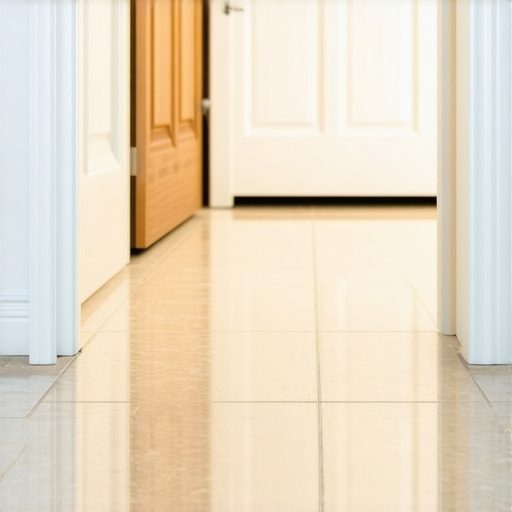
I smell like wet cement and stale coffee most days. My knees have the permanent calluses of a man who has spent twenty-five years staring at subfloors, and I can tell you exactly why your bathroom door is now grinding against your expensive porcelain. Most guys skip the leveling compound. They think the underlayment will hide the dip. It won’t. I spent three days grinding concrete on a job last month just so the floor wouldn’t click like a castanet. That job was a mess because the previous guy ignored the physics of the vertical stack. When you add a quarter-inch of cement board, an eighth-inch of modified thin-set, and another three-eighths of tile, you have just stolen nearly an inch of clearance from your door. It is a structural reality that many homeowners ignore until the first time they try to close the door and hear that sickening wood-on-stone scrape. This is not a cosmetic error. This is a failure of architectural planning. We are going to look at the chemistry of the bond and the physics of the swing to fix this properly.
The physics of the vertical floor stack
Bathroom doors rub on new tile floors because the finished floor height has exceeded the original door undercut clearance. This happens when the combined thickness of the subfloor underlayment, the thin-set mortar bed, and the ceramic or porcelain tile consumes the gap left by the previous vinyl or laminate flooring. Every millimeter of vertical elevation matters during a renovation.
When we talk about the floor stack, we are looking at a sandwich of materials. In an old bathroom, you likely had a single layer of linoleum or maybe a very thin builder-grade tile. These were often installed directly on a single layer of plywood. Modern standards from the TCNA (Tile Council of North America) require much more rigidity. You cannot just slap tile on a bouncy subfloor. To reach the required L/360 deflection rating, you usually need to add a layer of 1/2-inch or 1/4-inch cementitious backer unit (CBU) or a specialized uncoupling membrane. If you use a CBU, you have to realize that it requires its own bed of thin-set underneath it to fill the voids. You are not just adding the board, you are adding the glue. By the time you get to the tile, you have built a mountain that the door was never designed to climb. This is particularly common in older homes where the floor joists are 16 inches on center but have settled over time, requiring even more leveling compound to create a flat plane.
The subfloor secret no one told you
Subfloor prep and leveling are the most ignored aspects of a bathroom remodel that lead to door interference. If your subfloor is not level, the installer must use more thin-set mortar to compensate for the dips, which increases the finished height of the porcelain tile in specific areas. This uneven elevation creates high spots where the door will inevitably catch.
“A floor is only as good as the subfloor beneath it; deflection is the enemy of every joint.” – Master Flooring Axiom
I have seen it a hundred times. A homeowner buys a beautiful large-format tile. These tiles are popular for showers that wow and modern bathroom floors. However, large-format tiles require an extremely flat surface. To achieve that flatness on a wavy subfloor, the installer uses a medium-bed mortar. Unlike standard thin-set, medium-bed mortar can be applied up to 3/4 of an inch thick. If the installer has to build up one corner of the bathroom to keep the tiles from lippage, and that corner happens to be where the door swings, you are in trouble. The chemistry of these mortars is designed for support, not just adhesion. They are packed with polymers that allow the mortar to hold its shape without shrinking as it cures. While this is great for the tile, it is terrible for your door clearance. You also have to consider the moisture. If you are worried about the long-term look, you should look into grout restoration secrets for long lasting results because once that door starts rubbing, it will grind dirt into your grout lines and ruin them within weeks.
Why your thinset choice matters
Thinset mortar selection dictates the final elevation of the floor assembly. Using a large-and-heavy-tile mortar (formerly known as medium-bed) allows for a thicker application to support heavy porcelain slabs, but this thickness directly reduces the space under the door. Choosing the wrong notched trowel size can also lead to excessive mortar height and rubbing issues.
The trowel is the most important tool in the bag. If you use a 1/2-inch by 1/2-inch square-notched trowel, you are depositing a specific volume of mortar. Once you collapse the ridges by setting the tile, that mortar bed is going to be roughly 1/4-inch thick. If the installer uses a larger trowel to compensate for a poor subfloor, the floor gets higher. It is simple math. People often forget the transition. When you move from the hallway into the bathroom, you often need a transition strip or a marble threshold. These thresholds are usually 1/2-inch to 3/4-inch thick. If the door has to swing over that threshold, the clearance needs to be even greater. I always tell people to check their baseboards makeover ideas before they tile, because the height of the floor will also change where your baseboards sit. If the floor goes up, the baseboards go up, and suddenly the door looks like it was made for a different room.
| Material Layer | Typical Thickness | Impact on Door Clearance |
|---|---|---|
| 1/4-inch CBU | 0.25 inches | Moderate reduction |
| Modified Thinset | 0.125 to 0.25 inches | Variable based on trowel |
| Porcelain Tile | 0.375 inches | Significant reduction |
| Uncoupling Membrane | 0.125 inches | Minimal reduction |
| Large Format Tile | 0.50 inches | High reduction |
How to fix a dragging bathroom door
Fixing a dragging door requires either trimming the door bottom or adjusting the hinge pins to slightly tilt the door. Most solid wood doors can be cut with a circular saw and a fine-tooth blade, but hollow-core doors require more care to avoid removing the bottom structural rail entirely. Re-hanging the door is often the only permanent solution.
If you find yourself in this position, do not just keep forcing the door closed. You will ruin the tile, the grout, and the door itself. First, check if the door is level. Sometimes the weight of the new tile has caused a slight shift in the floor, or the hinges are just loose. Tighten the top hinge first. If that doesn’t work, you have to take the door off. To trim a door, use a piece of painter’s tape along the cut line to prevent splintering. Use a 40-tooth or higher carbide blade. If it is a hollow-core door, you can only take off about an inch before you hit the hollow center. If you go past that, you have to glue a new block of wood into the bottom. It is a pain. For those who want to keep things clean, remember to check tile cleaning tips for a sparkling bathroom in 2025 after you finish the woodwork, because sawdust in fresh grout is a nightmare to remove.
- Check door clearance before the old floor is removed.
- Calculate the total stack height including mortar and underlayment.
- Use a self-leveling compound to minimize thin-set thickness.
- Consider a low-profile uncoupling membrane instead of thick cement board.
- Test the door swing before the thin-set cures.
- Ensure hinges are tight and the door is plumb.
“Standard bathroom tile installations require a subfloor deflection rating of L/360 to prevent grout cracking.” – TCNA Industry Standard
The chemistry of the bond between the tile and the subfloor is also a factor. In high-moisture areas like bathrooms, the type of thin-set used can slightly expand. If you used an eco-friendly option like those found in eco-friendly tile solutions for sustainable homes in 2025, you might have different curing times. If you walk on the tile too soon, you can actually compress the mortar unevenly, leading to a high spot right under the door swing. This is why I am a stickler for cure times. Don’t let the plumber in there the next day. Give it forty-eight hours. The floor needs to settle into its final molecular state before it takes a load. If the door is rubbing because of a slight hump in the tile, you might be able to grind the bottom of the door at an angle, but usually, a straight cross-cut is the cleanest look. Always remember that a bathroom is a high-traffic zone. Every time that door rubs, it sends vibrations through the tile assembly. Over time, those vibrations can break the bond of the thin-set. You will end up with a hollow-sounding tile or a cracked grout line. It starts with a rub and ends with a full floor replacement if you aren’t careful. Take the time to measure your vertical height before the first bag of mortar is even opened.