
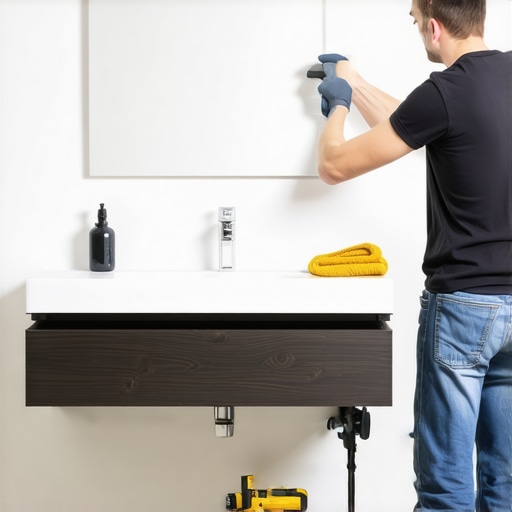
The physics of a wall hung vanity over tile
I smell like WD-40 and oak dust most days because I spent my life fixing what other people broke. Most guys skip the leveling compound. They think the underlayment will hide the dip. It won’t. I spent three days grinding concrete on a job last month just so the floor wouldn’t click like a castanet. When you are putting a floating vanity over existing tile, you are essentially betting that the original installer didn’t cut corners. If the tile was set on a bouncy subfloor or with a spot-bonding method, your $2,000 vanity is going to pull the porcelain right off the wall. You aren’t just hanging a cabinet, you are engineering a cantilevered load that must resist gravity while the tile acts as a brittle intermediary. This is not a project for the faint of heart or the poorly equipped. It requires a deep understanding of structural blocking and the molecular bond of modern adhesives.
“A floor is only as good as the subfloor beneath it; deflection is the enemy of every joint.” – Master Flooring Axiom
The structural lie of the surface
Installing a floating vanity over tile requires a solid structural connection to the wall studs to manage the cantilevered weight. You must bypass the tile layer and engage the framing directly using heavy duty lag bolts. The tile acts only as a decorative skin, not as a load bearing surface for the vanity brackets. People think tile is strong. It is not. It is hard, but it is brittle. If you tighten a bolt against a hollow spot behind a tile, that tile will shatter. This is why checking for lippage and hollow sounds is the first step. You take a mallet and you tap. If it sounds like a drum, you have a problem. You might need to look at grout restoration secrets for long lasting results if your existing lines are crumbling, because a vanity wont hide a failing wall forever.
Finding the studs behind the ceramic shield
To find studs behind tile, use a high strength neodymium magnet or a deep scan electronic stud finder capable of penetrating three quarters of an inch of masonry. Measuring from the corner is a good backup, but you must verify the center of the wood before you drill. Standard stud finders are useless here. They get confused by the density of the ceramic and the moisture in the thin-set. I use a magnetic level to find the drywall screws above the tile line and then drop a plumb line. It is old school, but it works. If you miss the stud by even half an inch, the lag bolt will just spin in the air, and your vanity will sag the moment you put a stone top on it. This is why we focus on the framing. If the framing is 2×4, you have about 3.5 inches of depth to work with. If it is 2×6, you have more meat to grab. You should also consider how this vanity placement affects your baseboards makeover ideas to elevate your space since floating units expose the floor and wall intersections.
The chemistry of diamond tipped penetration
Drilling through tile for vanity mounting requires diamond grit hole saws or carbide tipped bits kept cool with water to prevent thermal shock. You must drill a hole slightly larger than the lag bolt diameter through the tile to allow for expansion. If you try to use a standard masonry bit and a hammer drill, you will crack the tile. The vibration is the enemy. You want a slow, steady grind. I keep a wet sponge in one hand and the drill in the other. You have to keep that bit cold. Once you hit the wood stud behind the tile, you switch to a standard wood bit for the pilot hole. This prevents the wood from splitting when the heavy lag bolt enters. It is about the transition from brittle masonry to elastic wood. If you are also working on the bathroom floor, you might need tile cleaning tips for a sparkling bathroom in 2025 to make sure the old floor matches the new vanity brilliance.
| Mounting Method | Weight Capacity | Risk Level | Required Tools |
|---|---|---|---|
| Lag Bolts into Studs | 300+ lbs | Low | Impact Driver, Diamond Bits |
| Toggle Bolts | 50 lbs | High | Drill, Zinc Toggles |
| Structural Blocking | 500+ lbs | Zero | Drywall Saw, 2×6 Lumber |
The cantilevered force and static loads
A floating vanity creates a rotational force where the top of the cabinet pulls away from the wall and the bottom pushes into the tile. Distributing this weight across multiple studs is the only way to ensure the long term stability of the porcelain surface. This is simple physics. A thirty inch vanity with a quartz top and a sink full of water can weigh over 150 pounds. That weight is hanging out in space. If the bottom of the vanity pushes into a tile that was installed with a large gap behind it, the tile will cave in. You need to ensure the vanity back is flat and the tile surface is plumb. I often use thin shims of plastic, never wood, to level the vanity before I torque the bolts. Plastic does not rot when the kid overflows the sink. Speaking of water, if your bathroom feels dated, checking out showers with a style trendy ideas for small bathrooms can help you coordinate the vanity with the rest of the wet area.
“Deflection in the substrate must not exceed L/360 under concentrated loads to prevent ceramic fracture.” – TCNA Handbook Standards
The information gain on underlayment cushion
While most people want the thickest underlayment, too much cushion actually causes the locking mechanisms on LVP to snap under pressure. The same logic applies to tile. If your tile was installed over a thick, squishy waterproof membrane that was not properly compressed, the weight of a floating vanity will cause the tile to shift downward. You want a rigid bond. If I see a floor or wall with too much flex, I refuse to hang the vanity until the subfloor is stiffened. It is better to have a hard conversation now than a lawsuit later when the vanity falls on someone’s toes. If you are looking for more sustainable options during a full remodel, consider eco friendly tile solutions for sustainable homes in 2025 which often feature higher density and better load ratings.
The perimeter expansion gap mystery
Leave a 1/8 inch gap between the vanity sides and any adjacent walls to allow for the natural expansion and contraction of the bathroom framing. Fill this gap with 100 percent silicone sealant rather than hard grout. Wood moves. Tile does not. If you wedge a vanity tight between two tiled walls, something has to give when the humidity hits 90 percent in August. Usually, the grout cracks or the vanity cabinet doors start to bind. I always use a high quality silicone that matches the grout color. It stays flexible. It handles the movement. If you need to fix up the existing area, knowing how to refresh grout without replacing it is a life saver for the perimeter edges.
- Verify stud locations using deep scan technology
- Mark the height of the vanity based on the finish floor thickness
- Drill pilot holes through tile using water cooled diamond bits
- Install 3/8 inch lag bolts with washers into the center of the studs
- Seal the vanity to the tile using neutral cure silicone
- Check for level in both directions before final torque
Finishing the transition to the floor
The gap beneath a floating vanity exposes the tile floor and the baseboard termination points which must be finished with precision to maintain the aesthetic of the floating design. Use end caps or mitered returns on baseboards for a professional look. You cannot just leave the baseboard chopped off. It looks like a hack job. I miter the baseboard back into the wall. It creates a clean line. This is the part of the job where the details matter most. If you are struggling with the layout, chic baseboard designs that transform rooms in 2025 provides plenty of inspiration for these tricky transitions. A floating vanity is a statement. If the floor under it is filthy or the grout is stained, the whole look is ruined. Use tile cleaning tips for a sparkling bathroom in 2025 to prep the area before the vanity goes up. Once it is hanging, you will never have full access to that floor again without a lot of reaching. Make it perfect before you bolt it down. The modern look of showers that wow modern designs for 2025 often pairs perfectly with this floating aesthetic, creating a bathroom that feels larger and more open. Always remember that the vanity is a functional tool. It must be rock solid. If it wiggles when you lean on it, it is not finished. Take the time to do the structural work, and the beauty will follow naturally.