
Most homeowners treat grout as a permanent fixture that never changes, but as a guy who has spent twenty-five years scraping moldy cement out of shower stalls, I can tell you that grout is a living, breathing, and failing material. It is a porous network of sand and portland cement that wants to drink every drop of dirty water it touches. Most guys skip the leveling compound. They think the underlayment will hide the dip. It won’t. I spent three days grinding concrete on a job last month just so the floor wouldn’t click like a castanet, and that same level of negligence usually applies to grout sealing. People slap a coat of cheap sealer on and assume they are protected for life. They are wrong. If you do not know the exact state of your sealer, you are basically inviting moisture to rot your subfloor from the top down. This is not about aesthetics. This is about structural engineering and chemical barriers. You need to know if your barrier is intact before the mold starts winning. Here is how you do it without the guesswork.
The water drop test for porous surfaces
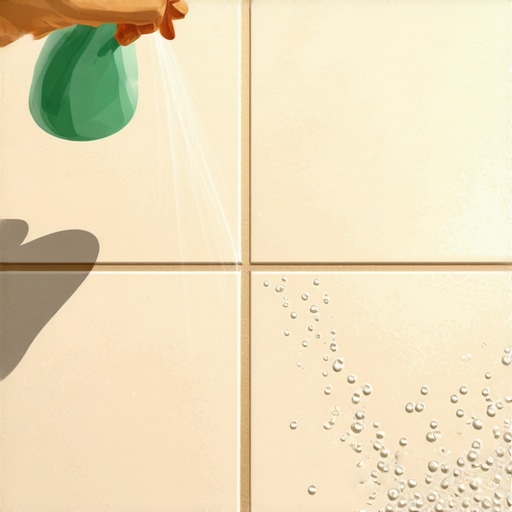
To test if your grout sealer is still working, you must place several drops of water on the grout lines in high-traffic or high-moisture areas. If the water beads up into tight spheres, the sealer is active. If the water disappears into the grout within thirty seconds, the seal has failed. This test relies on the physics of surface tension. When a sealer is healthy, it creates a low-surface-energy environment that forces liquid to maintain its own cohesion. When the sealer is gone, the capillary action of the porous grout pulls the liquid deep into the cement matrix. This is the simplest diagnostic tool in the industry. I usually carry a small dropper in my toolkit just for this. I do not just look at one spot. I test the areas near the drain, the corners where the floor meets the chic baseboard designs, and the high-traffic path from the door to the vanity. If one area fails, the whole floor is at risk. You are looking for a contact angle of at least 90 degrees. If the water flatlines, you are in trouble. The grout will begin to darken as it absorbs the moisture. That darkening is the visual signal of a structural vulnerability. If you see it, you need to act immediately before the moisture reaches the thin-set. Once the bond between the tile and the substrate is compromised by moisture, no amount of sealer will save you. You will be looking at a full tear-out.
“A floor is only as good as the subfloor beneath it; deflection is the enemy of every joint.” – Master Flooring Axiom
The microscopic anatomy of cementitious grout
Grout is a cement-based product that contains thousands of microscopic voids and channels created during the evaporation of water during the curing process. Without a sealer, these voids act as straws that suck in moisture, oils, and bacteria through capillary action. Think of grout like a hard sponge. When you mix portland cement and sand with water, a chemical reaction called hydration occurs. As the water leaves the mixture, it leaves behind a network of interconnected pores. These pores are where the trouble starts. In a humid environment like Florida or the Pacific Northwest, those pores are never empty. They are filled with water vapor or liquid runoff from your morning shower. If you have showers with a style that involves intricate tile patterns, you have miles of these microscopic straws. A penetrating sealer is designed to fill these voids with fluoropolymers or silanes that repel liquids while still allowing the floor to breathe. It is a delicate chemical balance. If you use a topical sealer, you are just putting a plastic skin on top. Topical sealers wear off under your feet. Penetrating sealers live inside the grout. That is why the water drop test is so important. It tells you if the chemical barrier inside the pores is still active or if it has been washed away by harsh cleaners. Most people use bleach, which is a sealer killer. It eats the fluoropolymers for breakfast.
Signs of chemical sealer degradation
Sealer degradation is often invisible to the naked eye until the grout begins to show signs of staining, permanent darkening, or localized cracking. Chemical breakdown occurs when the molecular bonds of the sealer are shattered by acidic cleaners or mechanical friction. I have seen people scrub their floors with vinegar thinking they are being green. In reality, they are dissolving the very barrier that keeps their floor healthy. When the sealer fails, the grout becomes a magnet for grease. In a kitchen, this means the grout lines turn black. In a bathroom, they turn orange or pink from Serratia marcescens bacteria. By the time you see the color change, the sealer has been dead for months. You can also look for “ghosting” after a shower. If the grout lines stay dark long after the tiles have dried, it means the grout is holding onto internal moisture. That moisture is a ticking time bomb for your subfloor. If you are noticing these signs, you might want to look into how to refresh grout without replacing it to save the installation. I tell my clients that a $30 bottle of sealer is the cheapest insurance policy they will ever buy. The alternative is a $10,000 bathroom remodel. It is a simple math problem that most people get wrong. Check the chart below for the technical differences between your sealer options.
| Sealer Type | Longevity | Chemical Base | Primary Benefit |
|---|---|---|---|
| Penetrating | 5-10 Years | Silane/Siloxane | Vapor permeable protection |
| Topical | 1-2 Years | Acrylic/Urethane | High gloss and surface shield |
| Epoxy Grout | 20+ Years | Epoxy Resin | Fully waterproof and chemical resistant |
The perimeter failure and baseboard rot
The most dangerous point of failure for grout is the perimeter where the tile meets the walls or baseboards. If the sealer fails here, water can migrate behind the baseboards and into the wall studs. This is where I see the most rot. People focus on the middle of the floor, but the edges are the structural weak points. When water gets into the edge of the grout, it travels sideways. It finds the gap between the tile and the drywall. Then it feeds the mold. If you have baseboards makeover ideas in mind, you better make sure the floor beneath them is dry. I always recommend using a high-quality 100% silicone caulk at the floor-to-wall transition instead of grout. Grout cracks at the corners because houses move. Silicone doesn’t. If you have grout in your corners, you need to check it twice as often. A failed seal in a corner can lead to a rotted sill plate in under a year. I have seen it happen in brand new builds. The builder skips the sealer to save a buck, the homeowner doesn’t know any better, and three years later the floor is bouncy. It is a tragedy of physics. You have to be smarter than the water.
Checklist for a complete grout health audit
- Perform the 30-second water drop test on ten different spots.
- Inspect for any hairline cracks or pinholes in the grout lines.
- Check the color consistency of the grout when wet versus dry.
- Verify that the caulk in the corners is not peeling or moldy.
- Look for white powdery residue which indicates efflorescence.
- Review the last time a pH-neutral cleaner was used on the surface.
Restoration and cleaning protocols
If your sealer fails the test, you cannot just pour more sealer on top of dirty grout. You must deep clean the lines to remove all contaminants before reapplying a chemical barrier. If you seal over dirt, you are just laminating the grime into your floor forever. You need to use a professional-grade alkaline cleaner to strip out the old oils. Use a stiff brush, but not a metal one. Metal brushes will chew up the grout and leave it looking like a gravel road. Once it is clean and bone dry, then you apply the sealer. And I mean bone dry. If there is moisture in the pores, the sealer can’t get in. I usually tell people to wait 24 hours after cleaning before sealing. If you are dealing with years of neglect, check out grout restoration secrets for long-lasting results. It is not just about the sealer; it is about the preparation. I once saw a guy try to seal a floor that was still damp. The sealer turned white and flaked off like dandruff. It was a mess. Don’t be that guy. Take the time to do the chemistry right. If you want a floor that lasts, you have to respect the science of the materials. Keep your tile cleaning tips updated to avoid using acids. If you treat the grout right, it will protect your home. If you ignore it, the water will eventually find a way to the joists. And water never loses. That is the one thing I have learned in twenty-five years on the job. Respect the moisture, or it will destroy your house.
“Cementitious grout is naturally porous and will absorb liquids, leading to staining and structural degradation if not properly sealed.” – Tile Council of North America