
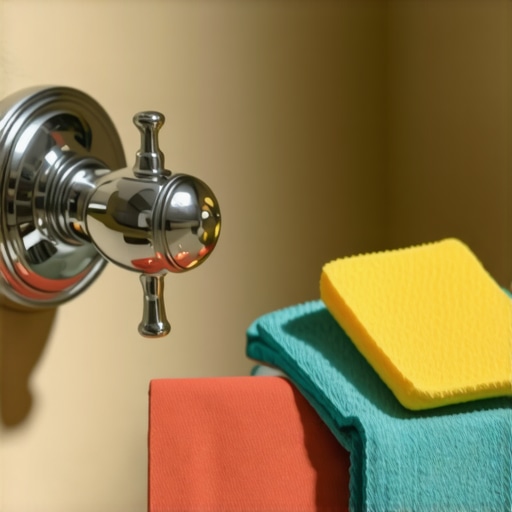
The micron that ruins everything
To repair scratched chrome shower fixtures you must understand that the chromium layer is a microscopic shield usually only a few microns thick. Restoring this finish involves a process of progressive abrasion followed by chemical polishing to level the surrounding surface without burning through to the nickel substrate underneath. Most guys skip the leveling compound on a floor and think the underlayment will hide the dip. It won’t. I spent three days grinding concrete on a job last month just so the floor wouldn’t click like a castanet. It is the same with chrome. If you think a simple wipe will hide a deep gouge, you are dreaming. When I walk into a bathroom with showers that wow, I look at the details. A scratch on a handle is a red flag for poor maintenance. You have to treat the metal like you treat a high-end hardwood finish. You don’t just sand it. You manage the grit. Chrome is electroplated. This means a base metal like brass or zinc is dunked in a series of chemical baths. First copper, then nickel, then a final flash of chromium. That silver shine is actually blue-white and extremely hard. On the Mohs scale, chrome sits at about an 8.5, which is harder than most steels. But it is brittle. When a wrench slips or a ring rubs against it, the metal doesn’t just bend, it shears. This leaves a canyon in the surface. To fix it, you are essentially performing micro-surgery. I smell like WD-40 and oak dust most days, but when I deal with bathroom hardware, I have to be as precise as a jeweler. If you go too deep, you hit the nickel. Nickel is yellow. Once you see yellow, the fixture is toast. There is no coming back from that without a full re-plating, which costs more than a new valve. I always tell my clients that a floor is only as good as the prep work. The same applies here. You have to clean the surface to a molecular level before you even think about polishing.
“A floor is only as good as the subfloor beneath it; deflection is the enemy of every joint.” – Master Flooring Axiom
The physics of metal abrasion
Restoring chrome requires a calculated removal of material from the surrounding high points to match the depth of the scratch valley. This requires ultra-fine abrasives starting at 2000 grit and moving toward 5000 grit before applying a final buffing compound with a high concentration of cerium oxide. You have to be careful with the heat. Friction creates heat, and heat can cause the plating to delaminate from the brass core. This is why I prefer wet sanding. Use distilled water. Tap water has minerals. Those minerals are like rocks when you are working at this scale. If you are in a place like Phoenix, the dry heat will evaporate your lubricant too fast. In the swampy humidity of Houston, you have to watch for flash oxidation if you expose any base metal. When I am installing tile, I make sure the plumber hasn’t already ruined the finish. I have seen guys use pipe wrenches on chrome nuts. It is enough to make a grown man cry. You use a strap wrench or you wrap the nut in a heavy rag. If the damage is already done, you have to assess the depth. Use a magnifying glass. If the scratch is deep enough to catch a fingernail, you are in for a long day. If it is just a swirl mark from a green scrubby pad, you can usually buff it out in twenty minutes. It is about the chemistry of the polish. Some polishes are mechanical, meaning they have little rocks in them. Others are chemical, meaning they dissolve the oxidized layer. You want a mix of both for the best results. While you are down there, check the grout restoration secrets to ensure the whole shower looks as good as the metal.
| Compound Type | Micron Level | Ideal Application |
|---|---|---|
| Heavy Rubbing Paste | 40-60 | Deep surface abrasions and oxidation |
| Fine Polishing Liquid | 10-20 | Swirl mark removal and light scratches |
| Ultra-Fine Cerium | 1-5 | Final mirror finish restoration |
The ghost in the chrome plating
The visual appearance of a scratch is often exacerbated by the accumulation of calcium carbonate and soap scum within the groove which reflects light at odd angles. Removing these deposits with a mild acid like acetic acid is the first step in determining the true extent of the damage. Sometimes what looks like a scratch is just a trail of hard water minerals. I see this all the time on baseboards makeover ideas where the trim meets the floor. People mistake dirt for damage. For chrome, take a 50/50 mix of vinegar and water. Soak a rag. Wrap it around the fixture. Let it sit. This is like acclimating hardwood. You can’t rush it. After an hour, wipe it clean. If the scratch is still there, it is a mechanical failure. Now you need the big guns. I use a rotary tool on a very low setting. High speeds will burn the metal. I use a felt pad and a tiny amount of jewelers rouge. Work in a circular motion. Do not stay in one spot. The moment the metal feels hot to the touch, stop. You have to let it cool. This is about patience. Most homeowners want it done in five minutes. That is how you end up with a bald spot on your faucet. If you are working near refresh grout areas, mask them off. Polishing compounds will stain your grout lines and then you have a bigger mess on your hands than a simple scratch.
- Assess scratch depth with a 10x jeweler loupe.
- Clean the fixture with a non-ionic detergent to remove oils.
- Mask off surrounding tile and baseboards with automotive tape.
- Select the appropriate grit based on the micron depth of the damage.
- Apply polishing paste in a cross-hatch pattern to ensure levelness.
- Buff with a clean microfiber cloth until the haze disappears.
- Apply a carnauba-based wax to seal the microscopic pores in the metal.
Why your fixture is lying to you
Reflections on curved chrome surfaces create an optical illusion that makes scratches appear deeper than they are due to the way light refracts off the nickel layer below. Consistency in lighting is essential for a professional repair to ensure the metal looks uniform from all angles. I have seen guys think they fixed a scratch in the shop only to get it under the bathroom LEDs and see a massive haze. It is like a subfloor that looks flat until you put a long-plank vinyl down. Then every hump shows. You need a raking light. Put a flashlight at a low angle against the chrome. This will highlight every imperfection. If you see a shadow, you still have a valley. You have to keep working. But remember the limit. Chrome is thinner than a piece of paper. You are walking on a tightrope. This is why I often recommend a protective coating after the repair. A high-quality ceramic coating, the kind they use on cars, can fill in the microscopic pores and give you a little more sacrificial layer for the next time someone gets careless with a cleaning brush. It also makes the water bead off, which prevents the mineral buildup that started the problem in the first place. When you are done, look at the transition to the chic baseboard designs in the room. A perfect fixture deserves a perfect room. Don’t let a scratched handle ruin the structural integrity of your design.
“Metals in the wet zone require more than a topical shine; they require a molecular bond to resist oxidation.” – Master Flooring Axiom
The 1/8 inch that ruins everything
Precision in fixture repair is measured in fractions of a millimeter because the tolerances of modern valve handles and escutcheon plates allow for almost no deviation in surface thickness. An unevenly polished surface can lead to leaks or poor fitment of the decorative trim pieces. If you sand too much off one side of a handle, the light hits it wrong and it looks warped. It is like a floor with a 1/8 inch dip over ten feet. It doesn’t sound like much until you try to lay a large format tile. Then your corners are lipping and the customer is screaming. In the bathroom, everything is magnified by the tile. If you are working on a shower with showers with a style that uses dark tile, the chrome will pop. Any mistake will be visible from the hallway. This is why you must use a backing block when sanding. Never use just your fingers. Your fingers are soft and will create an uneven surface. A hard rubber block ensures the sandpaper stays flat. This levels the peaks and fills the valleys. It is basic engineering. You are creating a new flat plane on a microscopic level. Once that plane is established, the light will reflect in a straight line and the scratch will vanish. It is not magic. It is physics. And it is the only way to do the job right. If you can’t do it right, don’t do it at all. That is my motto on the job site and it should be yours too. When you finish, check the eco-friendly tile solutions to see if your cleaning products are safe for the environment. Most heavy polishes are not, so use them sparingly and dispose of the rags properly. A clean shop is a safe shop and a clean fixture is the mark of a master.