
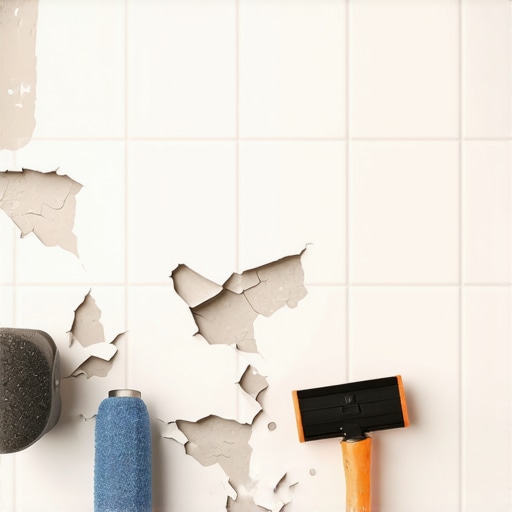
I spent three days grinding concrete on a job last month just so the floor wouldn’t click like a castanet. Most guys skip the leveling compound. They think the underlayment will hide the dip. It won’t. I recently walked into a bathroom where the shower floor was literally coming apart in translucent flakes. It looked like a snake shedding its skin. The homeowner had paid for one of those quick fix spray coatings. Those coatings are a band-aid on a bullet wound. You cannot ignore the physics of moisture. If the bond between the substrate and the topical layer is weak, the humidity will win every time. I smell oak dust and WD-40 on my clothes after a long day because I do the hard work of preparation. A floor is a structural assembly, not a sticker you slap on a wall. When a shower floor peels, it is a sign of a fundamental failure in the chemical bond or a total lack of moisture management.
The chemistry of a failing bond
A peeling shower floor occurs when the mechanical or chemical bond between the substrate and the topical coating fails due to moisture vapor pressure, improper etching, or thermal shock. Resurfacing requires removing the failed layer, grinding the tile to a specific profile, and applying a high-solids epoxy or specialized grout. The problem usually starts with the lack of surface profile. If you try to paint or coat a glazed tile without creating a mechanical key, the material has nothing to grab onto. It sits on top like oil on water. Eventually, the hot water from your morning shower causes the tile and the coating to expand at different rates. This is the coefficient of thermal expansion in action. The coating cannot keep up with the tile, it cracks, water gets underneath, and the peeling begins. You need to understand the molecular reality of the surface before you even think about a new finish.
Why your subfloor is lying to you
Subfloor deflection and moisture vapor transmission are the primary reasons why topical shower repairs fail within the first six months. Even if the surface looks flat, the minute movement of the joists under a heavy load can snap the bond of a rigid epoxy. I have seen guys try to level a shower with standard thin-set. That is a recipe for disaster. You need products rated for constant submersion. If the subfloor is plywood, you better have a cement board or a liquid membrane that can handle the movement. If it is concrete, you are dealing with moisture vapor drive. Water moves from the soil through the slab and pushes against the underside of your tile. If your resurfacing material is not breathable or lacks the tensile strength to resist that pressure, it will bubble and peel. This is why I spend more time with a moisture meter than a paint brush.
“A floor is only as good as the subfloor beneath it; deflection is the enemy of every joint.” – Master Flooring Axiom
The 1/8 inch that ruins everything
Precision in floor leveling is the difference between a shower that lasts twenty years and one that fails in twenty days. A dip of just one eighth of an inch can cause water to pool, leading to hydrostatic pressure that forces its way under the edges of your grout. This water eventually saturates the thin-set and weakens the bond of your tiles. When people talk about resurfacing, they often forget about the grout lines. If your grout is crumbling, the coating on top will fail too. You should look into grout restoration secrets for long lasting results to ensure your foundation is solid. I have seen $10,000 tile jobs ruined because the installer did not use a level on the mud bed. They thought the tile would hide the slope. It only highlighted the failure.
The ghost in the expansion gap
Expansion gaps at the perimeter of a shower floor are not optional; they are the only way to prevent tile tenting and coating delamination. Every material in your bathroom moves. The wood framing, the concrete slab, and the porcelain tile all react to temperature and humidity changes. If you grout the floor tight against the wall, the floor has nowhere to go when it expands. It will push against the wall, bow in the middle, and pop the bond of your resurfacing kit. I always use a high-quality 100 percent silicone caulk at the change of plane. It is flexible. It breathes. It does not peel like a cheap acrylic spray. If you want a modern look, you can find showers that wow modern designs for 2025 that incorporate these technical requirements into the aesthetic.
The technical reality of resurfacing
Resurfacing a shower floor involves a multi-stage process of chemical cleaning, mechanical abrasion, and the application of industrial grade resins. You cannot just clean it with some soap and start painting. You need to use an acid etch or a diamond grinding pad to open the pores of the tile. I prefer the mechanical approach because it is more predictable. Once the surface is prepped, you apply a primer designed for non-porous surfaces. Then comes the high-solids epoxy. This is not the stuff you buy at a big box store. This is professional grade material with a high mil-thickness. You are building a new wear layer, not just a color coat. If you are working with a small space, you might check showers with a style trendy ideas for small bathrooms to see how to maximize the visual impact of your new surface.
| Material Type | Bond Strength (PSI) | Moisture Resistance | Typical Lifespan |
|---|---|---|---|
| Standard Acrylic | 150 – 250 | Moderate | 1 – 3 Years |
| Industrial Epoxy | 400 – 600 | High | 5 – 10 Years |
| Polyurethane | 300 – 500 | Excellent | 7 – 12 Years |
| Cementitious Overlay | 200 – 400 | Very High | 10+ Years |
The science of the bond
Success in shower resurfacing depends on the surface energy of the substrate and the wetting ability of the adhesive or coating. If the tile is too smooth, the liquid coating will bead up like rain on a waxed car. You have to lower the surface tension. I use a 40-grit sandpaper for the initial pass. It is brutal on the hands, but it creates the mountain-and-valley profile needed for the epoxy to grab. After the grind, the dust removal is the most overlooked step. Even a microscopic layer of dust will act as a bond breaker. I use a vacuum with a HEPA filter and then a solvent wipe. If you are trying to avoid a full replacement, learning how to refresh grout without replacing it is a good intermediate step before committing to a full resurface.
Baseboards and the wet room transition
The transition between the shower floor and the bathroom floor is where most water damage starts, often affecting the baseboards first. If your shower is peeling, there is a high chance water is wicking into the drywall behind your baseboards. I always recommend checking the integrity of the trim during a resurface. Using moisture-resistant materials for your trim can prevent rot. You can find inspiration for this in chic baseboard designs that transform rooms in 2025 or look for baseboards makeover ideas to elevate your space to match your newly finished floor. A clean transition makes the whole room look professional.
“Moisture movement is the primary cause of bond failure in submerged or high-humidity environments.” – Master Flooring Axiom
- Remove all old silicone and failing coatings with a sharp scraper.
- Clean the entire surface with a heavy duty degreaser to remove body oils.
- Mechanically abrade the tile with a diamond pad or 40-grit sandpaper.
- Wipe the surface with isopropyl alcohol to ensure zero residue remains.
- Apply a bonding agent specifically rated for vitrified surfaces.
- Lay the new coating in thin, even layers to avoid air entrapment.
Maintenance for a long life
The longevity of a resurfaced shower floor depends entirely on the cleaning products you use and the frequency of moisture removal. Harsh chemicals will eat through an epoxy coating in months. I tell my clients to use pH-neutral cleaners. If you want to keep the rest of your bathroom in peak condition, follow these tile cleaning tips for a sparkling bathroom in 2025. Also, consider the environment. If you care about the planet, there are eco-friendly tile solutions for sustainable homes in 2025 that use recycled glass or low-VOC resins. I have been in this game for 25 years. I have seen every shortcut in the book. The only way to get a floor that stays is to respect the chemistry and do the prep. If you have questions about your specific situation, you can always contact us for expert advice. Do not let a peeling floor ruin your home. Fix the subfloor, fix the prep, and the floor will take care of itself.