
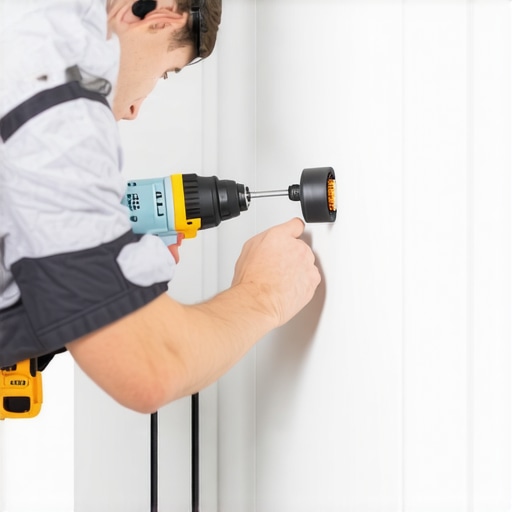
The subfloor secret and the hard truth of porcelain
Cutting holes for a shower mixer in porcelain requires specialized diamond-tipped tools and a steady hand to prevent the dense material from fracturing under thermal stress. Most guys skip the leveling compound and think the underlayment will hide the dip, but it won’t. I spent three days grinding concrete on a job last month just so the floor wouldn’t click like a castanet. That same level of obsessive prep applies to tile installation in showers. If your subfloor or wall substrate has even a fraction of an inch of deflection, your porcelain will crack the moment you apply the pressure of a drill bit. Porcelain is essentially a glass-like ceramic fired at extreme temperatures, making it incredibly hard but equally brittle. When you are prepping for a mixer valve, you are not just making a hole, you are performing surgery on a surface that has a Mohs hardness rating of seven or eight. This means it is harder than structural steel. If you approach this with a standard masonry bit, you will burn out the tip in five seconds and likely send a hairline fracture across a fifty dollar tile. I have seen it happen a thousand times where a DIY enthusiast tries to force a bit through the surface. The heat builds up, the tension in the fired clay reaches a breaking point, and then you hear that sickening pop. That sound is the sound of your weekend budget going down the drain. You have to respect the material. You have to understand that porcelain does not want to be cut. It wants to remain a solid, impermeable slab. To win this fight, you need to use physics to your advantage. This means managing the revolutions per minute of your drill, the temperature of the contact point, and the grit of your diamond abrasive.
The tools that make the difference
Diamond hole saws and wet-cutting setups are the primary instruments for creating clean, circular openings in porcelain for showers. You cannot use a standard carbide bit for this task. You need a core drill bit that is encrusted with industrial-grade diamond dust. These bits work by grinding away the material rather than cutting it. It is an abrasive process. I prefer a bit that has a vacuum-brazed diamond edge because it handles the heat better than the cheaper electroplated versions. When you are looking at the specs for tile tools, you want to see a high density of diamond particles. If the bit looks smooth, it is junk. It should feel like a rough piece of sandpaper on the edge. I also keep a spray bottle of water handy at all times. Water is the lifeblood of a successful porcelain cut. It acts as a lubricant and a coolant. Without it, the friction between the diamond and the porcelain will reach hundreds of degrees in seconds. This heat expands the material locally while the rest of the tile remains cool, leading to a thermal shock crack. I have a specialized guide template that suctions to the tile surface. This prevents the bit from skating across the polished finish. If you have ever seen a tile with a long, jagged scratch snaking away from the mixer hole, it is because the installer didn’t use a guide or a pilot hole. You have to be precise. There is no room for error when the trim kit for the shower mixer is only an inch wider than the hole itself.
“A floor is only as good as the subfloor beneath it; deflection is the enemy of every joint.” – Master Flooring Axiom
Measuring for the mixer valve assembly
Accurate layout and marking are the foundations of a professional finish when installing showers with complex plumbing fixtures. You need to measure from your nearest fixed point, which is usually the edge of the previous tile or the corner of the wall. I use a wax pencil or a fine-tip permanent marker on a piece of painter’s tape. Never mark directly on a textured or porous tile surface as the ink can bleed into the microscopic pores. Once you have your center point, you need to verify the diameter of the mixer valve body. You want the hole to be large enough for the valve to fit through with a bit of wiggle room, but small enough that the decorative escutcheon plate covers the gap completely. This is a balancing act. If the hole is too tight, any house settling will put pressure on the valve and crack the tile. If it is too big, you will be looking at a gap that grout cannot safely bridge. I always aim for a quarter-inch of clearance around the valve. This allows for the expansion and contraction that happens when the hot water starts flowing. People forget that materials move. A shower goes from sixty degrees to a hundred degrees in a matter of minutes. That thermal expansion is real. If you want to see some inspiration for how these finished spaces should look, you can check out showers that wow for layout ideas. The goal is to make the plumbing look like it grew out of the wall, not like it was forced through it.
The physics of the oscillating drill
Variable speed control is the most important feature of your power drill when working with dense porcelain tile. You do not want to go at full throttle. High speed creates high heat. I usually run my drill at about half speed, around 600 to 800 RPM. This allows the diamonds to bite into the surface without glazing over. Glazing is what happens when the metal matrix holding the diamonds melts and covers the abrasive. Once a bit is glazed, it is useless. You also need to use an oscillating motion. Instead of pushing straight in, you tilt the drill slightly and move it in a circular pattern. This reduces the surface area of the bit in contact with the tile, which helps dissipate heat and allows the water to reach the cutting edge more effectively. It also helps clear out the porcelain dust. That dust is essentially ground glass. If it stays in the cut, it acts as an insulator and speeds up the overheating process. You have to keep the slurry moving. I often have an assistant hold a shop vac near the cut while I spray water. It is a messy job, but it is the only way to get a factory-quality edge. If you are worried about the mess or the longevity of your installation, learning about grout restoration secrets can help you understand how to maintain the area once the cutting is done.
| Tool Type | Ideal RPM | Cooling Method | Best Use Case |
|---|---|---|---|
| Diamond Hole Saw | 600-900 | Constant Water Stream | Main Mixer Valve Holes |
| Carbide Tipped Bit | N/A | None | Do Not Use for Porcelain |
| Angle Grinder with Blade | 11,000 | Dry/Air Cooled | Large Square Cutouts |
| Diamond Core Bit | 1500-2000 | Wax Infused/Dry | Small Anchor Holes |
Maintaining the integrity of the tile surface
Porcelain density dictates that every cut must be planned to avoid compromising the structural strength of the wall. When you cut a large hole for a mixer, you are creating a weak point. If the tile is not fully back-buttered with thin-set, that hole will be a prime candidate for cracking. I always ensure there is 100 percent coverage behind the tile around the plumbing fixtures. Air pockets are the enemy. If there is a void behind the tile, the pressure of the drill or the later installation of the trim kit will cause the tile to collapse into the void. This is why I talk about the chemistry of adhesives. You need a high-polymer modified thin-set that can bond to the non-porous back of the porcelain. If you use a cheap, standard mortar, the tile will eventually delaminate. I also pay close attention to the grout lines. The mixer hole should ideally be centered on a tile or balanced between two tiles to maintain the visual symmetry of the showers. If you end up with a tiny sliver of tile next to a hole, it will almost certainly break during installation. Planning your layout is as important as the cut itself. For those looking for smaller bathroom configurations, showers with a style offers great advice on how to manage these tight tolerances without sacrificing the aesthetic.
- Always wear eye protection to shield against porcelain shards.
- Mark the cut on painter’s tape to prevent the bit from walking.
- Use a wet sponge to constantly feed water into the cutting groove.
- Start the drill at an angle to create a starting notch.
- Never use the hammer function on your drill for porcelain.
- Check the back of the tile for full thin-set coverage.
The relationship between tile and baseboards
Transition zones where the shower tile meets the bathroom floor and the baseboards require careful architectural planning to ensure a watertight seal. I have seen beautiful tile jobs ruined because the installer didn’t know how to handle the baseboard transition. In a bathroom, you should really be using a waterproof baseboard material or a matching tile base. If you use wood baseboards against a shower entrance, they will wick up moisture and rot within two years. I like to see a clean, silicone-sealed joint where the wall tile meets the floor. This joint should never be grouted. Grout is rigid. The junction between a wall and a floor is a change of plane, and houses move. If you put grout in that corner, it will crack and fall out. You need a high-quality 100 percent silicone sealant that matches your grout color. This allows for movement while keeping the water inside the shower pan. When you are looking to finish the rest of the room, exploring chic baseboard designs can provide the right finishing touch that ties the porcelain work into the rest of the home’s architecture. It is about the holistic view of the room. You can’t just focus on the hole in the wall and ignore the trim that frames the space.
The final cleanup and sealing process
Post-installation care is what separates a master installer from a hack who just wants to get paid and leave. Once the holes are cut and the tiles are set, you have to clean the residue immediately. Porcelain dust, once mixed with water and allowed to dry, becomes a cement-like film that is incredibly difficult to remove without scratching the surface. I use a clean microfiber cloth and a dedicated tile cleaner. You should also be thinking about the long-term maintenance of the grout around your new mixer. Even the best installation can look terrible if the grout gets stained or moldy. For those who want their bathroom to stay pristine, I recommend checking out tile cleaning tips. It is also worth noting that while porcelain itself is waterproof, the holes you just cut are not. You must apply a generous bead of silicone around the plumbing pipe before the escutcheon plate goes on. This prevents any water that leaks behind the handle from getting into the wall cavity. I have seen entire subfloors rotted out because someone forgot a five-cent bead of caulk behind a shower handle. It is the small details that preserve the structural integrity of the home. The chemistry of the sealants you use is just as important as the diamonds on your drill bit. Use a mold-resistant silicone to ensure that the area stays clean for years to come. If you find your existing grout is already failing, there are ways to fix it without a full remodel, such as learning how to refresh grout. Taking the time to do it right the first time saves thousands in repairs later. “