
The hidden world beneath the mud bed
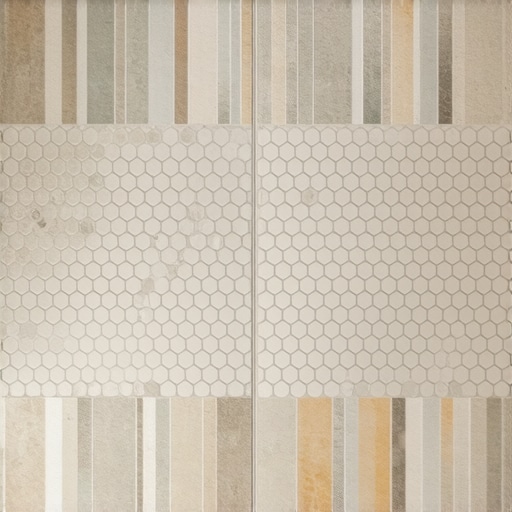
Most guys skip the leveling compound. They think the underlayment will hide the dip. It won’t. I spent three days grinding concrete on a job last month just so the floor wouldn’t click like a castanet. When you are dealing with a shower floor, that level of obsession is not optional. A shower is a wet environment where every fraction of an inch dictates whether water flows toward the drain or sits and rots your joists. Most homeowners look at a 2 inch hexagon and see a pretty pattern. I see thousands of tiny joints that are all potential points of failure if the substrate is not dead flat. The reality of professional flooring is that the tile is just the skin. The skeleton is the subfloor, the muscle is the mortar, and the circulatory system is the waterproofing. If any of those systems fail, the whole body dies. I have seen fifteen thousand dollar master baths get ripped out because an installer thought a little extra thinset would level out a low spot. It never works. Thinset shrinks as it cures. If you use it to fill a half inch hole, your tile will sink and leave you with a puddle in your shower.
The brutal reality of shower floor preparation
Shower floor preparation requires a subfloor that is perfectly sloped to the drain while maintaining a surface flat enough to prevent lippage. Using modified thin-set and a waterproof membrane ensures the hexagon mosaic bond remains permanent. This process prevents water from pooling under the tile and causing mold growth. I smell the dust of ground concrete every time I think about a bad prep job. You cannot rush the cure times. You cannot ignore the pitch. A shower floor must slope a minimum of one quarter inch per foot toward the drain. If you miss that by even an eighth of an inch, you are looking at standing water. Standing water leads to mineral deposits and grout degradation. I always tell my clients that the best way to keep things looking new is through proper engineering. If you are worried about longevity, look into tile cleaning tips for a sparkling bathroom in 2025 to see how much work a bad installation creates.
“A floor is only as good as the subfloor beneath it; deflection is the enemy of every joint.” – Master Flooring Axiom
The physics of the staggered mesh
Hexagon mosaic sheets are notoriously difficult to align because of their interlocking geometry and mesh backing. Achieving a consistent grout joint requires the installer to manually adjust individual tiles within the sheet to avoid visible grid lines. Professional setters often use offset patterns to mask sheet boundaries. This is where the amateurs get exposed. You see it in the light. A bad hex job looks like a series of rectangles. A good one looks like a single continuous field of geometry. The mesh is your enemy. It stretches. It shrinks. It comes from the factory with inconsistencies. I always cut the mesh between tiles if I see a joint that is too tight. You have to be a surgeon with a utility knife. You are fighting the physics of the 120 degree angle. If one sheet is off by a millimeter, by the time you get to the other side of the shower, you are off by an inch. It is cumulative error in action. If you want to see how these designs fit into broader aesthetics, check out showers with a style trendy ideas for small bathrooms.
The chemistry of the bond
Modified thinset mortar contains polymers that increase flexural strength and adhesion to non-porous surfaces like porcelain or glass. For hexagon mosaics, using a small notch trowel like a 3/16 inch V-notch is vital to prevent thinset squeeze-through in the grout joints. If you use a trowel that is too big, the mortar will ooze up between the tiles. Then you are spending four hours picking dried cement out of joints before you can grout. It is a nightmare. I use a premium white thinset for mosaics. It is more expensive, but it stays where you put it and it does not ghost through light colored stones. The chemical bond happens at the molecular level. You need to collapse the ridges of the thinset to get 100 percent coverage. In a shower, 95 percent coverage is the absolute minimum by code, but I aim for 100. Any air pocket under that tile is a place for water to hide. Water is a solvent. Over time, it will find a way to break down the bond.
The 1/8 inch that ruins everything
Drain integration is the most difficult part of a hexagon installation because the tile pattern must be cut to fit a circular or square drain flange. Precise cuts using a wet saw or diamond blade are required to maintain the aesthetic flow of the mosaic. I see guys just hack a hole around the drain and fill the gap with grout. That is garbage work. You need to trace the drain, cut the hexes, and ensure the tile sits flush with the top of the grate. If the tile is higher than the drain, you stub your toe. If it is lower, water pools. It is a game of millimeters. People ask me why I take so long on the drain. I tell them it is because that is where the water goes. If the water cannot get out, the shower is just a bucket. You want a shower that wows? You have to get the technical details right. Look at showers that wow modern designs for 2025 for inspiration on how high end drains and tiles work together.
Why your subfloor is lying to you
Subfloor deflection refers to the vertical movement of the floor under a load, which can cause grout to crack or tiles to de-bond. Measuring the joist span and plywood thickness is a mandatory step before any tile installation begins in a bathroom. I have walked into jobs where the floor felt solid, but my level told a different story. If you have any bounce in that floor, your hexagon mosaics will pop like popcorn. Mosaics have more grout lines, which means more places for stress to show. I often add a layer of 1/2 inch cement board or a decoupling membrane. It adds height, which means you have to think about your chic baseboard designs that transform rooms in 2025 early in the process. You do not want a thick floor that makes your baseboards look like they are sinking into the ground.
The grout trap and how to avoid it
Epoxy grout is the gold standard for shower floors because it is non-porous, stain-resistant, and provides structural reinforcement to the tile assembly. Unlike cementitious grout, it does not require sealing and will not discolor over time due to moisture exposure. However, it is a beast to work with. You have a limited window of time before it turns into plastic. If you leave a haze on the tile, it is permanent. I have seen guys ruin a five thousand dollar tile job because they did not wash the epoxy off fast enough. But once it is in, it is bulletproof. If you are dealing with old grout that was not done right, you might want to learn how to refresh grout without replacing it before you decide to rip the whole thing out. Proper maintenance is the difference between a floor that lasts ten years and one that lasts fifty.
Material Comparison for Shower Mosaics
| Material Type | Janka Hardness / Durability | Moisture Absorption | Recommended Grout |
|---|---|---|---|
| Porcelain Hex | High (Grade 4-5) | Less than 0.5% | Epoxy or Urethane |
| Carrara Marble | Medium | Porous (requires sealer) | Non-sanded Cement |
| Glass Mosaic | High (but brittle) | 0% | High-Bond Polymer Thinset |
| Slate Hexagon | Medium-Low | Variable | Sanded Cement |
The ghost in the expansion gap
Expansion joints are necessary at the perimeter of the shower floor where the wall tile meets the floor tile to allow for thermal expansion. Filling this gap with 100% silicone sealant instead of hard grout prevents cracking and water infiltration at the corners. This is the most common mistake I see. People grout the corners. Houses move. Wood expands and contracts with the seasons. If that corner is filled with hard grout, it will crack. Once it cracks, water gets behind the tile. Then you get rot. Then you get a phone call to me asking why the ceiling in the kitchen is leaking. I always use a color matched silicone. It looks like grout but acts like a rubber band. For those looking for long term durability, checking out grout restoration secrets for long lasting results can save you a lot of headache.
The arsenal of the master tile setter
You cannot do a professional job with a bucket and a sponge from a big box store. You need a specific kit to handle the complexity of hexagon mosaics. Here is what I keep in my van at all times.
- Digital moisture meter for checking subfloor saturation levels.
- 3/16 inch V-notch trowel for precise mortar application.
- High-speed diamond hole saws for plumbing penetrations.
- Suction cup tile levelers for adjusting individual hex pieces.
- White non-woven nylon scrub pads for epoxy grout cleanup.
- Laser level with a 360 degree horizontal beam.
- Microfiber towels for the final haze removal.
“The TCNA Handbook is the bible of the industry; if you deviate from its methods, you are gambling with the client’s home.” – Master Flooring Axiom
The contrarian truth about small tiles
While most people think that smaller tiles are better for shower floors because the grout lines provide slip resistance, the truth is that more grout lines mean more maintenance. A hexagon mosaic has roughly 300 percent more grout than a standard 12 inch tile. If you are not prepared to use high quality epoxy or urethane grout, you are building a mold farm. The slip resistance is a benefit, but it comes at the cost of chemical vulnerability. Every grout line is a valley where soap scum and skin cells collect. This is why I advocate for eco-friendly tile solutions for sustainable homes in 2025 that focus on non-toxic sealers and dense porcelain that does not require heavy chemicals to clean. You have to think about the life of the floor, not just the day of the photoshoot.
Final checks before the water flows
Before I pack up my tools, I do a flood test. I plug the drain and fill the shower pan with two inches of water. I let it sit for 24 hours. If the water level does not drop, I know my waterproofing is solid. If it drops, I have a leak. It is better to find out now than after the tile is down. I also check the transition to the bathroom floor. I hate bulky T-moldings. I prefer a flush transition where the hex tile meets the main floor at the same height. This requires planning. You have to know the thickness of your main floor before you set the shower pan. If you are updating the rest of the room, consider how baseboards makeover ideas to elevate your space can hide the expansion gaps at the walls. Flooring is a puzzle where every piece affects the next. If you get the hexes right but mess up the transition, the whole job looks amateur. Stick to the standards, watch your slopes, and never trust a subfloor that you haven’t ground down yourself.