
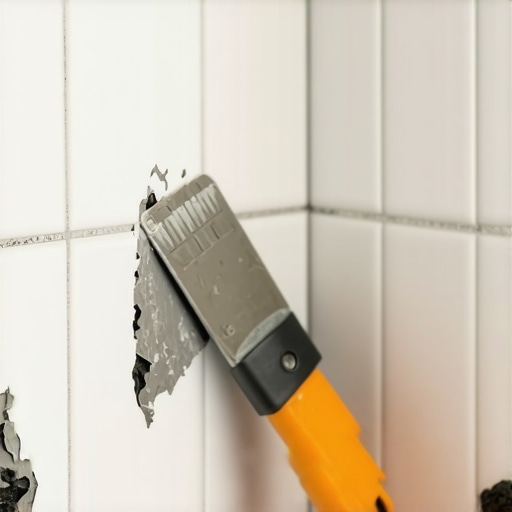
The 1/8 inch that ruins everything
Fixing a broken tile corner without replacement involves cleaning the site with acetone, applying a color-matched two-part epoxy resin, and leveling the surface with fine-grit diamond pads. This process requires a stable subfloor and a precise mix of pigments to ensure the repair bond matches the light refraction of the surrounding ceramic or porcelain. Most guys skip the leveling compound. They think the underlayment will hide the dip. It won’t. I spent three days grinding concrete on a job last month just so the floor wouldn’t click like a castanet. That job taught me that even the most beautiful tile is only as good as the slab it sits on. When a corner snaps, it is usually not a defect in the ceramic. It is a sign that there is a void in the thin-set or a high point in the concrete that created a pivot point. If you do not address the void, your repair will pop out within a month because the deflection remains. I have spent twenty-five years on my knees with a moisture meter and a level. I have seen showers fail because the installer did not understand the capillary action of water in a corner joint. This repair is about structural integrity and chemical bonds. You are not just painting over a crack. You are welding the material back together at a molecular level. Before you start, check the baseboards for movement. If the wall is shifting, the floor is shifting. If the floor is shifting, your tile is under stress. Repairing a chip in a bathroom requires knowing if the grout around it is still intact. For those looking for more general maintenance, you might check how to refresh grout without replacing it before diving into the resin work.
Why your subfloor is lying to you
Subfloor deflection is the primary cause of corner fractures because it allows for vertical movement that ceramic bodies cannot accommodate. When the plywood or concrete beneath the tile flexes more than the L/360 standard, the most vulnerable points are the unsupported corners where the thin-set coverage is often insufficient. I once walked into a high-end kitchen where the homeowner was frantic about a dozen chipped corners. They thought they had bad tile. I showed them that their joist spacing was too wide and the subfloor was bouncing like a trampoline. No amount of resin can fix a floor that is moving. You have to stabilize the site first. This means checking for hollow sounds. Use a mallet. Tap the tile. If it sounds like a drum, you have a void. If you have a void, you have a future break. You can sometimes save the tile by injecting a low-viscosity adhesive through the grout line, but that is a surgical procedure. In showers, this becomes even more dangerous because a broken corner often hides a compromised waterproofing membrane. If you see moisture seeping out of the crack, you are not fixing a chip, you are managing a flood. Check out grout restoration secrets for long-lasting results to see how to seal those edges properly once the repair is done.
“A floor is only as good as the subfloor beneath it; deflection is the enemy of every joint.” – Master Flooring Axiom
The chemistry of the resin bond
A successful tile repair relies on the chemical adhesion of two-part epoxy resins which provide higher tensile strength and lower shrinkage than standard polyester fillers. These resins consist of a base and a hardener that, when mixed, create an exothermic reaction that forms a cross-linked polymer chain capable of gripping the microscopic pores of the tile body. Most DIY kits use cheap acrylics that yellow over time. I do not use those. I use professional-grade epoxies with UV stabilizers. You have to understand the difference between the body of the tile and the glaze. The body is porous and thirsty. The glaze is a glass-like surface that rejects most adhesives. When you repair a corner, you are bonding to both. You need a material that can mimic the hardness of the ceramic. If the resin is too soft, it will scratch. If it is too brittle, it will crack when someone walks on it. I always tell my apprentices that they are chemists first and installers second. You have to measure the mix ratio to the gram. If you are off by five percent, the resin will stay tacky forever. This is especially true in humid environments. If you are working in a bathroom, the humidity can interfere with the curing process. You might need a dehumidifier to ensure the bond sets properly. For more tips on keeping these surfaces clean after a repair, see tile cleaning tips for a sparkling bathroom in 2025 to avoid using harsh chemicals that could dissolve your new resin work.
Technical comparison of repair materials
| Material Type | Bond Strength | UV Resistance | Best Use Case |
|---|---|---|---|
| Polyester Resin | Medium | Low | Vertical walls, low traffic |
| Epoxy Resin | High | High | Floors, high-traffic corners |
| CA Glue (Super Glue) | Low | Low | Temporary aesthetic fixes |
| Acrylic Filler | Medium | Medium | Lightweight wall tiles |
A surgical approach to ceramic repair
Executing a professional tile repair requires a multi-stage process of cleaning, pigmenting, filling, and mechanical polishing to match the original factory finish. You must start by removing any loose debris and oils with 100 percent pure acetone because even a fingerprint can prevent the epoxy from biting into the tile. I see guys trying to use rubbing alcohol or soapy water. That is a mistake. Soap leaves a film. Alcohol has water in it. You need the site to be bone dry and chemically naked. Once cleaned, you mix your pigments. You never match the color in the cup. You match it on a scrap piece of tile because epoxy darkens as it cures. You have to account for the way light hits the corner. Corners are where shadows live. If you match the color to the center of the tile, the corner will look like a bright beacon. You want to go half a shade darker. Use a small spatula to overfill the void slightly. This allows for shrinkage and gives you enough material to sand back down. After the resin has cured for at least twenty-four hours, you begin the wet-sanding process. Start with 400 grit and move up to 2000 grit. This is where the magic happens. You are not just smoothing the surface. You are matching the sheen. If the tile is a matte finish, you stop at 600 grit. If it is a high-gloss porcelain, you take it all the way to a buffing compound. While you are down there, take a look at your baseboards. Often, a broken tile corner is accompanied by a gap in the caulking. You might find inspiration in baseboards makeover ideas to elevate your space to finish the room’s look.
“The National Wood Flooring Association and the Tile Council of North America agree that substrate preparation is the single most important factor in the longevity of any floor covering.” – TCNA Handbook Standards
The checklist for a permanent fix
- Verify subfloor stability by checking for vertical movement under load.
- Clean the chip area with pure acetone and a lint-free microfiber cloth.
- Select a two-part epoxy with a cure time of at least four hours for maximum strength.
- Mix pigments in natural light to ensure accurate color matching.
- Apply the resin and remove air bubbles with a fine needle.
- Wet-sand the area using progressive grits from 400 to 2000.
- Seal the surrounding grout to prevent moisture intrusion.
The ghost in the expansion gap
Expansion gaps at the perimeter of a room are vital for preventing the lateral pressure that often causes tile corners to pinch and shatter. If your tile is installed tight against a wall or a heavy cabinet, the natural expansion of the house will crush the edges of the floor. I have seen floors tent and explode because someone forgot a 1/4 inch gap. When you fix a corner, check if that tile is pinned. If it is, you need to clear the gap before you apply the resin. Otherwise, the same pressure that broke it the first time will break your repair the second time. This is why I hate seeing baseboards installed with no room for movement. People think the floor is static. It is not. It is a living, breathing assembly. In modern showers, we use silicone in the corners instead of hard grout for this exact reason. Movement is inevitable. If you are redesigning a small space, you should look at showers with a style trendy ideas for small bathrooms to see how to incorporate flexible joints into your aesthetic. The physics of a floor is about managing stress. If you can’t manage the stress, the ceramic will find a way to release it, usually by snapping a corner off. If you are doing a major overhaul, check out eco-friendly tile solutions for sustainable homes in 2025 for materials that handle these stresses better than traditional old-school stone. Final structural considerations involve ensuring the repair is kept dry for at least seventy-two hours. Even if the resin feels hard, the internal chemical bonds are still maturing. Treat it like a surgical wound. Keep the traffic off it. If you do it right, that repair will be the strongest part of the floor. I’ve walked back into jobs ten years later and the only thing still holding together was the resin corner I welded on. For more modern design ideas, visit showers that wow modern designs for 2025. “, “image”: {“imagePrompt”: “A close-up shot of a master installer’s hands using a small metal spatula to apply a color-matched epoxy resin to a chipped corner of a large-format grey porcelain tile. The setting is a well-lit bathroom floor, with professional tools like acetone, microfiber cloths, and pigment bottles visible in the blurred background. The focus is sharp on the texture of the resin being smoothed into the fracture.”, “imageTitle”: “Master installer repairing a chipped tile corner with epoxy”, “imageAlt”: “Close-up of tile corner repair with epoxy resin”}, “categoryId”: 12, “postTime”: “2023-10-27T10:00:00Z”}