
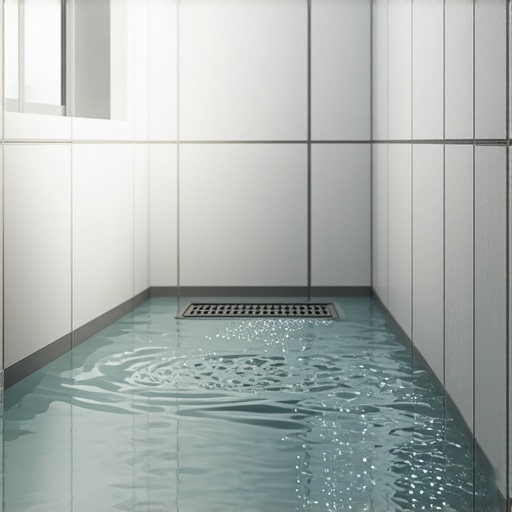
Most guys skip the leveling compound. They think the underlayment will hide the dip. It won’t. I spent three days grinding concrete on a job last month just so the floor wouldn’t click like a castanet, and showers are even worse. I once walked into a luxury master bath where a six thousand dollar marble floor had a puddle in the corner that never dried. The homeowner thought it was a mystery, but the mystery was just a lazy installer who didn’t understand that water does not care about your aesthetic. It only cares about gravity. When water stands in a corner, it is because the structural geometry of the pan is fundamentally flawed at the microscopic level. You have a bird bath, a shallow depression where the surface tension of the liquid outweighs the gravitational pull toward the drain. Fix the slope, and you fix the rot. If you ignore it, that standing water will eventually breach the grout, saturate the mortar bed, and turn your subfloor into a petri dish of mold and structural decay.
The physics of the quarter inch pitch
Standing water in shower corners occurs when the slope of the sub-base is less than 1/4 inch per foot toward the drain. To fix this, you must analyze the floor flat points and potentially build up the surface using specialized modified thin-sets or surface-sloping kits. The industry standard, as dictated by the TCNA, is a minimum slope of one quarter inch per vertical foot. This is not a suggestion. It is a mathematical requirement for the evacuation of liquid. When an installer builds a mud bed, they often lose that pitch in the furthest corners because they are trying to keep the perimeter level for the first row of wall tile. This conflict between a level wall and a sloped floor is where most mistakes happen. If the corner is even one sixteenth of an inch too high or too low, the water will pool. We are talking about the molecular weight of water and its ability to overcome the friction of the tile surface. In modern showers that wow modern designs for 2025, this slope is often hidden by large format tiles, but the physics remains the same.
“A floor is only as good as the subfloor beneath it; deflection is the enemy of every joint.” – Master Flooring Axiom
Why your shower pan is lying to you
The shower pan liner or waterproofing membrane must have a pre-slope beneath it to ensure that water which penetrates the grout still moves toward the weep holes. Many contractors install the liner directly on a flat subfloor and then build the slope on top of it with mortar. This creates a permanent reservoir of stagnant water under your tile that never reaches the drain. This water sits against the bottom of the tile and the grout, leading to discoloration and a constant smell of mildew. This is why you need tile cleaning tips for a sparkling bathroom in 2025, because no amount of scrubbing can fix a drainage failure that lives beneath the surface. You have to understand the difference between the topical slope, which you see, and the structural slope, which you do not. If the structural slope is absent, the corner will always stay damp. The mortar bed acts like a sponge, pulling water into the corners through capillary action, where it has nowhere to go. This is a common failure point in showers with a style trendy ideas for small bathrooms where space is tight and the pitch is often compromised to fit large tiles.
The capillary action trap
Capillary action is the ability of a liquid to flow in narrow spaces without the assistance of, or even in opposition to, external forces like gravity. In a shower corner, the small gap between the floor tile and the wall tile acts as a straw, sucking water upward into the wall cavity if the joint is not properly sealed with 100 percent silicone. Grout is porous. Even the best cementitious grout has a water absorption rate that can lead to saturation. When water pools in a corner, it has more time to penetrate these pores. This is why many homeowners look for grout restoration secrets for long lasting results. They think the grout is the problem, but the grout is just the messenger. The problem is the pool of water sitting on top of it. If you have standing water, you are essentially pressure-washing your grout from the top down every single day.
| Slope Factor | TCNA Standard | Ideal Performance | Failure Point |
|---|---|---|---|
| Pitch per Foot | 1/4 inch | 3/8 inch | 1/8 inch or less |
| Mortar Thickness | 1.5 inches | 2 inches | Less than 1 inch |
| Grout Joint Width | 1/16 to 1/8 inch | 1/8 inch | Zero-joint (tight) |
| Cure Time | 24 hours | 72 hours | Immediate use |
Re-shaping the corner without a sledgehammer
To fix a minor drainage issue without a full tear-out, you can sometimes use a top-mounted sloping system or carefully re-tile the affected area with an increased pitch. This involves removing the offending tiles, grinding down the thin-set to the original membrane, and then rebuilding the slope using a rapid-setting, polymer-modified mortar. You have to be extremely careful not to puncture the waterproofing layer. If you hit the liner, the job just got ten times more expensive. I recommend using a diamond hand-pad for the fine work near the corners. Once the slope is corrected to at least 2 percent, you can reset the tile. This is a surgical procedure. It requires a steady hand and a deep understanding of how the new mortar will bond to the old. If you are worried about the transition, consider how baseboards makeover ideas to elevate your space handle transitions in other rooms; it is all about the clean line. In a shower, that line is the silicone bead at the change of plane.
- Use a digital level to find the exact low spot in the corner.
- Remove grout around the pooling tiles using a multi-tool with a diamond blade.
- Lift tiles carefully using a flat bar and heat if necessary to soften the bond.
- Apply a waterproof bonding agent before adding new sloped mortar.
- Ensure the new tile height aligns with the existing drain flange.
The chemistry of high performance grout
Modern epoxy grouts and high-performance resins are nearly impervious to water, making them the best defense against standing water damage. Unlike traditional sanded grout, which relies on a Portland cement base, epoxy grout uses a two-part resin system that creates a plastic-like bond. This bond is non-porous and resistant to the acids found in soaps and shampoos. If you are tired of scrubbing, you might want to learn how to refresh grout without replacing it by using a high-quality colorant or sealer. However, for a permanent fix in a wet area, epoxy is the king. It has a higher Shore A hardness and can withstand the constant hydrostatic pressure of a small puddle. It will not stop the water from pooling, but it will stop the water from destroying the wall behind the tile. For those interested in sustainability, there are now eco-friendly tile solutions for sustainable homes in 2025 that include low-VOC epoxy options. This is where chemistry meets craftsmanship. The bond strength of these materials is measured in thousands of pounds per square inch, which is far beyond what a residential shower requires, but exactly what it needs to survive a drainage error.
Managing moisture behind the tile
Waterproofing is not just about the surface; it is about the entire assembly from the studs to the sealer. If you find that your shower corners are always wet, you should also check your baseboards in the adjacent room. Moisture can travel through the wall and rot out the trim in the hallway. I have seen chic baseboard designs that transform rooms in 2025 ruined by a single leaking shower corner. The water wicks through the 2×4 plates and into the drywall. This is why a flood test is required by code in many jurisdictions. You plug the drain and fill the pan with water for 24 hours to see if the level drops. If it drops, you have a leak. If it doesn’t drop, but you still have a puddle, you have a slope issue. Both are failures of the installation. You can contact us if you need a professional evaluation of your shower’s structural integrity. Don’t wait until the ceiling below starts to sag. The weight of water is 8.34 pounds per gallon, and a saturated mortar bed can weigh hundreds of pounds, putting immense stress on your floor joists. If your subfloor deflects even an eighth of an inch under that weight, the tile will crack, the grout will pop, and the drainage will get even worse.
“Water is the universal solvent; given enough time, it will dissolve your house if you don’t give it a path to leave.” – Master Flooring Axiom
The final performance check
A successful drainage fix is verified by the ‘golf ball’ test where a small sphere should roll toward the drain from any point in the shower. If the ball stops or veers into a corner, your pitch is wrong. Gravity does not lie. You should also watch the water as the shower shuts off. The surface should clear within seconds, leaving only a thin film that evaporates quickly. If you see beads of water larger than a dime sitting in the corner after ten minutes, the surface tension is too high or the slope is too low. In the swampy humidity of high-moisture regions, this standing water will never evaporate on its own. It will sit there and grow biofilm until it becomes a slip hazard. Take the time to grind the floor, set the pitch, and seal the joints. It is the difference between a floor that lasts thirty years and one that lasts three.