
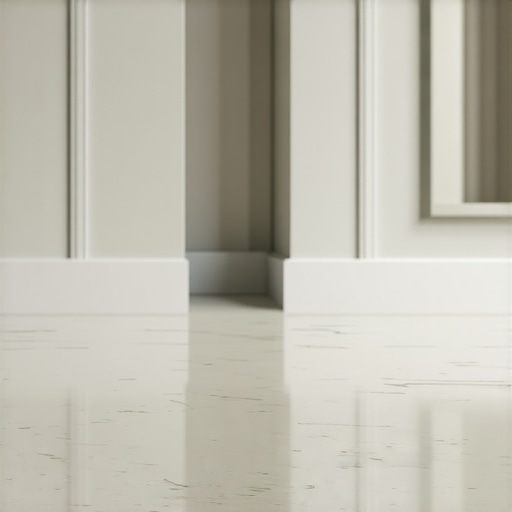
How to Install Slim Baseboards for a Minimalist Bathroom Look
Minimalism in a bathroom is a paradox of labor. To achieve that quiet, understated aesthetic where lines are sharp and surfaces are uninterrupted, you must engage in a level of technical precision that would break a standard builder. Most guys skip the leveling compound. They think the underlayment will hide the dip. It won’t. I spent three days grinding concrete on a job last month just so the floor wouldn’t click like a castanet, and that was before we even touched the slim baseboards. When you are working with a profile that is only a quarter inch thick, there is no room for a wavy wall or a heaving subfloor to hide. You are exposing the structural reality of the room. This guide is not about decorating. It is about the engineering required to make a bathroom look like it was carved from a single block of stone.
The myth of the flat wall
Slim baseboard installation requires a wall surface deviation of less than one eighth of an inch over ten feet to prevent visible gaps. Because minimalist trim lacks the heavy decorative casting of traditional colonial baseboards, it cannot flex to follow the contours of a poorly framed wall. You must use a long straightedge to identify high spots in the drywall and low spots in the floor before the first piece of trim is ever cut. If the wall bows out, the slim profile will stand away from the surface, creating a shadow line that screams of amateurish work. You may need to skim coat the bottom six inches of the drywall with setting-type joint compound to create a perfectly flat plane. This is the difference between a high end architectural finish and a weekend DIY project that looks unfinished.
The physics of moisture in the bathroom environment
Bathrooms are high humidity zones that require baseboards with a zero percent absorption rate to prevent swelling and mold growth behind the trim. In a space where showers generate constant steam and potential splashes, the choice of material is governed by chemistry, not just aesthetics. Solid wood is a liability here. Even if primed on all six sides, wood fiber remains hygroscopic. It will pull moisture from the air, expanding and contracting at a different rate than the tile or the wall. This differential movement is what causes grout lines to crack and caulk beads to fail. For a minimalist look, I recommend high density polymers or anodized aluminum. These materials are inert. They do not react to the 100 percent relative humidity of a post-shower environment. You can find more inspiration on modern aesthetics at showers that wow modern designs for 2025.
“A floor is only as good as the subfloor beneath it; deflection is the enemy of every joint.” – Master Flooring Axiom
The ghost in the expansion gap
A minimalist baseboard must cover the mandatory expansion gap required by the flooring manufacturer while maintaining a thin profile. Most floating floors, including luxury vinyl or engineered wood, require a quarter inch to a half inch gap at the perimeter. This is a structural necessity to prevent the floor from buckling when temperatures change. The challenge with slim baseboards is that they are often only 3/8 of an inch thick. This leaves you almost zero margin for error. If your gap is 1/2 inch but your baseboard is 3/8 inch, you are left with a visible hole. You must plan your flooring layout so that the planks are cut with surgical precision. If you are working with tile, the expansion gap is less aggressive, but you still need to account for movement joints at the perimeter as per TCNA Handbook Method EJ171.
Comparing slim baseboard materials for wet zones
| Material | Moisture Resistance | Flexibility Index | Expansion Rate | Minimalist Rating |
|---|---|---|---|---|
| Anodized Aluminum | 100% | Low | Low | Elite |
| High-Density PVC | 100% | High | Medium | Good |
| Solid White Oak | 20% | Low | High | Poor |
| MDF (Moisture Resistant) | 65% | Medium | Medium | Average |
The structural anatomy of the shadow line
Creating a shadow line or a reveal requires a recessed baseboard track that is integrated into the wall framing before the drywall is finished. This is the pinnacle of minimalist architecture. Instead of the baseboard sitting on top of the drywall, it is flush or recessed. This requires an L-bead or a specialized aluminum profile like a Fry Reglet. You are essentially building a channel at the base of the wall. This is not a simple swap. It requires the removal of the bottom section of drywall and the installation of a sub-base. The reward is a floor that appears to slide under the wall, a look that is often featured in chic baseboard designs that transform rooms in 2025. This look is only possible if your subfloor is perfectly level, as any dip will be magnified by the consistent height of the reveal.
Why your subfloor is lying to you
Subfloors often have subtle undulations that are invisible to the naked eye but become obvious when a straight slim baseboard is applied. If you are installing over a concrete slab, you must check for moisture vapor emission rates. I always use a calcium chloride test or an in-situ RH probe. If the slab is pushing out more than 3 pounds of moisture per 1,000 square feet, your adhesives will fail. In bathrooms, the subfloor must also be rigid. For tile, the deflection must be less than L/360 for ceramic and L/720 for natural stone. If the floor bounces, the slim baseboard will eventually pull away from the wall or the floor. Use a self-leveling underlayment to fill the valleys. Do not trust the house to be square. It never is. You can learn more about refreshing the look of your surfaces at how-to refresh grout without replacing it.
The 1/8 inch that ruins everything
A single sixteenth of an inch gap at a miter joint will ruin the minimalist illusion by drawing the eye to the failure. Traditional trim uses cope joints to hide movement. Slim, square-edge baseboards require perfect miters or butt joints. In a bathroom, where the grout lines provide a grid, the baseboard must align with that grid. If your baseboard is slightly off-parallel with the floor, it will be highlighted by the horizontal line of the first grout joint. I use a laser level to project a line around the entire room. This ensures that the top of the slim baseboard is perfectly level, even if the floor has a slight slope for drainage towards the showers. For more ideas on how to elevate your space, check out baseboards makeover ideas to elevate your space.
“Cementitious grout is porous by nature; the transition to the baseboard must be sealed with a flexible sealant to accommodate structural shift.” – TCNA Guide
The physics of the 45 degree cut
In minimalist installations, a 45 degree miter is often less effective than a 45.5 degree cut which ensures the front edge closes tightly. Wood and even some polymers have a memory. They want to return to their original shape. By slightly over-cutting the angle, you ensure that the visible corner is under tension, holding the seam shut. I also use a cyanoacrylate adhesive (super glue) with an activator for these corners. This bonds the two pieces into a single unit before they are even attached to the wall. This prevents the joint from opening up when the house settles or when the humidity spikes after a long hot shower. This level of detail is how you maintain a clean look in 2025. You may also want to look into grout restoration secrets for long lasting results to keep the entire room looking sharp.
Adhesive chemistry for wet environments
Mechanical fasteners like nails are often insufficient for slim baseboards because the thin material cannot hide the nail head effectively. I prefer a hybrid polymer adhesive. These adhesives combine the strength of a polyurethane with the flexibility of a silicone. They are waterproof and have high initial tack. You apply a continuous bead to the back of the trim, press it into place, and use a few micro-pins only to hold it while the glue sets. This eliminates the need for heavy wood filler, which always shrinks and becomes visible over time. In a bathroom, where tile is the primary floor covering, you are often bonding the baseboard to a waterproof membrane or a tile backer board. The adhesive must be compatible with these substrates. For maintenance tips, see tile cleaning tips for a sparkling bathroom in 2025.
Precision tools for slim baseboard installation
- Laser level with 360 degree green beam for high visibility on tile.
- Digital protractor to measure the actual angle of corners (rarely 90 degrees).
- Micro-pin nailer (23 gauge) to minimize surface damage.
- Hybrid polymer construction adhesive for waterproof bonding.
- Diamond grit sanding blocks for smoothing the edges of cut tile or metal trim.
- High-quality silicone sealant color-matched to the baseboard or floor.
Avoiding the shadow line trap
The shadow line between the baseboard and the floor can be eliminated by using a color-matched flexible sealant rather than a standard caulk. Standard acrylic caulk shrinks by up to 25 percent as it dries. This creates a concave bead that traps dust and hair. In a minimalist bathroom, you want a flush transition. Use a 100 percent silicone or a color-matched sanded caulk that matches your grout. This creates a visual bridge between the vertical and horizontal planes. If you are interested in sustainability, consider eco friendly tile solutions for sustainable homes in 2025. The goal is to make the baseboard look like an extension of the wall or the floor, not an after-thought tacked on at the end of the project.
The final transition
Installing slim baseboards is an exercise in restraint and technical excellence. You are fighting the natural tendencies of building materials to warp, swell, and shift. By focusing on subfloor preparation, moisture-stable materials, and chemical bonding, you can create a bathroom that feels expansive and calm. If you have questions about your specific layout or need professional guidance on complex tile and trim integrations, feel free to contact us. Precision is the only way to achieve true minimalism. It is a commitment to the 1/8 inch that most people ignore. But in a small space like a bathroom, that 1/8 inch is everything.”, “image”: {“imagePrompt”: “A high-detail, close-up photograph of a minimalist bathroom floor meeting a wall. The floor is large-format light gray matte porcelain tile with thin grout lines. A very slim, 1/4-inch thick white modern baseboard is perfectly flush against the wall and the tile. The lighting is soft and architectural, highlighting the clean 90-degree angle and the absence of gaps or heavy caulking. The focus is on the precision of the joint.”, “imageTitle”: “Minimalist Slim Baseboard Detail”, “imageAlt”: “Close up of a slim white baseboard installed over gray tile in a minimalist bathroom”}, “categoryId”: 5, “postTime”: “2023-10-27T10:00:00Z”}