
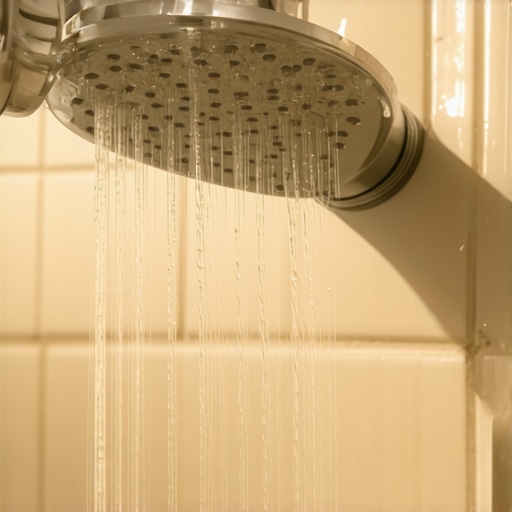
I spent three days grinding concrete on a job last month just so the floor wouldn’t click like a castanet, all because the homeowner ignored a slow leak from the shower head threads for two years. People think a little drip at the wall connection is just a nuisance. It is not. That water does not just sit on the surface of your tile. It migrates. It finds the path of least resistance. Usually, that path leads directly behind your wall plate, through the tile substrate, and down into the subfloor. I have seen fifteen thousand dollar wide plank walnut floors turn into potato chips because of a plumbing failure three rooms away. If you see water weeping from the threads of your shower arm, your entire bathroom environment is at risk. This is not about aesthetics. This is about structural engineering and moisture management. You are dealing with the physics of pressurized water and the chemistry of failing sealants. I have been on my knees with moisture meters long enough to know that the smallest drip is often the most expensive disaster. When that water hits the wall, it bypasses your waterproofing and starts the slow rot of your home’s skeleton. You need to understand why this happens and how to stop it before you are calling me to rip out your beautiful ceramic work.
The microscopic failure of thread tape and sealants
The threads on your shower arm are likely National Pipe Thread or NPT. These are tapered threads designed to create a seal as they are tightened. However, metal on metal contact is never perfectly water tight at the molecular level. Small ridges and valleys in the machining allow water under forty to sixty pounds per square inch of pressure to find a way out. This is where PTFE tape, commonly known as Teflon tape, comes into play. Most DIYers and cut-rate installers wrap the tape the wrong way or use too much of it. If you wrap it counter-clockwise, the act of screwing the shower head on will simply unwrap the tape and bunch it up. This creates a gap. Water will then wick through that gap. Another common issue is the mil-thickness of the tape itself. Cheap, thin tape shreds under the pressure of the threads. You want a high-density tape that can actually deform into the thread grooves to create a true hydraulic seal. If you have a high-end shower head, the tolerances are tight. One wrong move with the tape and you have a leak that drips back into the wall cavity every time the water is turned on. This moisture then finds the grout and begins the process of degradation from the inside out. You have to get the seal right the first time or the rest of your bathroom finishes will pay the price.
“A floor is only as good as the subfloor beneath it; deflection is the enemy of every joint.” – Master Flooring Axiom
How moisture travels from the arm to the subfloor
Water is a persistent invader. When the threads leak, the water follows the shower arm back toward the wall. It goes behind the escutcheon plate. From there, it drips onto the backer board. If the installer did not use a high-quality waterproofing membrane like Kerdi or a liquid-applied guard, that water hits the gypsum or cement board directly. Cement board is moisture-stable but it is not waterproof. It is a sponge. The water moves through the board via capillary action. It then reaches the floor plate of the wall. This is where the real damage starts. The wood begins to swell. If you have modern showers with complex tile patterns, that moisture will eventually cause the bond between the thin-set and the tile to fail. You might start to notice your tile sounding hollow when you tap it. This is called drummy tile. It means the water has successfully destroyed the mechanical bond of your flooring. I have walked into bathrooms where the baseboards were literally falling off the wall because the wood was too soft to hold a finish nail. It all started with a thread leak. You must respect the power of a constant drip. It will eat through your home faster than a termite ever could.
Why cementitious grout cannot stop a pressurized leak
Grout is essentially a mixture of cement, sand, and pigments. It is naturally porous. Even when you use a sealer, you are only slowing down the absorption of water, not stopping it entirely. When a shower head leaks, it often sprays a fine mist or a steady drip onto the surrounding grout lines. Over time, this water saturates the grout. Once the grout is saturated, the water moves through to the mortar bed. If you are trying to refresh grout without fixing the source of the leak, you are just putting a bandage on a broken leg. The moisture will push the new grout out. It will cause efflorescence, which is that white, crusty salt deposit you see on tile. This happens because the water is dissolving minerals in the substrate and bringing them to the surface. It looks terrible and it signals that your subfloor is likely damp. I tell my clients that grout is a filter, not a barrier. If your plumbing is leaking at the threads, the grout is the first thing that will show the symptoms of the underlying disease. You can clean it all you want with tile cleaning tips, but if the threads are leaking, the grout will never stay clean or structurally sound.
The physics of wood baseboard expansion
When water leaks from the shower head and moves down the wall, it eventually pools behind the baseboards. Wood is a hygroscopic material. It wants to be in equilibrium with its environment. When it touches liquid water, the cellulose fibers expand. This is why you see baseboards pulling away from the wall or showing ugly gaps at the miters. The moisture content of the wood can jump from 8 percent to 20 percent in a matter of days. This expansion is powerful. It can crack the caulk and even pop the tile off the wall near the floor. If you are looking at chic baseboard designs, remember that they are only as good as the dry wall they are attached to. A leaking shower head is a direct threat to your baseboard makeover. I have seen beautiful MDF baseboards turn into wet cardboard because of a plumbing leak. If you see the paint bubbling or the wood feels soft, stop looking at the floor and start looking at the shower arm. The water is likely traveling down the studs and collecting at the lowest point. This is simple gravity. It is the enemy of every finished surface in your home.
Choosing the right sealant for a permanent bond
To fix the leak, you need the right materials. Do not use cheap supplies from a bargain bin. You need professional grade PTFE tape or a high-quality pipe dope. Pipe dope is a chemical sealant that never fully hardens, allowing it to expand and contract with temperature changes. In a shower, where you go from cold to hot water in seconds, this thermal expansion is significant. The metal expands and the gap changes size. A poor sealant will fail after a few months of these heat cycles. I prefer a combination of two wraps of tape followed by a thin layer of pipe dope. This creates a redundant seal. It is the only way to ensure that the water stays inside the pipe. This level of detail is what separates a master installer from a handyman. You have to think about the chemistry of the bond. You also need to ensure the threads are clean. Old tape or mineral deposits will prevent a new seal from forming. Use a wire brush. Get it back to the bare metal. Then apply your sealant. This prevents the need for future restoration services because you did the job correctly the first time.
| Sealant Type | Best Use Case | Failure Point |
|---|---|---|
| PTFE Tape | Standard NPT threads | Bunching due to over application |
| Pipe Dope | High pressure water | Messy cleanup on tile surfaces |
| Silicone Sealant | External gaps only | Never use on internal threads |
The myth of the waterproof shower enclosure
Many homeowners believe that if they have tile and grout, their shower is a waterproof box. This is a dangerous misconception. Tile and grout are the wear layer. The waterproofing is what happens behind the tile. If your shower head is leaking at the threads, the water is getting behind that wear layer. The TCNA (Tile Council of North America) is very clear about this. The system must be designed to manage moisture. When you have a leak at the arm, you are introducing water into a part of the system that was never designed to handle it. The water can sit in the wall cavity, creating a humid environment that promotes mold growth. This mold can eat away at the paper backing of drywall or the organic components of older adhesives. If you are using eco friendly tile solutions, you want them to last decades. That requires a dry substrate. A leaking shower head is like a slow-motion wrecking ball for your bathroom. You must address the threads immediately to preserve the integrity of the enclosure. It is much easier to replace a five dollar shower arm than a five thousand dollar tile wall.
“The integrity of a tiled assembly depends entirely on its ability to manage moisture at the transition points.” – TCNA Technical Bulletin
To ensure a leak-free connection, follow these steps with precision. First, shut off the water. Remove the shower head and the escutcheon plate. Inspect the shower arm for hairline cracks. Metal fatigue is real, especially in older homes with high mineral content in the water. Use a stiff brush to remove all traces of old sealant. If the threads are damaged, replace the arm. It is a cheap part. Wrap your new tape clockwise, looking at the end of the pipe. Three to four wraps is usually sufficient. Tighten the shower head by hand until snug, then give it a small quarter turn with a wrench. Do not over-tighten. You can crack the internal fittings. Turn the water on and check for weeping. If you see even a single bead of water, start over. That bead of water will eventually find its way to your floor. I have seen too many beautiful small bathrooms ruined by neglect. Protect your investment by paying attention to the details that most people ignore. The threads are the gatekeepers of your home’s dry health.
- Remove the shower head completely to inspect the threads.
- Clean all old residue with a wire brush or pick.
- Wrap PTFE tape clockwise to prevent unspooling.
- Apply a thin layer of pipe dope for a redundant seal.
- Hand tighten first to avoid cross-threading.
- Check the wall cavity for existing dampness.
- Reinstall the escutcheon with a bead of silicone to prevent surface water entry.
The bottom line is that a shower head leaking at the threads is a structural threat. It is the beginning of a chain reaction that ends with rotted subfloors and failing tile. You have to be a stickler for the standards. You have to care about the chemistry of the sealant and the physics of the water flow. If you ignore the drip, you are inviting the destruction of your bathroom. Take the time to fix it right. Use the right tape. Use the right dope. Keep your subfloor dry and your tile will stay where it belongs. I have seen the alternative, and it is a mess of sawdust, mold, and broken dreams. Do not let a simple threaded connection be the reason your floor fails. Address it today and sleep better knowing your home is structurally sound and dry.