
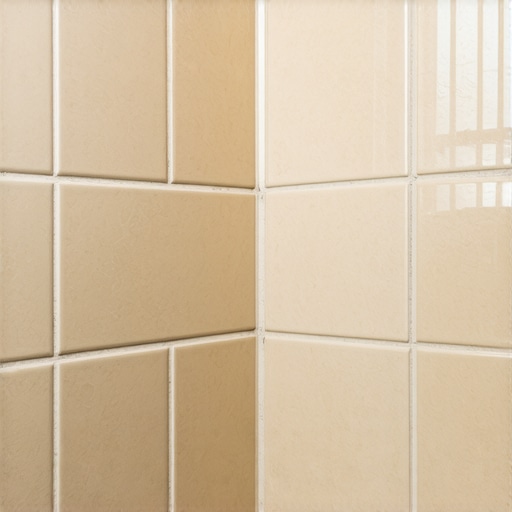
How to Stop Grout from Cracking in Your Shower Corners
Most guys skip the leveling compound. They think the underlayment will hide the dip. It won’t. I spent three days grinding concrete on a job last month just so the floor wouldn’t click like a castanet. That job taught me that if you do not respect the subfloor, the finish will humiliate you. My hands still smell like WD-40 and oak dust from the morning prep. I have seen thousand dollar tile jobs ruined by a single hairline crack in the corner. People think it is a cosmetic issue. It is not. It is a failure of structural physics. When a homeowner calls me about cracked grout in their shower, they usually want a quick patch. I tell them a patch is a lie. The grout is cracking because the house is breathing and the grout is not. You have two walls meeting at a ninety degree angle, and both those walls are moving independently. If you fill that gap with rigid portland cement, it will fail every single time. Hard grout in a corner is a fundamental error that defies the laws of expansion and contraction.
The structural lie of rigid joints
Cracking grout in shower corners happens because houses move. These change-of-plane areas require flexible sealant like 100 percent silicone caulk instead of rigid cementitious grout. When walls shift due to seasonal humidity or settling, rigid grout cannot expand or contract, leading to immediate hairline fractures and water intrusion issues. This movement is known as differential settlement. Every building undergoes a constant cycle of expansion and contraction based on the moisture content of the wood framing and the thermal changes in the substrate. When you apply a cement-based grout to a corner, you are creating a rigid bridge between two planes that want to move in different directions. The grout has a high compressive strength but zero tensile strength. It cannot stretch. As soon as the wall studs behind the tile expand by even a fraction of a millimeter, that grout joint is under enough pressure to snap. We call this a change of plane. In the world of professional tile setting, any change of plane must be treated as an expansion joint. If you ignore this, you are just waiting for the inevitable failure. This is why I always keep a tube of high grade silicone in my bucket. It is the only thing that handles the stress of a house that refuses to sit still.
“A floor is only as good as the subfloor beneath it; deflection is the enemy of every joint.” – Master Flooring Axiom
The physics of deflection and wall movement
Wall movement occurs because of the hygroscopic nature of wood framing and the load bearing stresses placed on the floor joists. In a shower, the temperature changes rapidly from sixty degrees to over one hundred degrees. This thermal shock causes the tile and the substrate to expand at different rates. If your shower is on a second floor, you have even more movement to worry about. The floor joists will flex as people walk across the room. This flex translates into the vertical walls. If those walls are not decoupled from the movement, the weakest point will give way. That point is almost always the grout line in the corner. I have seen guys try to use grout additives to make it flexible. It is a waste of money. You are fighting against the molecular structure of the cement. You need to understand the L/360 rule. This rule states that a floor should not deflect more than the length of the span divided by 360. If your subfloor is too bouncy, no amount of expensive grout will save your corners. You have to stiffen the structure before the first tile ever touches the thin-set. This often means adding blocking between joists or installing a second layer of exterior grade plywood. If you want to learn more about maintaining your surfaces, check out these tile cleaning tips for a sparkling bathroom in 2025 to keep everything looking sharp once the structural work is done.
The chemistry of the bond and silicone selection
The chemical bond between tile and grout is purely mechanical, whereas the bond between tile and silicone is a chemical adhesion. Silicone remains elastic for decades, allowing it to absorb the kinetic energy of a shifting house without losing its seal or pulling away from the tile edge. Not all sealants are created equal. You will see tubes at the hardware store labeled as caulk or siliconized acrylic. Stay away from those for shower corners. They shrink as they dry because the water in the formula evaporates. Once they shrink, they pull away from the tile and leave a gap for mold to grow. You need 100 percent RTV silicone. RTV stands for Room Temperature Vulcanizing. This material turns into a rubber-like substance as it reacts with the moisture in the air. It does not shrink. It stays flexible. It has a high shore A hardness rating, meaning it can resist impact while still being soft enough to stretch. When I am finishing a job, I make sure the corner gap is at least 1/8 inch wide. If the tiles are butted too tight, there is not enough silicone to handle the movement. You need a sufficient bead of material to act as a shock absorber. This is the difference between a job that lasts three years and a job that lasts thirty years. For those looking for inspiration on how to design these spaces, look at showers that wow modern designs for 2025 to see how the pros handle these transitions.
| Material Property | Cementitious Grout | 100% RTV Silicone |
|---|---|---|
| Flexibility | Zero | High (25% movement) |
| Shrinkage | Minimal | None |
| Water Resistance | Porous | Hydrophobic |
| Bond Type | Mechanical | Chemical Adhesion |
| Longevity in Corners | Poor | Excellent |
The 1/8 inch that ruins everything
A common mistake is making the corner joint too narrow, which prevents the sealant from having enough mass to stretch. A 1/8 inch gap is the industry standard for a movement joint because it allows the silicone to elongate without tearing or delaminating from the tile edge. If you jam your tiles tight into the corner, you are creating a pinch point. As the house settles, those tiles will actually grind against each other. This can cause the edges of the tile to chip, a phenomenon known as spalling. I always use spacers even in the corners. I want a clean, consistent vertical line. Once the grout is dry on the flat walls, I go back and pull the spacers from the corners. I clean the thin-set out of that gap entirely. If there is thin-set in the corner, the silicone cannot get a deep bite. You want the silicone to bond to the edges of the tile, not the debris in the back of the joint. It requires patience. Most installers are in a rush to get home. They grout the whole thing and walk away. That is why they get call backs. I do not like call backs. They cost me money and my reputation. I do it right the first time by ensuring that 1/8 inch gap is clean and ready for the silicone. You can even use this approach when dealing with chic baseboard designs that transform rooms in 2025 because the transition from floor to wall is also a movement joint.
“Movement joints are not a suggestion; they are a requirement for any installation that expects to survive a change in seasons.” – TCNA Handbook for Ceramic, Glass, and Stone Tile Installation
Technical checklist for a permanent seal
- Clean the corner joint of all grout and thin-set residue using a vacuum and a nylon brush.
- Wipe the tile edges with denatured alcohol to remove oils and dust that prevent adhesion.
- Ensure the area is completely dry, using a heat gun or hair dryer if necessary.
- Apply a consistent bead of 100 percent silicone from bottom to top.
- Tool the joint with a finger dipped in soapy water or a dedicated caulking tool for a smooth finish.
- Allow the sealant to cure for a full 24 hours before exposing it to water.
Why your subfloor is lying to you
Subfloors often appear level and stable to the naked eye but harbor hidden deflection issues that only manifest under the weight of a full shower. A standard 3/4 inch plywood subfloor can still flex significantly between joists if the span is too long for the wood species used. This is why I am obsessed with the physics of the base. I have walked onto jobs where the subfloor felt like a trampoline. The homeowner wanted marble. I told them no. Marble is brittle. If that floor moves, the marble cracks. You have to understand the modulus of rupture. This is the amount of force a material can take before it breaks. Ceramic and porcelain have high ratings, but they are still rigid. If the plywood underneath is bowing, the tile will pop. I always check the moisture content of the subfloor with a meter. It should be within 2 to 4 percent of the ambient humidity of the house. If the wood is wet when you install the tile, it will shrink as it dries. That shrinkage pulls at the joints. It will buckle. I have spent many days with a grinder, leveling out high spots in concrete slabs. A flat floor is not just about looks. It is about ensuring the stress is distributed evenly across the entire surface. If you have already encountered issues, you might need grout restoration secrets for long lasting results to fix the damage before it spreads. This is not just about aesthetic beauty. It is about structural integrity.
The hidden cost of moisture intrusion
Water entering through cracked corner grout can rot the wall studs and lead to mold growth long before you see a stain on the ceiling below. Once the seal is broken, capillary action pulls water behind the tile where it becomes trapped against the waterproofing membrane or the wood framing. People forget that grout is not waterproof. It is water resistant. It is basically a hard sponge. The real waterproofing happens behind the tile with a liquid applied membrane or a sheet membrane like Kerdi. But if the corner grout is cracked, you are dumping gallons of water directly into the wall cavity every time someone takes a shower. This water has nowhere to go. It sits there and feeds mold spores. By the time the baseboards start to swell or the paint starts to peel in the adjacent room, the damage is done. You are looking at a full tear out. This is why I am so hard on my guys about the corners. It is the most vulnerable part of the entire system. If you see cracks, do not ignore them. You need to know how to refresh grout without replacing it before the moisture destroys your home. It is a small fix that prevents a five figure disaster.