
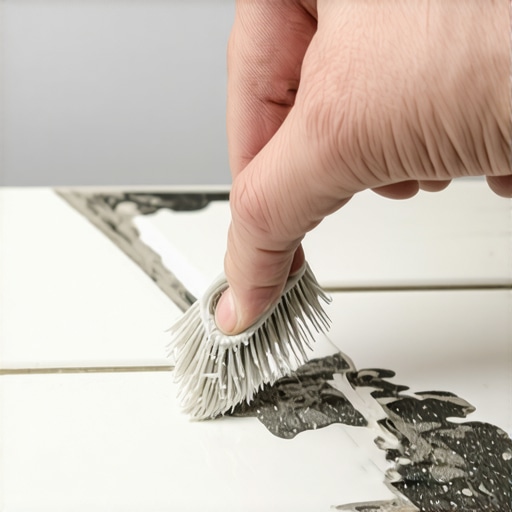
The subfloor secret that reveals the amateur
Hiding the raw edge of porcelain tile requires a combination of bullnose profiles, metal trim strips, and precision mitering to cover the exposed porcelain biscuit. Most guys skip the leveling compound. They think the underlayment will hide the dip. It won’t. I spent three days grinding concrete on a job last month just so the floor wouldn’t click like a castanet. That same philosophy applies to your edges. If you have a raw, jagged edge of porcelain showing in your shower or on your floor, you have failed the installation. Porcelain is a dense, vitrified material. When it is fired at temperatures exceeding 2,200 degrees Fahrenheit, the minerals fuse into a solid mass. However, the glaze only sits on the top. When you cut that tile, the side looks like dry clay. It is ugly, it is porous, and it screams DIY mistake. You have to treat the edge like a structural transition, not an afterthought. I have seen million-dollar bathrooms ruined because the installer thought a fat bead of caulk was a legitimate way to finish a corner. It is not. You need to understand the physics of the cut and the chemistry of the bond to make that edge disappear into the architecture of the room.
The clay and heat beneath the glaze
Porcelain tile manufacturing involves pressing kaolin clay, feldspar, and quartz into a dense biscuit before applying a digital or liquid glaze. This vitrification process ensures a water absorption rate of less than 0.5 percent, making it nearly waterproof. When you use a wet saw with a continuous rim diamond blade, you are essentially grinding through a glass like substance. The heat generated can cause micro-fractures in the glaze. This is why the raw edge looks different from the factory edge. The factory edge has been slightly rounded and glazed over. Your cut edge is sharp and reveals the internal color of the clay body. If you are working with through-body porcelain, the color is the same all the way through, but the texture is still rough. To hide this, you must choose a finishing method that matches the durability of the tile itself. You are not just hiding a line. You are protecting the most vulnerable part of the tile from chipping. If a heavy vacuum hits a raw porcelain edge, it will shatter the glaze. A metal profile or a bullnose piece absorbs that impact energy and distributes it through the thin-set and into the substrate.
The metal solution that saves the day
Schluter strips and aluminum tile profiles provide a mechanical transition that protects the porcelain edge while creating a clean aesthetic line. These profiles come in L-shapes, square edges, and rounded bullnose mimics. They are the gold standard for modern installations. You do not just glue them on at the end. They have a perforated flange that must be embedded in the thin-set mortar before the tile is set. This creates a monolithic bond. If you are building a modern shower, you should be looking at showers with a style that utilizes these brushed nickel or matte black edges. The profile acts as a stop for the tile. It ensures that the expansion and contraction of the wall won’t cause the tile to pop. You must select the height of the profile based on the thickness of the tile plus the thickness of the notched trowel bed. If you use a 3/8 inch tile, do not use a 3/8 inch profile. Use a 1/2 inch profile to account for the mortar. If you get this wrong, the tile will sit higher than the metal, and you will have a sharp lip that catches socks and skin.
“A floor is only as good as the subfloor beneath it; deflection is the enemy of every joint.” – Master Flooring Axiom
The art of the 45 degree miter
Mitered tile edges involve grinding the backside of the porcelain at a 45 degree angle to create a seamless corner without exposing the biscuit. This is the most difficult way to hide an edge. It requires a steady hand and a high quality diamond polishing pad. You cannot cut a perfect 45 degree angle on a wet saw and expect it to be perfect. You have to cut it at about 40 degrees, leaving a tiny bit of the factory glaze at the tip. This is called a quirk miter. If you bring the two tiles to a sharp point, they will be extremely fragile. They will chip if you even look at them wrong. By leaving a half-millimeter of glaze and filling the tiny gap with epoxy grout, you create a reinforced corner that looks like a solid block of stone. This is how high end architects handle outside corners in luxury hotels. It takes three times as long as using a metal strip, but the result is a zero-threshold look that cannot be beaten. You must use a high-modulus adhesive for this because any movement in the wall will crack that miter joint instantly.
Edge comparison for professional results
| Method | Skill Level | Durability | Best Use Case |
|---|---|---|---|
| Bullnose Tile | Beginner | High | Traditional Bathrooms |
| Metal Profiles | Intermediate | Extreme | Modern Kitchens/Showers |
| Mitered Edge | Expert | Medium | Luxury Vertical Walls |
| Pencil Liners | Intermediate | High | Decorative Borders |
Why your subfloor is lying to you
Subfloor deflection refers to the vertical movement of the floor joists or plywood substrate under a load. If your subfloor is not stiff enough, specifically meeting the L/360 standard for ceramic and L/720 for stone, your edges will never stay hidden. The grout will crack. The caulk will pull away. You can spend days perfecting a mitered edge, but if the floor flexes when you walk on it, that edge will explode. I always check for bounce before I even open a box of tile. If the floor is bouncy, I am adding a layer of 1/2 inch plywood or a cement backer board. But remember, the backer board does not add structural strength. It only provides a bonding surface. The strength comes from the joists and the subfloor thickness. In humid regions like the Gulf Coast, the wood substrate can swell, pushing the tiles together and crushing the edges. You must leave an expansion gap at the perimeter. This gap is usually hidden by baseboards. If you are curious about how to finish those areas, look into baseboards makeover ideas to elevate your space to see how the trim covers the structural necessity of the expansion joint.
The 1/8 inch that ruins everything
Expansion joints are mandatory gaps placed every 20 to 25 feet in tile installations to allow for thermal expansion and moisture movement. If you butt your porcelain tile tight against a hardwood floor or a wall without a gap, the floor will tent. I have seen entire floors lift off the concrete like a tectonic plate because the installer didn’t leave a gap at the edge. You hide this gap with a transition strip or a baseboard. Never fill an expansion gap with hard grout. It must be filled with a 100 percent silicone sealant that matches the grout color. Silicone is flexible. Grout is rigid. If the house settles, the silicone compresses. If the grout is there, the tile snaps. This is the difference between a floor that lasts 50 years and one that fails in three. Many homeowners want a seamless look, but the physics of the building won’t allow it. You have to build the movement into the design.
The chemistry of the bond
Modified thin-set mortar contains polymer additives like latex or acrylic that increase the bond strength and flexibility of the adhesive. When you are hiding a tile edge, the mortar is what holds your trim or your bullnose in place. For porcelain, you cannot use cheap, unmodified mortar. Porcelain is so dense that it doesn’t absorb the water from the mortar to create a mechanical grip. It relies on the chemical bond of the polymers. If you use the wrong mud, your metal trim will wiggle loose within a year. You also need to consider the curing time. High-polymer mortars take longer to set because the water has to evaporate through the narrow grout lines. If you grout too early, you trap that moisture, which can lead to efflorescence. This is the white, powdery salt that ruins the look of your grout. If your grout starts to look dingy because of poor installation or age, you should learn how to refresh grout without replacing it to save the installation without a full tear-out.
“Edge treatment is not merely an aesthetic choice but a protection against mechanical impact and moisture ingress.” – TCNA Handbook for Ceramic, Glass, and Stone Tile Installation
The ghost in the expansion gap
Perimeter joints are often hidden ghosts in a flooring system that cause mysterious cracking when they are improperly filled with rigid materials. People think the edge is just about looks. It is about survival. If you are installing tile in a sunroom with large windows, the thermal expansion will be significant. The porcelain will grow as it heats up. Without a soft joint at the edge, the tile will exert thousands of pounds of pressure against the walls. This can actually crack the drywall or the studs. I always use foam backer rod in the perimeter gap before siliconing. This ensures two-point adhesion for the silicone, which allows it to stretch properly. If you just glob it in there, it will fail. It is these microscopic details that make a floor professional. You are an architect of a surface that people will walk on for decades. Treat it with that level of respect.
Installation checklist for tile edges
- Verify subfloor deflection meets L/360 requirements.
- Measure tile thickness including mortar bed for profile selection.
- Ensure wet saw blade is dressed with a dressing stone for clean cuts.
- Embed metal profile flanges fully in the thin-set.
- Maintain a 1/8 inch expansion gap at all vertical obstructions.
- Use 100 percent silicone for all change-of-plane joints.
- Polish mitered edges with diamond pads up to 400 grit.
The final polish and hand finishing
Hand finishing involves using diamond hand pads to smooth the micro-chips along the cut edge of a porcelain tile. No matter how good your saw is, there will be tiny chips. You take a 200 grit diamond pad and run it at a 45 degree angle along the cut. This is called easing the edge. It takes the sharpness off and makes the cut edge feel like a factory edge. This is crucial for safety. A raw cut porcelain edge is sharper than a surgical scalpel. I have seen guys end up in the emergency room because they swiped their hand across a raw edge while cleaning grout. Once the edge is eased, it also holds the grout better. The grout has a small shoulder to sit against, which prevents it from flaking out over time. It is the last five percent of the job that takes fifty percent of the effort, but it is why my floors don’t have call-backs. Stop looking for the fast way. Look for the right way. Your floor is a structural assembly, not a sticker you put on the ground.