
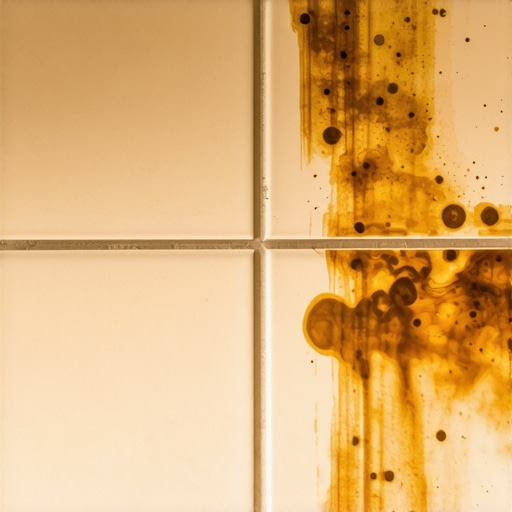
Why Your Grout Looks Muddy After Cleaning
I spent three days grinding concrete on a job last month just so the floor would not click like a castanet, and that same level of structural obsession applies to the microscopic world of your grout lines. When you see that dull, grey, or brown haze settling into the joints of your beautiful ceramic or porcelain tiles, you are not just looking at dirt. You are looking at a failed chemical process and the physical reality of a porous material that is acting like a sponge. Most homeowners think they are cleaning when they pull out a mop and a bucket of scented water, but in the world of professional flooring, that is simply called a soil transfer session. You are moving dirt from the center of the tile and depositing it into the lowest point of the floor, which happens to be the grout joint. This cementitious material is full of tiny voids that drink up the grey water you are pushing around, leaving behind a muddy residue that hardens as it dries.
The structural failure of the standard mop
Grout looks muddy because traditional mopping techniques often redistribute liquefied soil into the porous cement joints rather than removing it. When the water evaporates, it leaves behind a concentrated layer of dirt and cleaning chemicals that darken the grout and attract more debris over time. This is a common issue for those who do not use a dual-bucket system or a high-velocity extraction tool. I once walked into a luxury kitchen where the owner had spent thousands on marble but used a string mop daily. The grout, which started as a pristine bone white, looked like wet sidewalk cement. The culprit was not the dirt itself, but the way it was being handled. Grout is essentially a mixture of sand and Portland cement. Under a microscope, it looks like a mountain range with deep valleys. When you mop, those valleys fill up with the dirty water you just picked up from the tile surface. If that water is not vacuumed up or rinsed with fresh water, it stays in the valleys. This is the primary reason for that muddy appearance that never seems to go away no matter how hard you scrub.
“A floor is only as good as the subfloor beneath it; deflection is the enemy of every joint.” – Master Flooring Axiom
Molecular physics of grout porosity
The chemistry of grout is often misunderstood by anyone who has not spent years mixing it in five-gallon buckets. Sanded grout is used for joints wider than 1/8 inch because the sand particles act as a bridge, preventing the cement from shrinking and cracking as it cures. However, those sand particles create a massive surface area that is highly absorbent. If you do not apply a high-quality sealer, you are leaving the door wide open for every spill and mop bucket to penetrate the matrix of the floor. We talk about capillary action in the flooring trade because liquids will literally climb into the grout. This is why grout restoration secrets for long-lasting results always start with deep extraction and ends with a high-solids sealer. Without that barrier, the moisture migration carries fine particulates deep into the cement. You are not just cleaning the surface. You are fighting a war against the physical properties of the materials themselves. If your grout was never sealed, or if the sealer has worn off from using harsh acids, the muddy look is actually a permanent stain living inside the grout body. You can scrub until your knuckles bleed, but you are only touching the top 2 percent of the problem. It requires a chemical breakdown to lift those buried particles to the surface.
The chemical trap of dirty water
Surfactants are the active ingredients in most floor cleaners, and they are designed to lower the surface tension of water so it can grab onto grease and grime. The problem arises when people use too much soap. That excess surfactant stays on the floor as a sticky film. Every time you walk across the floor, the oils from your feet or the rubber from your shoes stick to that film. This is a massive issue in high-traffic areas and near the edges of the room. This residue is especially problematic near baseboards makeover ideas to elevate your space because the mop never quite reaches the very edge, leaving a dark perimeter of gunk. To avoid this, you must understand the pH scale. Many people use vinegar, which is an acid. Acid eats away at the calcium carbonate in the grout, making the pores even larger. This creates a vicious cycle where the grout gets dirtier even faster because you have physically increased the size of the holes in the cement. You need a neutral cleaner or a slightly alkaline one to break down the proteins and oils without destroying the structural integrity of the joint.
| Cleaning Agent Type | pH Level | Effect on Grout Integrity | Risk of Muddy Haze |
|---|---|---|---|
| White Vinegar | 2.5 | High (Corrodes Cement) | Very High |
| Neutral Cleaner | 7.0 | Low (Safe for Sealer) | Low |
| Heavy Alkaline | 11.0 | Moderate (Strips Sealer) | Moderate |
| Bleach | 12.0 | High (Degrades Color) | High |
The 1/8 inch that ruins everything
Subfloor deflection is a silent killer of grout aesthetics. If your subfloor has too much flex, the grout joints will develop micro-fissures. These cracks are so small you might not see them standing up, but they are wide enough to swallow dirty water and harbor bacteria. This is why I always check the joist spacing and the thickness of the plywood before a single tile is laid. If the floor moves, the grout breaks. Once it breaks, it becomes a literal drain for every liquid that hits the floor. This is particularly dangerous in showers that wow modern designs for 2025 where constant water exposure can lead to mold growth behind the tile if the grout is compromised. The muddy look in a shower is often a sign of sub-surface saturation. If you see dark spots that do not dry out, you have a moisture management problem, not just a cleaning problem. You are likely looking at wet thin-set or saturated backer board telegraphing through the grout. This is why professional installers focus on the waterproofing membrane more than the tile itself. A pretty tile on a wet substrate is a recipe for a disaster that smells like a swamp and looks like a mud pit.
Why baseboards are grout magnets
The intersection of the floor and the wall is where most cleaning efforts fail. We see it all the time. Dust and hair blow to the edges, and when you mop, that debris gets pushed into the expansion gap under the baseboards. If that gap was not properly handled or if the grout was run too tight to the wall without a caulk joint, it will crack and trap dirt. Check out some chic baseboard designs that transform rooms in 2025 to see how a proper transition should look. A professional knows that the perimeter should be finished with a color-matched 100 percent silicone sealant, not hard grout. Silicone is flexible and non-porous, meaning it will not hold onto that muddy water like cement will. If your grout looks particularly dark at the edges, it is likely because it has absorbed years of floor wax or improper cleaning solutions that have pooled there. Cleaning this requires detail work with a small brush and a wet-dry vacuum to physically remove the slurry instead of just spreading it around.
Showers that hide bacterial colonies
In the bathroom, the muddy look is often biological. Skin scales, soap scum, and hair products create a biofilm that coats the grout. When you use a generic tile cleaner, you might be removing the top layer of grime but leaving the biological base intact. This is why people struggle with tile cleaning tips for a sparkling bathroom in 2025. You need to use an enzymatic cleaner or a product specifically designed to break down calcium and body oils. For small spaces, consider showers with a style trendy ideas for small bathrooms that utilize larger format tiles. Fewer grout lines mean fewer places for mud and mold to hide. When I install a shower, I recommend epoxy grout for this very reason. It is essentially plastic. It has zero absorption rate. It is harder to install and costs more, but your grout will never look muddy because nothing can penetrate the surface. It is the ultimate solution for the homeowner who hates scrubbing.
- Use a dual-bucket system to ensure you are always rinsing with clean water.
- Switch to a microfiber flat mop which lifts dirt rather than pushing it.
- Apply a high-quality penetrating sealer every 12 to 24 months.
- Avoid using dish soap or high-residue cleaners on tile surfaces.
- Vacuum or dry-sweep thoroughly before any wet cleaning happens.
- Use a wet-vacuum to pull dirty solution out of the grout joints.
A better way to restore the shine
If your grout is already past the point of a simple cleaning, you have to look into restorative measures. Sometimes you need to learn how to refresh grout without replacing it by using a grout colorant. These are epoxy-based coatings that sit on top of the existing grout, sealing it and providing a uniform color. It is a tedious job. You have to clean the joints with an alkaline cleaner, rinse them with water, let them dry completely, and then paint the colorant onto every single line with a toothbrush. But once it is done, the floor looks brand new and becomes much easier to maintain. For those looking for more sustainable options, eco-friendly tile solutions for sustainable homes in 2025 often involve using pre-sealed grouts or recycled glass tiles that require less aggressive chemicals to keep clean. The goal is always to reduce the amount of work needed to keep the surface performing as intended.
“Grout is the most vulnerable part of a tile installation; treat it with the same respect as the subfloor.” – Master Flooring Axiom
The final word on floor performance is that maintenance is a structural requirement. You cannot expect a porous material to stay clean if you are feeding it dirty water every week. You have to change your philosophy from spreading water to extracting soil. Use the right chemicals, maintain your sealers, and keep your subfloor stiff to prevent the cracking that leads to deep-seated staining. If you follow these rules, you will stop wondering why your floors look worse after you clean them and start enjoying the high-performance surface you paid for. For more information on how we handle these materials, you can always visit our privacy policy or contact us directly for expert advice on your specific flooring challenges.