
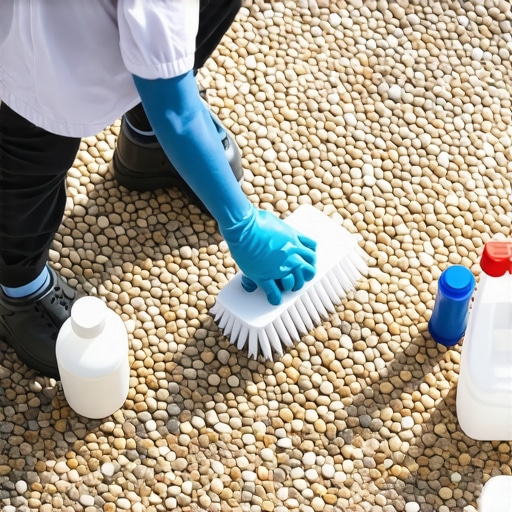
The deceptive nature of natural stone surfaces
Deep cleaning pebble floors requires a pH-neutral stone cleaner, a medium-stiff nylon brush, and a methodical extraction process to remove embedded bio-film. Natural pebbles are high-profile surfaces with deep grout valleys that trap skin cells, mineral deposits, and soap scum more aggressively than flat tiles. You must neutralize contaminants before they calcify.
I smell like oak dust and WD-40 most days. My hands are calloused from thirty years of dragging a grout float and a grinder across uneven slabs. Most people see a beautiful, spa-like pebble floor and think about relaxation. I see a topographical nightmare of a thousand tiny crevices waiting to harbor bacteria. I spent three days grinding concrete on a job last month just so the floor would not click like a castanet. That job taught me that if you do not respect the physics of the surface, the surface will eventually win. Pebble floors are no different. They are a collection of rounded river stones embedded in a cementitious or epoxy matrix. This design creates a massive surface area compared to a standard porcelain tile. When you clean a flat floor, you are wiping a plane. When you clean pebbles, you are navigating a mountain range. Most homeowners fail because they use a flat mop. A flat mop on a pebble floor is like trying to clean a forest by flying a plane over the trees. You never touch the ground where the real mess lives.
The physics of the grout valley
Grout valleys in pebble floors act as gravity-fed collection basins for every liquid and solid contaminant introduced to the room. Because the pebbles are rounded, the lowest points of the floor are the grout joints. Gravity pulls dirty mop water and soap residue into these recessed areas where it settles and hardens into a stubborn layer of filth. This is why your floor looks dark and dingy even after a surface wipe. You need to understand the porosity of the grout. Standard cement-based grout is essentially a hard sponge. It has microscopic pores that pull in moisture through capillary action. If that moisture is carrying dirt, the dirt becomes part of the grout structure. This is especially true in showers that wow but are poorly maintained. The mineral content in your water, like calcium and magnesium, reacts with the soap to create a waxy substance that bonds to the stone. To break this bond, you need chemical agitation and physical scrubbing. Do not use bleach. Bleach does not clean dirt. It just turns it white. It also eats away at the sealants that protect your stone.
“A floor is only as good as the subfloor beneath it; deflection is the enemy of every joint.” – Master Flooring Axiom
The chemistry of safe stone restoration
Safe stone restoration relies on maintaining a neutral pH balance to prevent the chemical etching of natural calcium carbonate. Many river pebbles are composed of limestone or marble variants which react violently to acidic cleaners. Even a mild vinegar solution can create permanent dull spots on the stone surface by dissolving the top layer of minerals. You must use specialized stone soaps. These soaps are engineered to suspend dirt particles in a liquid state so they can be rinsed away without leaving a residue. I have seen beautiful installations ruined because someone thought a harsh bathroom spray would save time. It did not. It stripped the sealer and left the stones looking like sun-bleached bones. When you select a cleaner, look for something specifically labeled for natural stone. This ensures the surfactants are gentle enough for the stone but strong enough for the grease. You also need to consider the age of your grout. If you need to how to refresh grout without replacing it, you start with a deep chemical purge of these contaminants.
| Cleaner Type | pH Level | Effect on Pebble Floors |
|---|---|---|
| Vinegar/Lemon | 2-3 (Acidic) | Erodes stone, dissolves grout over time |
| Neutral Stone Soap | 7 (Neutral) | Safe for daily use, preserves sealer |
| Heavy Duty Degreaser | 10-12 (Alkaline) | Removes heavy oils, requires thorough rinsing |
| Bleach | 11-13 (Basic) | Discolors stone, weakens grout structure |
The mechanical scrub technique
Mechanical scrubbing with a circular motion is the only way to reach the lateral surfaces of rounded pebbles where grime attaches. Linear scrubbing only hits the tops of the stones and skips over the recessed grout lines. By using a stiff nylon brush in a swirling pattern, you force the bristles into the gaps and around the perimeter of each individual stone. This is where the work happens. You want to see a gray or brown slurry forming. That slurry is the evidence that the dirt is being lifted out of the pores. If your water stays clear, you are not cleaning. You are just wetting the floor. I tell my apprentices that if their forearms do not burn, they are doing it wrong. You have to get down there. You have to work the cleaner into the matrix. After scrubbing, you must extract the slurry immediately. If you let it dry, the dirt just settles back into the grout and bonds even tighter. Use a wet-dry vacuum or a microfiber towel to lift the liquid off the floor entirely. For more general advice, check out tile cleaning tips for a sparkling bathroom in 2025 to keep the rest of your space matching the floor.
The danger of over-saturation in showers
Over-saturation of the pebble bed in a shower can lead to subfloor rot if the waterproof membrane or weep holes are compromised. In a shower environment, water goes through the grout and hits the liner. If the grout is packed with dirt and soap scum, the water cannot drain properly. This creates a stagnant pool under your feet. This is why some pebble floors start to smell like a swamp. The organic matter in the grout starts to decay. You need to ensure your grout is intact. If you see cracks, you are looking at a future failure. I have ripped out dozens of floors because the homeowner ignored a small crack in the grout. That crack allowed gallons of water to seep into the thin-set, causing the bond to fail. If you are noticing issues with your grout integrity, you should look into grout restoration secrets for long lasting results. It is cheaper to fix the grout now than to replace the entire pan later. In humid regions, this moisture trap is a breeding ground for black mold that can migrate behind your baseboards and into the wall studs.
“Ensure that the slope to the drain is at least one-quarter inch per foot to prevent standing water in stone mosaics.” – TCNA Installation Handbook
Sealing the stone for long term protection
Sealing pebble floors with a high-quality impregnating sealer creates a hydrophobic barrier that prevents liquid penetration. Unlike topical sealers that sit on top like a plastic film, impregnators soak into the stone and grout. They occupy the microscopic voids that would otherwise hold dirt. This makes future cleaning much easier because the grime stays on the surface. You should seal your pebble floor at least once a year. In a high-use shower, every six months is better. To test if your sealer is still working, drop some water on the stone. If it beads up like a freshly waxed car, you are good. If it soaks in and darkens the stone, you are unprotected. Applying sealer is a meticulous process. You must ensure the floor is bone dry first. If you trap moisture under the sealer, you will get a cloudy white haze called efflorescence. It is a nightmare to remove. It is a salt deposit that forms when moisture moves through the stone and evaporates at the surface. You can find more about high-end finishes in showers with a style designs.
- Clear all loose debris with a high-suction vacuum.
- Pre-wet the stones with clean water to prevent deep absorption of the cleaner.
- Apply a pH-neutral stone cleaner and let it dwell for five minutes.
- Scrub in circular motions with a nylon brush.
- Extract the dirty slurry with a wet-vac.
- Rinse with distilled water to prevent mineral spots.
- Dry the floor completely with a high-velocity fan.
- Apply a solvent-based impregnating sealer.
Maintaining the perimeter and transitions
Maintaining the perimeter where the pebble floor meets the wall is vital for preventing structural water damage. This transition is usually covered by a bead of silicone or specialized caulk. Over time, this seal breaks down. When you are deep cleaning, pay close attention to these edges. If the caulk is peeling, water is getting behind your walls. I always check the chic baseboard designs near the floor for signs of swelling or discoloration. If the wood is soft, you have a leak. Cleaning the pebbles is only half the battle. You have to protect the entire assembly. Use a small toothbrush to clean the junction between the pebbles and the wall. Be gentle but thorough. Once clean and dry, replace any failing caulk with a 100 percent silicone product. This maintains the flexibility needed for the floor to expand and contract without cracking the grout at the edges. This is the difference between a floor that lasts five years and one that lasts fifty. Flooring is a structural engineering challenge. If you treat it like a cosmetic choice, you will be calling someone like me to tear it out in a few years. Take care of the details and the floor will take care of you. If you have questions about specific stone types, you can always contact us for professional guidance.”,