
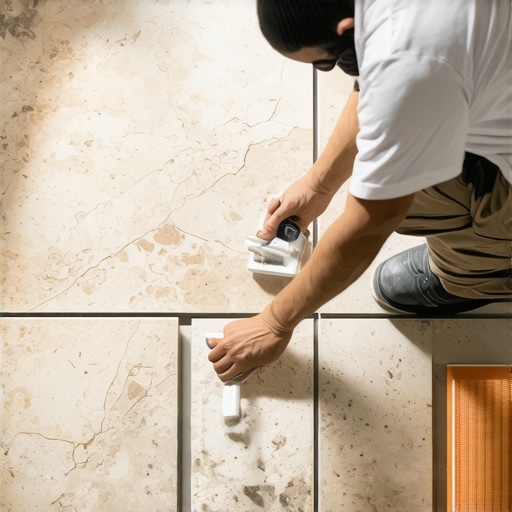
The Best Way to Seal Natural Stone Before Grouting
I spent three days grinding concrete on a job last month just so the floor would not click like a castanet. Most guys skip the leveling compound. They think the underlayment will hide the dip. It won’t. I have spent 25 years on my knees with a moisture meter and a level. I see a floor as a performance surface. It is not a decoration. When you work with natural stone like travertine, slate, or marble, you are working with a geological fossil that is still breathing. If you do not seal that stone before the grout hits the surface, you are asking for a permanent disaster. The stone is a sponge. It will suck the pigment right out of your grout mix. This creates a permanent stain known as grout shading. It looks like garbage. You cannot scrub it out. You cannot bleach it out. You have to prevent it at the molecular level before the first bucket of mud is even opened.
The physics of stone porosity and capillary action
Natural stone contains microscopic voids and capillaries that pull liquids deep into the internal crystalline structure through capillary action. Sealing before grouting involves applying a penetrating impregnator that fills these voids with silane or siloxane resins. This creates a hydrophobic barrier that prevents grout pigments and water from bonding with the stone minerals. You have to understand that stone is not solid. It is a network of tunnels. When you spread grout across an unsealed stone, the water in the grout acts as a transport mechanism. It carries the fine particles of pigment deep into those tunnels. Once the water evaporates, the pigment is trapped. It is a microscopic cave-in. I have seen white marble turn a muddy gray because the installer was too lazy to spend twenty minutes with a sealer pad. It is a heartbreak that costs thousands to fix. You need to ensure the stone is bone dry before you apply the sealer. If there is moisture trapped in the stone, the sealer will not penetrate. It will sit on the surface and turn into a cloudy, white mess. We call that blushing. It happens when the resin reacts with the water vapor trying to escape the slab.
“A floor is only as good as the subfloor beneath it; deflection is the enemy of every joint.” – Master Flooring Axiom
The chemistry of solvent based versus water based sealers
Solvent based sealers utilize smaller molecular structures to penetrate dense stones like granite or quartz whereas water based sealers are better suited for high porosity materials like saltillo or limestone. Choosing the correct carrier liquid ensures the resin reaches the proper depth to provide a durable barrier against grout staining. The solvent is just the taxi. It carries the solids into the stone and then it evaporates. Solvent based sealers smell like a chemical plant. They are aggressive. They get deep. I prefer them for dense marbles because the molecules are tiny enough to find their way into the tightest pores. Water based sealers are easier on the lungs. They work well for slate or tumbled travertine. The goal is the same. You want to saturate the surface until it cannot drink anymore. You apply it. You let it sit for ten minutes. You wipe off the excess. If you leave the excess on the surface, it will dry into a sticky film. That film will attract every piece of dust in the room. It will look like a sticky thumbprint over your entire floor. You are not building a layer on top. You are filling the holes inside. It is a structural reinforcement of the stone surface.
The 1/8 inch that ruins everything
Precision in stone installation requires an absolute commitment to flat subfloors where the deviation is less than 1/8 inch over ten feet. Any dip in the substrate creates a void that causes the stone to flex and the grout to crack regardless of the sealer quality used during the process. I have walked into too many showers with a style that looked great for a week and then started leaking. The stone was beautiful. The sealer was top tier. But the subfloor was wavy. When you step on a stone that has a void underneath it, the stone moves. It might only move a hair. That is enough. The grout is rigid. It does not bend. It snaps. Once the grout snaps, water gets behind the stone. It bypasses the sealer. It rots the thin-set. It creates mold. You have to grind that concrete flat. You have to use a self-leveling underlayment. Do not trust your eyes. Use a straight edge. If you can slide a nickel under your level, you are not done grinding. The sealer is your chemical defense. The subfloor is your structural foundation. One cannot save the other.
| Stone Type | Porosity Level | Recommended Sealer Type | Acclimation Time |
|---|---|---|---|
| Granite | Low | Solvent Based Impregnator | 24 Hours |
| Marble | Medium | Solvent Based Impregnator | 48 Hours |
| Travertine | High | Water Based Impregnator | 72 Hours |
| Slate | High | Water Based or Enhancing | 48 Hours |
| Limestone | Very High | Water Based Heavy Duty | 72 Hours |
Protecting stone in showers and high moisture zones
Sealing stone in wet environments requires a specialized breathable impregnator that allows moisture vapor to escape the assembly while preventing liquid water from entering the stone pores. Failure to use a breathable sealer leads to spalling where the stone surface flakes off due to trapped hydrostatic pressure. In a shower, the water is hitting the wall constantly. If you seal the stone with a topical film, you are essentially wrapping it in plastic. The water that gets behind the stone from the edges or the tile cleaning tips you followed cannot get out. It turns into steam when the shower gets hot. That steam pressure is immense. It will blow the face right off a piece of slate. You need a sealer that has a high moisture vapor transmission rate. It lets the stone breathe. This is especially true for showers that wow in modern bathrooms. They look great because they use large format stone. But large format stone has fewer grout lines. That means there are fewer places for moisture to escape. The sealer choice is the only thing keeping that stone from rotting from the inside out. I always tell people to check their grout restoration secrets before they blame the sealer. Sometimes the grout is the leak point.
The specific checklist for a professional finish
Successful pre-grout sealing depends on a systematic approach that includes deep cleaning, moisture testing, uniform application, and proper curing times to ensure the chemical bond is permanent. Follow these steps to prevent the stone from absorbing grout residue or experiencing permanent pigment staining during the installation phase.
- Vacuum every speck of dust from the stone surface and the open joints.
- Test the stone moisture with a pinless meter to ensure it is below 4 percent.
- Apply the sealer using a lint free microfiber applicator or a high density foam roller.
- Work in small sections to prevent the sealer from drying on the surface before wiping.
- Allow the first coat to dwell for ten minutes and then buff the excess off with a clean cloth.
- Wait at least four hours before applying a second coat to high porosity stones like travertine.
- Let the sealer cure for a full 24 hours before you even think about mixing your grout.
- Keep the room temperature between 60 and 80 degrees Fahrenheit for optimal chemical reaction.
Managing the baseboards and transitions
Transitions between stone floors and vertical surfaces must be handled with flexible caulk rather than rigid grout to accommodate the different expansion rates of the materials. Integrating stone with baseboards requires a clean seal at the perimeter to prevent moisture wicking into the wall studs. I see it all the time. Guys grout the stone right up to the baseboards. The house shifts. The wood expands. The stone stays still. The grout line cracks and looks like a jagged mess. You need to leave an expansion gap. Cover that gap with your baseboards makeover ideas or some chic baseboard designs. Use a color matched 100 percent silicone caulk in that joint. It handles the movement. It keeps the water out. If you are worried about the look, remember that the sealer on the stone needs to go all the way to the edge. If the edge is unsealed, it will suck up the moisture from the floor mop. That moisture will travel up into your baseboards. Then you have moldy wood and stained stone. It is a chain reaction. Every component of the floor is linked. If you want a floor that lasts thirty years, you have to respect the physics of every joint.
“Natural stone is a living material; treat it with the chemistry it deserves or it will fail you.” – TCNA Installation Guide
The contrarian truth about sealer thickness
Most homeowners and some rookie installers think that the thicker the sealer, the better the protection. That is a lie. Too much sealer is a disaster. If you apply a thick layer of sealer on a stone like granite, it cannot soak in. It stays on top. It becomes a sticky magnet for dirt. It will eventually peel off like a bad sunburn. You want the thinnest possible layer that still achieves saturation. It is about the depth of penetration, not the thickness of the film. This is the same logic we use for eco friendly tile solutions. We want materials that perform without excess waste. If you find yourself needing to how to refresh grout without replacing it later on, it is usually because the initial sealing was done poorly. You did not get enough product into the pores, or you left too much on the surface. Consistency is the mark of a master. Your floor should look like there is nothing on it at all. It should just look like perfect, clean stone that happens to repel water like a duck’s back. That is the goal. That is the only way I leave a job site.