
Most guys skip the leveling compound. They think the underlayment will hide the dip. It won’t. I spent three days grinding concrete on a job last month just so the floor wouldn’t click like a castanet. When you transition that logic to wall tile in showers, the stakes get higher because gravity never sleeps. If your thinset mix is off by even a few ounces of water, the bond fails at a molecular level before the first piece of tile is even set. I have seen fifteen thousand dollar marble slabs slide right off a vertical surface because the installer treated thinset like pancake batter instead of the complex chemical adhesive it actually is. You have to respect the hydration process of the Portland cement and the polymer chains that create the mechanical lock between your substrate and the ceramic or stone material.
The science of the bucket and the blade
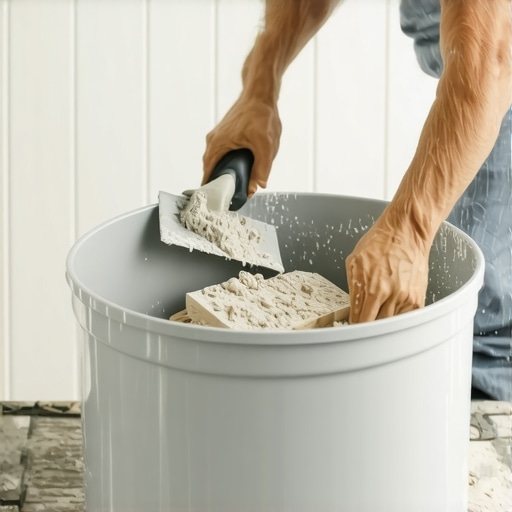
To mix thinset for the perfect wall tile bond, you must combine polymer-modified mortar with cool, clean water in a precise ratio, typically five to six quarts per fifty-pound bag. You mix it at low speed, let it slake for ten minutes, and then remix it to break the initial chemical set. This process ensures that the hydration of the cement particles is complete and the additives are fully activated for maximum vertical grab. I see too many rookies use a high speed drill that whips air into the mixture. This is a disaster. Air pockets in your mortar reduce the surface contact area by up to thirty percent. When that moisture evaporates, you are left with a brittle, honeycomb structure that will crack the moment your house settles or someone slams a bathroom door. You want the consistency of creamy peanut butter that holds its shape on a notched trowel without sagging or dripping. It should be stiff enough to support the weight of the tile but wet enough to transfer fully to the back of the piece. This is the only way to ensure the structural integrity of your showers and walls over the long haul.
“The bond strength of a tile installation is directly proportional to the mortar coverage and the mechanical interlock achieved during the initial set.” – Master Flooring Axiom
The mistake of skipping the slake time
Slaking is the period where you let the mixed mortar sit undisturbed for about ten minutes. This is not a coffee break. It is a vital phase of the chemical reaction where the dry polymers and the water molecules find each other. During this time, the water penetrates the core of the cement clinkers. If you skip this, your thinset will feel gritty and will dry out too fast on the wall. I have walked onto jobs where the guy was constantly adding water to his bucket to keep it loose. That is the hallmark of an amateur. Adding water after the initial mix is called retempering, and it kills the strength of the cement. It dilutes the polymer concentration and ruins the bond. If the thinset starts to harden in the bucket, throw it away. Do not try to save it. The cost of a new bag is nothing compared to the cost of ripping out a failed shower wall because you were too cheap to mix a fresh batch. When you are working on modern showers, you are often dealing with waterproof membranes that do not absorb water like old cement board did. This means your thinset has to be perfect because the moisture can only escape through the grout joints.
Surface preparation and the hidden bond breakers
You cannot stick a high quality tile to a dirty surface. I spent years learning that dust is the enemy of every adhesive. If you have drywall dust or sawdust on your backer board, the thinset will bond to the dust and not the wall. Wipe every surface with a damp sponge before you even open a bag of mortar. This also prevents the substrate from sucking the moisture out of the thinset too quickly. This is especially true for cementitious backer units which are incredibly thirsty. If the board steals the water from the thinset, the cement will not hydrate, and the bond will be powdery and weak. This is a common cause of tile popping off around baseboards or in the corners of a room. For those interested in the aesthetic side of these transitions, checking out baseboards makeover ideas to elevate your space can show you how a properly set floor meets the wall. But remember, no amount of trim can hide a failing tile bond. You have to get the chemistry right first.
| Thinset Type | Substrate Compatibility | Slake Time Required | Ideal Vertical Grab |
|---|---|---|---|
| Unmodified | Concrete, Cement Board | 5-10 Minutes | Low to Moderate |
| Polymer-Modified | Plywood, Membranes, Tile | 10 Minutes | High |
| Rapid Setting | All standard substrates | 3-5 Minutes | Extreme |
| Large Format (LFT) | Heavy Wall Tiles | 10 Minutes | Non-Sagging |
The physics of the notch and air entrapment
Proper trowel technique involves combing the thinset in straight lines rather than swirls to allow air to escape when the tile is pressed into place. You must achieve at least ninety-five percent coverage in wet areas like showers to prevent moisture from pooling behind the tile. Swirl marks create air pockets. Those pockets are where mold grows and where the tile is most likely to crack if it gets hit. When you press a tile into straight ridges, those ridges collapse and spread the mortar evenly across the entire back of the piece. I always back-butter large tiles. This means putting a thin layer of mortar on the back of the tile with the flat side of the trowel before setting it. This ensures that every square inch of that ceramic or stone is mechanically linked to the wall. If you are aiming for showers that wow modern designs for 2025, you are likely using larger format tiles which are heavy and unforgiving. These require a specific LFT (Large Format Tile) mortar that has high suction to prevent sagging. Without the right mix, your grout lines will never be straight because the tiles will creep down the wall as they cure.
Managing the environment and the bucket life
Humidity and temperature are the silent killers of a good mix. If it is ninety degrees in the house, your thinset will skin over in minutes. Skinning is when the top layer dries while the bottom is still wet. If you set a tile on skinned mortar, it will not stick. You might as well be using glue sticks. In hot weather, you need to mix smaller batches and keep your bucket in the shade. Use ice water if you have to. On the other hand, if it is too cold, the chemical reaction slows down to a crawl. The tile might look set, but the bond is not actually hard. If you start grouting too soon, you will knock the tiles loose. Speaking of finishing, you should look into grout restoration secrets for long-lasting results to ensure your final product stays as clean as the day you installed it. A solid grout joint is the secondary defense against moisture, but it cannot fix a bad thinset job. The thinset is the heart of the system.
- Use a dedicated mixing bucket that is free of old, dried mortar.
- Always add the powder to the water, not the water to the powder.
- Use a margin trowel to scrape the sides of the bucket during mixing.
- Measure your water with a dedicated measuring cup, do not eyeball it.
- Wear a dust mask because the silica in thinset will ruin your lungs.
- Check your coverage periodically by pulling a set tile off the wall.
The vertical grab and the non-sag requirement
For wall applications, you need a mortar with high thixotropic properties. This is a fancy way of saying it stays stiff when it is sitting still but flows when you move it. This is what prevents a heavy stone from sliding down the wall and ruining your alignment with the baseboards. If you are using eco-friendly tile solutions for sustainable homes in 2025, you may find that some recycled materials have different absorption rates. Always test a small area first. If the tile is not sticking, your mix is either too dry or the tile is too dusty. I have spent twenty five years perfecting this balance. It is a sensory experience. You hear the way the drill sounds when the mortar reaches the right thickness. You feel the resistance on the trowel. If it feels like work to spread it, it is too dry. If it runs down the wall, it is too wet. There is a sweet spot that feels like heavy cream. That is the sweet spot that makes a floor or wall last for fifty years instead of five. You can see more about finishing these projects at chic baseboard designs that transform rooms in 2025 to see how the top installers finish their work.
“Deflection is the enemy of every joint, but poor hydration is the silent killer of the ceramic bond.” – Master Flooring Axiom
Conclusion of the installation cycle
Once the tile is set, leave it alone. Do not try to clean the grout lines until the mortar has had at least twenty four hours to cure. If you mess with it too early, you break those microscopic C-S-H crystals that are growing into the pores of the tile. This is why some people have tiles that sound hollow when you tap on them. They were disturbed during the curing phase. After everything is rock hard, you can move on to cleaning and maintenance. For tips on that, tile cleaning tips for a sparkling bathroom in 2025 is a great resource. Just remember that the pretty finish is only possible because of the dirty, dusty work you did with the mixing paddle. If you have questions about specific substrates or unique regional humidity issues, you can always contact us for expert guidance. Every job site is different, but the chemistry of a good bond remains the same. Respect the mix, respect the slake, and respect the trowel. That is the only way to build a shower that stands the test of time.