
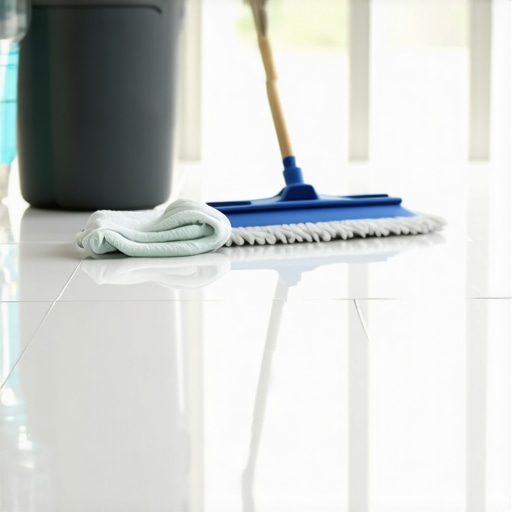
How to Clean Porcelain Tile to Restore Original Shine
Most guys skip the leveling compound. They think the underlayment will hide the dip. It won’t. I spent three days grinding concrete on a job last month just so the floor wouldn’t click like a castanet. That same philosophy applies to cleaning. You cannot just slap a damp rag over a surface and expect it to perform. Porcelain is a structural material, a product of kaolin clay and feldspar fired at temperatures exceeding 2,200 degrees Fahrenheit. It is nearly vitrified, meaning it has a water absorption rate of less than 0.5 percent. When you lose that shine, you aren’t looking at worn-out stone. You are looking at a layer of chemical filth, hard water minerals, or a botched wax job that has no business being on a high-density ceramic surface. I have spent twenty-five years looking at floors through a magnifying glass, and I can tell you that a dull floor is almost always a result of user error and poor chemistry. Cleanliness is not an aesthetic state. It is a state of mechanical purity where the refractive index of the tile surface is no longer obscured by foreign particulates.
The microscopic war against surface residue
To restore the original shine of porcelain tile, you must remove the accumulated surfactant film and mineral deposits that block light reflection. This process involves using a balanced pH approach to break down alkaline soap scum and acidic hard water scale without compromising the integrity of the grout joints. Restoration is not about adding a new coating. It is about stripping away the garbage that has bonded to the microscopic peaks and valleys of the tile face. Even a polished porcelain tile has a texture when viewed under a microscope. When you mop with too much soap, that soap dries in those valleys. It creates a sticky trap for dust. Over months, this builds a laminate of grime. You need a targeted strike. You start with a neutral cleaner to take off the loose oils. If that fails, you move to a mild phosphoric acid solution to eat the minerals, but you must be careful. You never let chemicals sit until they dry. If they dry, you have just redeposited the problem in a more concentrated form.
“A floor is only as good as the subfloor beneath it; deflection is the enemy of every joint.” – Master Flooring Axiom
Why your mop is making the surface duller
Standard mopping often fails because it utilizes a closed-loop water system that redistributes suspended solids into the grout and across the tile face. As the water evaporates, it leaves behind a concentrated residue of detergents and minerals that create a matte appearance on otherwise glossy porcelain surfaces. I see this in every commercial lobby. The janitor uses a dirty string mop and a bucket of grey water. He is just painting a thin layer of mud over the floor. To get a real shine, you need a two-bucket system or a high-quality microfiber pad that actually lifts the soil. Microfiber works on a mechanical level. The fibers are split to create more surface area, allowing them to hook onto the dirt molecules. If you are using a cotton mop, you are just pushing the dirt around. You also have to look at the chemistry of your water. If you live in a region with high calcium carbonate levels, your tap water is a liability. Every time you clean, you are adding a layer of lime. Use distilled water for your final rinse if you want that showroom look. It sounds like overkill until you see the difference in light refraction.
The mechanical reality of showers and baseboards
Cleaning tile in showers and along baseboards requires addressing specific contaminants like calcium stearate and heavy dust accumulation that gravity pulls into the lowest points of the room. Using specialized tile cleaning tips ensures that these vertical and horizontal transitions remain free of the biofilms that dull the porcelain surface. Showers are the worst offenders. You are dealing with soap scum, which is a chemical reaction between the fats in soap and the minerals in your water. It creates a waxy coating that can be a nightmare to remove. You need an alkaline cleaner to cut the fat, followed by a mild acid to take out the mineral. And don’t forget the transitions. When I install baseboards makeover ideas, I make sure the gap between the tile and the wood is caulked correctly. If it isn’t, water gets back there and starts a mold colony that will eventually wick out and stain your grout from the inside out. It is all about the envelope. If the envelope is sealed, the shine stays. If the envelope is compromised, you are fighting a losing battle against biology.
| Cleaner Type | Target Contaminant | Safety Rating |
|---|---|---|
| Neutral pH | Dust, Loose Oils | Safe for all finishes |
| Alkaline (High pH) | Grease, Soap Scum | Safe for most porcelain |
| Acidic (Low pH) | Hard Water, Grout Haze | Use with caution on grout |
| Solvents | Paint, Adhesive | Test in inconspicuous area |
Grout restoration for a visual frame
The perceived shine of a porcelain floor is heavily influenced by the contrast provided by clean, uniform grout lines that frame the individual tiles. Restoring grout through deep cleaning or recoloring eliminates the visual noise of stains, which allows the eye to focus on the reflective properties of the porcelain itself. If your grout is black and your tile is white, the floor will look dirty even if the tile is sterile. Grout is the weak link in any installation. It is a porous mixture of sand and cement. It absorbs everything. I always recommend using a high-quality sealer or moving to an epoxy grout if you are doing a new install in showers that wow. If the grout is already ruined, you might need to look into how to refresh grout without replacing it. This usually involves a deep scrub with a stiff brush and a peroxide-based cleaner. Do not use bleach. Bleach kills the mold but it can weaken the cementitious bond over time. You want oxygen-based cleaners that lift the stain out of the pore. Once it is clean, seal it. If you don’t seal it, you are just inviting the dirt back for a second visit.
The ghost in the expansion gap
Expansion gaps are required at the perimeter of every tile installation to allow for the natural movement of the subfloor and the tile assembly without causing pressure cracks. Maintaining these gaps by keeping them free of rigid debris is essential for the long term structural integrity and cleanliness of the floor system. Most homeowners don’t see the gap because it is hidden under the baseboard. But that gap is a collector for hair, dust, and moisture. If that gap fills up with gunk, the floor can’t move. When the floor can’t move, the grout starts to crack. When the grout cracks, it turns into a dust factory. Every time you walk on the floor, you are puffing microscopic concrete dust onto the surface of your tile, which kills the shine. It is a cycle of destruction. When you are cleaning, get the vacuum nozzle under the edge of those chic baseboard designs. Keep that perimeter clear. A floor needs to breathe, even a hard one like porcelain.
“Porcelain tile must have a water absorption rate of 0.5 percent or less to be classified as porcelain.” – Ceramic Tile Standards
The checklist for a permanent shine
- Vacuum the floor twice to remove all abrasive particulates before applying liquid cleaners.
- Use a dual-bucket system to ensure you are never putting dirty water back on the tile.
- Select a pH-neutral cleaner for daily maintenance to prevent the buildup of surfactant films.
- Deep clean grout lines every six months using a dedicated grout brush and oxygenated cleaner.
- Rinse the floor with distilled water if you live in a hard water area to prevent mineral hazing.
- Check the integrity of perimeter caulking to prevent moisture from reaching the subfloor.
- Avoid using steam mops on tiles with high-gloss finishes as thermal shock can occasionally cause micro-crazing.
Modern solutions for long term durability
Investing in sustainable cleaning practices and high-quality materials reduces the frequency of deep restoration projects and extends the life of the flooring system. Utilizing eco-friendly tile solutions often results in surfaces that are easier to maintain due to advanced glazing technologies. The industry is moving toward tiles that have antimicrobial properties baked into the glaze. These tiles actively fight the buildup of biofilms. But even with the best tech, you can’t ignore the basics. You have to understand that porcelain is a glass-like surface. If you scrub it with steel wool, you will scratch it. Once you scratch the glaze, the shine is gone forever. There is no buffing it out like you can with marble or granite. You have to be gentle but persistent. Use soft nylon brushes. Use microfiber. Use chemistry instead of brute force. If you treat the floor like the engineering marvel it is, it will stay bright for fifty years. If you treat it like a sidewalk, it will look like one in six months. It is your choice. Spend the time on the prep and the maintenance, or spend the money on a new floor. I know which one I would choose. I have spent enough time on my knees to know that a little bit of science goes a long way in keeping a floor under your feet instead of in a dumpster.