
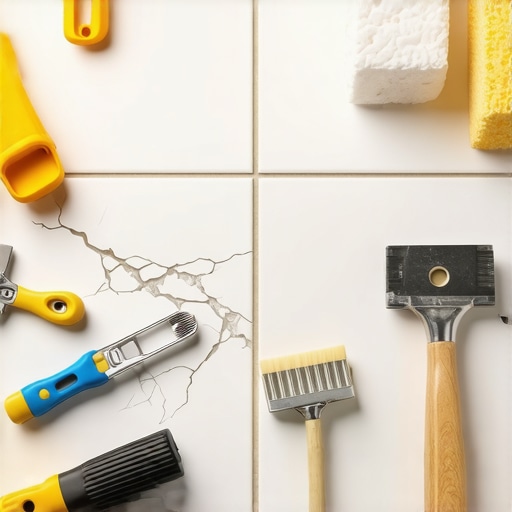
Most guys skip the leveling compound. They think the underlayment will hide the dip. It won’t. I spent three days grinding concrete on a job last month just so the floor wouldn’t click like a castanet. That experience taught me one thing that every homeowner needs to understand about their tile. The crack you see in your grout is rarely just a grout problem. It is a symptom of a structural failure or a chemical oversight happening beneath the surface. When you see a hairline fracture running through your shower or along the edge of your baseboards, you are looking at the result of physics and chemistry at war. I have spent 25 years with sawdust under my nails and the smell of WD-40 on my clothes, and I can tell you that fixing a crack is about more than just smearing new paste into a hole. You have to understand why the bond failed in the first place.
The subfloor secret that ruins your grout
Subfloor deflection and structural movement are the primary causes of hairline cracks in grout joints. If your subfloor flexes more than the Tile Council of North America allows, your grout will inevitably fail. For standard ceramic tile, the deflection limit is L/360, which means the floor should not bend more than the length of the span divided by 360. If you are laying natural stone, that requirement doubles to L/720. When the floor moves, the grout, which is essentially a rigid bridge between two tiles, cannot handle the tension. It snaps. Most homeowners ignore the subfloor and just keep patching the cracks. This is like painting over a termite hole. You need to verify that your joists are spaced correctly and that your plywood thickness meets the 1.25 inch total requirement for a stable tile assembly. Without stability, no amount of high-quality grout will stay in place.
“A floor is only as good as the subfloor beneath it; deflection is the enemy of every joint.” – Master Flooring Axiom
The microscopic fracture in your shower
Hairline cracks in showers usually indicate a lack of proper movement joints or an issue with the waterproofing membrane. Showers are subject to extreme thermal expansion. When you turn on the hot water, the tile and the grout expand at different rates. If the installer did not leave a soft joint at the change of plane, meaning where the wall meets the floor, the grout will crush itself. This is why you should always use 100 percent silicone caulk at the corners rather than hard grout. Water is a patient thief. It finds those hairline cracks and uses capillary action to pull itself behind the tile. Once the water gets back there, it can rot the wall studs or cause the thin-set to lose its grip. If you are dealing with moisture issues, you might want to look into showers with a style that incorporates better drainage and modern waterproofing systems. Modern designs for 2025 emphasize monolithic membranes that prevent these cracks from becoming structural disasters.
The chemistry of the bond
Grout is a mixture of portland cement, graded aggregates, and chemical modifiers that dictate its strength and flexibility. When you mix grout, you are starting a chemical reaction called hydration. If you use too much water, you dilute the polymers and create microscopic voids as the water evaporates. This leaves a weak, brittle structure that is prone to cracking. Professionals use the minimum amount of water necessary to achieve a peanut butter consistency. If the mix is too runny, it will shrink significantly during the curing process, leading to immediate hairline fractures. Many modern grouts come pre-mixed or with high-performance additives. These are far superior to the basic bags you find at big-box retailers. If you want to avoid future repairs, understanding grout restoration secrets can save you from a full tear-out later. Proper hydration and curing are the differences between a floor that lasts decades and one that fails in months.
| Grout Type | Ideal Joint Width | Shrinkage Risk | Best Use Case |
|---|---|---|---|
| Sanded Grout | 1/8 inch to 1/2 inch | Low | Floor tiles and large joints |
| Unsanded Grout | Less than 1/8 inch | High | Wall tiles and polished stone |
| Epoxy Grout | Any width | Minimal | Showers and high-traffic areas |
| High-Performance Cement | 1/16 inch to 1/2 inch | Low | General residential use |
The baseboard connection
Baseboards act as a perimeter constraint that can actually cause grout to crack if the tile is installed too tightly against them. Every tile floor needs an expansion gap around the perimeter. This gap is usually hidden by the baseboards or shoe molding. If the installer pushed the tile right up against the wall or filled the gap with hard grout, the floor has nowhere to go when the house settles or the humidity changes. This pressure translates into the nearest grout joints, causing them to pop or crack. When you are looking at baseboards makeover ideas, ensure that the new trim allows for at least a 1/4 inch gap for floor movement. Choosing chic baseboard designs is important for aesthetics, but their primary job is to cover the necessary mechanical gap that keeps your floor from self-destructing.
Tools for a repair that actually lasts
To fix a hairline crack properly, you must remove the old, damaged grout to a depth of at least half the tile thickness. You cannot simply smear new grout over the old. The new layer will be too thin to bond and will flake off within weeks. Use a carbide-tipped grout saw or a multi-tool with a diamond blade to carefully scrape out the crack. You must be careful not to chip the edges of the tile. Once the joint is clean, use a vacuum to remove every speck of dust. Dust is a bond-breaker. If you leave it in the joint, the new grout will sit on top of the debris rather than sticking to the tile. If you are struggling with maintaining your surfaces, following tile cleaning tips can help you identify cracks before they become major leaks. Prevention is always cheaper than a cure.
“Grout is not a structural adhesive; it is a filler that must be supported by a rigid substrate.” – NWFA Technical Guidelines
- Inspect the crack for signs of moisture or mold beneath the surface.
- Remove old grout using a specialized grout removal tool or oscillating saw.
- Clean the joint thoroughly with a vacuum and a damp sponge.
- Mix high-performance grout to a stiff, paste-like consistency.
- Force the grout into the joint at a 45 degree angle using a rubber float.
- Let the grout sit for 10 to 20 minutes before wiping with a damp, not wet, sponge.
Professional hacks for hairline cracks
One of the best hacks for fixing fine cracks is using a color-matched grout caulk rather than a cementitious grout. This is especially true in areas where movement is likely. Grout caulk looks like grout but has a high percentage of siliconized acrylic, allowing it to flex. If the crack keeps coming back in the same spot, it is a movement crack. Stop fighting it with rigid cement and switch to a flexible filler. Another trick is to use a grout sealer that contains a fortifier. This helps the new grout bond to the old side walls of the tile. If you want to learn how to refresh grout without replacing it, you can often use a grout pen or a specialized epoxy colorant to hide minor imperfections while strengthening the surface. These solutions are perfect for homeowners who want professional results without the cost of a full renovation.
Why your subfloor is lying to you
A subfloor might look flat to the naked eye while actually possessing significant undulations that stress the grout joints. I have seen slabs that looked like a mirror but had a 1/4 inch dip over a four-foot span. When you walk over that dip, the tile deflects. This creates a vertical shear force on the grout. Over time, this shear force turns a solid joint into powder. If you are planning a new project, always check for flatness with a ten-foot straightedge. If the floor is out of spec, use a high-quality self-leveling underlayment. In regions with high humidity, like Florida or the Gulf Coast, the subfloor can also expand and contract with the seasons. Using eco-friendly tile solutions often involves using recycled underlayments that also provide better decoupling properties. These decoupling membranes allow the subfloor and the tile to move independently, which is the ultimate insurance against hairline cracks.