
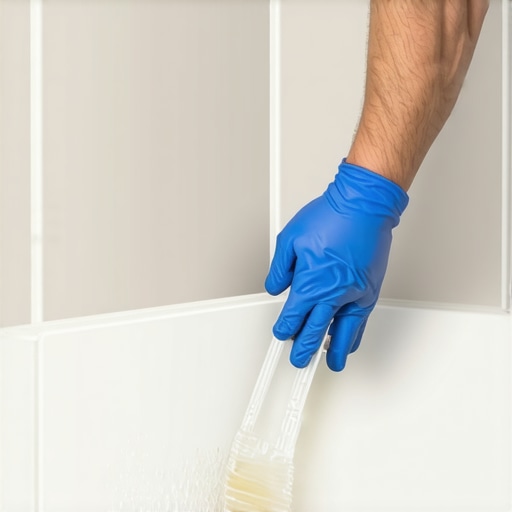
I once walked into a house where a $15,000 wide-plank walnut floor was cupping so bad it looked like a potato chip because the installer didn’t check the crawlspace humidity. That same level of neglect happens every day in bathrooms. Most guys skip the leveling compound and think the underlayment will hide the dip. It won’t. I spent three days grinding concrete on a job last month just so the floor wouldn’t click like a castanet. When it comes to tile corners, the same obsession with preparation is what separates a hack job from a factory finish. You cannot just smear some goop into a corner and expect it to hold. You are fighting the physics of a house that wants to move while your tile wants to stay still. If you do not understand the chemistry of the bond, you are just wasting time and money.
The structural reality of the movement joint
Silicone caulking in a tile corner requires 100% RTV silicone to manage expansion and contraction at a change of plane. Using grout in these areas leads to structural failure because cementitious products lack the elasticity needed for movement joints in showers and baseboards. This is the first law of the Tile Council of North America (TCNA). Any time two different planes meet, such as where a wall meets a floor or two walls meet in a corner, you have a movement joint. If you fill that joint with hard grout, the first time the house settles or the wood studs behind the tile swell with humidity, that grout will crack. It will turn into a jagged, ugly mess that lets water seep behind the tile. This is often the root cause of mold behind showers. By using silicone, you create a flexible gasket that moves with the house. This is not about aesthetics, it is about engineering a waterproof envelope. Many people attempt grout restoration secrets for long-lasting results without realizing that the corner was never supposed to have grout in the first place.
“A floor is only as good as the subfloor beneath it; deflection is the enemy of every joint.” – Master Flooring Axiom
The chemistry of the bond
100 percent RTV silicone utilizes an acetoxy cure or neutral cure process to create a cross-linked elastomer that resists moisture and mildew. Understanding the molecular structure of polysiloxanes is essential for ensuring that the sealant adheres to the tile glaze and grout joints effectively. Most big-box stores sell cheap acrylic caulk or siliconized latex. These are garbage for wet environments. They shrink as they dry because they are water-based. 100 percent silicone does not shrink. It cures. During the curing process, acetoxy silicone releases acetic acid, which is why it smells like vinegar. This acid helps the silicone bite into the microscopic pores of the tile. If you are working in a region with high humidity like the Pacific Northwest, your skinning time is significantly reduced. You might only have five minutes to tool the bead before the surface begins to polymerize. If you touch it after it skins, you ruin the finish. It will look like a shredded tire. You need to work in small sections and respect the chemistry of the tube. This is why showers that wow modern designs for 2025 always prioritize high-grade sealants over cheap fillers.
The 1/8 inch that ruins everything
Surface preparation for silicone application must involve denatured alcohol or 91 percent isopropyl to remove soap scum and dust from the tile joint. A 1/8 inch gap is the industry standard for movement joints, allowing the elastomeric properties of the caulk to function without adhesive failure. If your gap is too tight, the silicone cannot get enough surface area to grab onto. If it is too wide, it will sag under its own weight. I always tell my apprentices that if they spend ten minutes caulking, they should have spent an hour cleaning. Any dust left in that corner acts as a bond breaker. The silicone will stick to the dust instead of the tile. Within six months, the bead will peel away like a sunburnt layer of skin. You must also ensure the joint is bone dry. I use a heat gun or a hair dryer to blow out any hidden moisture behind the tile. If there is water trapped in the grout, the silicone will trap it there, leading to a black mold line that you can never clean. For those looking for tile cleaning tips for a sparkling bathroom in 2025, starting with a clean, well-caulked joint is the best defense against grime accumulation.
| Tool Type | Pros | Cons | Best Use Case |
|---|---|---|---|
| Finger (Dry) | Tactile control | Messy, leaves skin oils | Small repairs |
| Finger (Soapy Water) | Smooth finish | Can contaminate bond | Non-critical areas |
| Profiling Tool | Perfect consistency | Learning curve | Professional showers |
| Caulk Finisher | Fast results | Wastes material | Long straight runs |
Tooling techniques that separate pros from amateurs
Professional tooling of silicone beads requires a caulk gun with a high thrust ratio and steady pressure to avoid air bubbles in the sealant line. Using a profiling tool creates a concave bead that directs water flow away from the corner joint, preventing biofilm buildup. Most amateurs use their finger and a bucket of soapy water. This is a mistake. The soap can get behind the silicone before it bonds to the tile, causing the edges to curl. A pro uses a dry tool or a very specific technique called back-pushing. You cut the nozzle at a 45-degree angle to the width of the joint. You push the gun forward so the silicone is forced into the gap, rather than just laying it on top. This ensures 100 percent wetting of the surfaces. While most people want the thickest underlayment, too much cushion actually causes the locking mechanisms on LVP to snap under pressure. Similarly, an oversized bead of silicone creates a larger surface area for mold colonization and actually weakens the mechanical bond at the center of the joint. You want a bead that is just wide enough to cover the change of plane but thin enough to remain flexible.
Why your baseboards deserve better than painters caulk
Baseboard transitions to tile floors must be treated as dynamic joints where wood expansion meets rigid ceramic surfaces. Applying color-matched silicone instead of painters caulk prevents the ugly cracking often seen at the top edge of trim work in high-moisture areas. Wood moves. It breathes. In the winter, your baseboards will shrink. In the summer, they will swell. If you use standard painters caulk, it will crack within one season. I always use a high-quality silicone or a specialized hybrid polymer that can be painted if necessary. This keeps the line between your beautiful chic baseboard designs that transform rooms in 2025 and your floor looking crisp. The goal is to create a transition that looks like it came from the factory. This means no wavy lines and no smears on the wall. If you are struggling with old, cracked material, you should look into how to refresh grout without replacing it before you apply your final silicone seal. A clean slate is the only way to get a professional result.
- Inspect the joint for any loose grout or debris.
- Clean the area twice with denatured alcohol and a lint-free rag.
- Ensure the room temperature is between 60 and 80 degrees Fahrenheit.
- Cut the caulk tube nozzle to match the joint width exactly.
- Apply a continuous bead without stopping mid-run.
- Tool the bead immediately before the skinning process begins.
- Allow 24 hours for a full cure before exposing the area to water.
The ghost in the expansion gap
Expansion gaps are the unseen heroes of a long-lasting tile installation, providing the necessary room for thermal expansion without tented tiles. When you fill these perimeter joints with silicone, you are creating a buffer zone that protects the integrity of the entire floor assembly. Many homeowners complain about their floors