
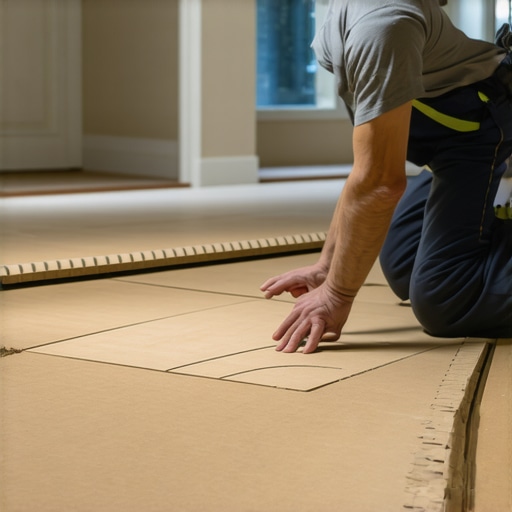
I spent three days grinding concrete on a job last month just so the floor would not click like a castanet. Most guys skip the leveling compound. They think the underlayment will hide the dip. It will not. When you are dealing with radiant floor heating, the stakes are ten times higher. I have seen installers shoot a two inch finish nail straight through a hydronic PEX line because they were too lazy to find the sill plate. Water everywhere. A twelve thousand dollar floor ruined in four seconds. You cannot just wing it when there is a heat source under the planks. This is a job that requires a moisture meter, a thermal camera, and a complete respect for the physics of thermal expansion. If you treat your trim as just a piece of wood to hide a gap, you are going to fail. You have to treat it as a structural component that must live in a high temperature environment without warping or causing a flood. I smell the WD-40 on my hands as I write this because I just finished a similar project where the homeowner thought they could just glue baseboards to the tile. It does not work that way. You need a mechanical and chemical bond that respects the heating elements beneath.
The hidden heat below the trim
Installing baseboards over radiant heat requires identifying hydronic PEX tubing or electric heating cables using thermal imaging cameras. Fastening must avoid the heating elements to prevent fluid leaks or electrical shorts. Using construction adhesive and finish nails driven only into wall studs ensures a safe installation. Radiant systems are a marvel of engineering but a nightmare for the uninformed carpenter. Whether you have a hydronic system pumping hot water through a boiler or an electric mat system, the floor is constantly expanding and contracting. This movement is the ghost in the machine. If you pin your baseboards too tightly against the floor, you create a pinch point. When the floor expands, it will either buckle the floor or pop the baseboard off the wall. I always recommend leaving a gap of about one sixteenth of an inch between the bottom of the baseboard and the top of the flooring surface. This allows the floor to breathe as the temperature rises from sixty to eighty five degrees. If you are working in a bathroom near showers, this gap is even more mandatory to prevent moisture wicking into the trim material.
Tracing the ghost in your slab
Identifying radiant heat lines involves running the system at maximum temperature and using an infrared thermometer or thermal camera to map the layout of pipes. This step prevents puncturing lines with fasteners. Marking the heat zones on the wall above the trim line is a requirement for safety. I never trust the blueprints the builder left behind. Pipes shift during the concrete pour. I turn the heat up high and wait for the floor to glow on my FLIR camera. Once I see the orange lines of the PEX, I mark the floor with a wax pencil. You want to see exactly where those loops turn. Most systems keep the lines at least six inches away from the perimeter walls, but you cannot bet your career on most. Sometimes the plumber got aggressive and ran a line right against the plate. If you are installing over tile, the thermal mass of the thin set makes the heat bloom wider, which can make it harder to find the exact center of the pipe. You have to be precise. One stray nail into a pressurized line will result in a fountain of glycol or water that will ruin your subfloor in minutes.
“A floor is only as good as the subfloor beneath it; deflection is the enemy of every joint.” – Master Flooring Axiom
Why glue is your best friend
Construction adhesives provide a secure bond for baseboard installation when mechanical fasteners like nails risk damaging radiant heating components. Using a polyurethane based adhesive ensures a flexible hold that withstands thermal cycling without losing adhesion or cracking. I have moved away from relying solely on nails in these situations. I use a high quality polyurethane adhesive like Loctite PL Premium. It does not get brittle. This is important because the heat from the floor will eventually dry out cheap water based glues. I apply a continuous bead in a zigzag pattern on the back of the trim. This creates enough surface area to grab the drywall. If I can find a stud, I will still use a small eighteen gauge brad nail, but I aim high. I make sure the nail is at least two inches above the floor level to ensure I am hitting the bottom plate or the studs rather than the slab where the heat lives. If you are looking for design inspiration, you should look at chic baseboard designs that transform rooms in 2025 to see how modern profiles handle these challenges.
The expansion gap that saves the floor
Thermal expansion gaps are mandatory spaces between the flooring material and the wall studs that allow wood or vinyl to expand and contract. Baseboards must cover this gap without being nailed into the floor itself. Maintaining a floating perimeter prevents buckling and joint separation. People think waterproof LVP means it is invincible. It is not. It is essentially a giant sheet of plastic that grows when it gets warm. If you nail your baseboard through the LVP and into the subfloor, you have effectively locked the floor in place. When the radiant heat kicks on, the floor has nowhere to go but up. I have seen entire living rooms with a six inch hump in the middle because the installer pinned the perimeter. You have to nail into the wall, never the floor. When working with tile, the movement is less dramatic, but the grout can still crack if the baseboard is pressing down too hard. For more on maintaining those areas, see tile cleaning tips for a sparkling bathroom in 2025. Proper spacing is the difference between a floor that lasts thirty years and one that fails in three months.
| Material Type | Heat Resistance | Expansion Rate | Recommended Fastening |
|---|---|---|---|
| Solid Oak | Medium | High | High Nails and Glue |
| MDF Trim | Low | Medium | Adhesive Only |
| PVC Baseboard | High | Low | Stainless Brads |
| Primed Pine | Medium | High | Stud Fastening |
The chemistry of the bond
Polyurethane adhesives excel in radiant heat environments because they maintain elasticity under temperature fluctuations. These adhesives create a chemical bond with the drywall paper and wood substrate. This prevents the trim from pulling away as the wall warms and cools. I always check the VOC content on my tubes. In a house with radiant heat, the floor acts like a giant radiator that can bake the chemicals out of your glue. If you use a cheap, smelly adhesive, the homeowner is going to smell it for months every time the heat turns on. I prefer low odor, high tack formulas. You also need to consider the moisture content of the baseboard itself. I never install trim that has not acclimated to the room for at least seventy two hours. If you take wood from a cold truck and nail it over a warm floor, it will shrink faster than a cheap suit in the rain. You will end up with massive gaps at your miters. This is why baseboards makeover ideas to elevate your space always emphasize proper preparation over quick speed.
- Acclimate all trim materials for 72 hours in the heated room.
- Use an infrared camera to map all heating elements.
- Mark stud locations with a magnetic finder.
- Apply polyurethane adhesive to the back of the trim.
- Set the baseboard on 1/16 inch spacers to maintain a gap.
- Shoot nails only into the studs at an upward angle.
- Seal the top edge with a flexible acrylic caulk.
Moisture and the radiant bathroom
Radiant heat in bathrooms increases the evaporation rate of water on tile surfaces, which can lead to high humidity at the baseboard level. Using PVC or composite baseboards in these areas prevents rot and mold growth. Proper grout sealing around the perimeter ensures a waterproof barrier. When I am working near showers, I am extra careful. The heat from the floor can actually draw moisture out of the air and trap it behind the baseboard. If you used wood trim, it will rot from the back side where you cannot see it. I always back prime my wood trim if the client insists on natural materials. But usually, I push for a high density polymer trim that looks like wood but is immune to water. This is a common strategy when designing showers with a style trendy ideas for small bathrooms where space is tight and moisture is high. You also have to be careful with your grout joints at the wall. Never grout the gap between the floor and the wall. Use a color matched 100 percent silicone caulk. Silicone can stretch; grout will just crack and turn into sand.
“Radiant heat changes the molecular behavior of wood; if you do not account for the movement, the floor will find a way to move itself.” – NWFA Technical Manual
Final inspection of the thermal envelope
A successful installation is one where the homeowner never has to think about their baseboards again. You want tight miters, clean caulk lines, and a floor that can grow and shrink without a sound. If you hear a loud pop in the middle of the night, that is the sound of a fastener failing or a floor board cracking because it was pinned. Avoid that phone call by doing the work up front. Use the camera. Use the right glue. Respect the gap. I have been doing this for twenty five years and I still get nervous when I see a radiant system. It is a sign of a high end home, and high end homes deserve high end technical skill. Do not be the guy who causes a flood because he wanted to save ten minutes on a stud finder. Stick to the standards set by the TCNA and the NWFA. Your knees and your bank account will thank you. In this industry, the things you cannot see, like the pipes under the floor, are the things that will break you if you ignore them.