
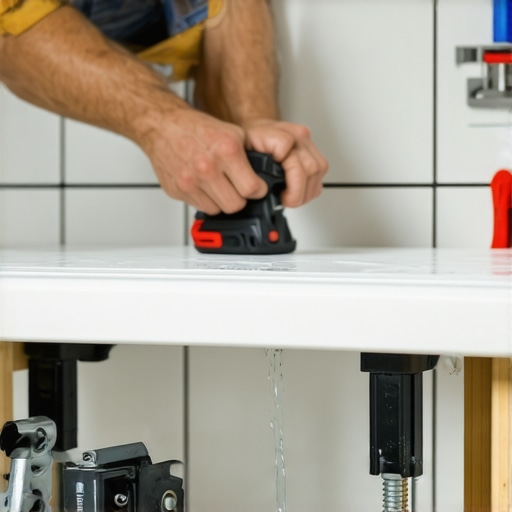
I spent three days grinding concrete on a job last month just so the floor wouldn’t click like a castanet. It was a brutal reminder that most people ignore what is under their feet until it is too late. When you have a loose shower bench, you are looking at more than just a minor annoyance. You are looking at a structural failure that will eventually compromise your entire waterproofing system. Most guys skip the leveling compound and they think the underlayment or the grout will hide the dip. It won’t. If that bench moves even a fraction of a millimeter after you have applied your grout, you will see cracks within a week. A shower is a high-moisture environment where thermal expansion and contraction happen daily. Without a rock-solid foundation, the bench becomes a lever that pries the tile away from the wall.
The structural nightmare of a shifting seat
To secure a loose shower bench before grouting, you must achieve a mechanical and chemical bond using epoxy thin-set or modified mortar with stainless steel fasteners driven into 2×6 blocking. Surface prep requires removing all dust to prevent bond-breaking. It is a structural fix, not a cosmetic one. When a bench is loose, it usually means the internal framing is not properly tied into the wall studs or the adhesive bond between the substrate and the tile backer has failed. If you ignore this and try to fill the gap with grout, you are wasting time. Grout has zero structural integrity. It is meant for aesthetics and to keep debris out of joints, not to hold a seat in place. You need to examine the physics of the load. Every time someone sits down, they apply hundreds of pounds of pressure. That pressure needs a direct path to the floor and the wall studs. This is a vital part of showers that wow in the modern era, as functionality must precede beauty.
Why mechanical fasteners fail in wet environments
Mechanical fasteners are often the first thing people reach for, but they are often the first point of failure. Using standard drywall screws in a shower is a recipe for rust and rot. Even galvanized screws will eventually succumb to the high humidity found in the coastal regions or poorly ventilated bathrooms. You must use 316-grade stainless steel screws. These screws have a high chromium and molybdenum content, which provides superior resistance to chlorides and moisture. When you drive a screw through a waterproofing membrane to secure a bench, you are creating a hole. This hole must be sealed with a high-quality polyurethane sealant or a liquid waterproofing membrane. I have seen entire subfloors rotted out because an installer forgot to seal a single screw head on a bench. The water travels down the threads of the screw like a straw, feeding the wood framing until it turns to mush. This is why many pros are moving toward foam-core benches that use pure chemical bonds instead of metal penetrations.
The physics of the bond between substrate and bench
The chemical bond is where the real science happens. Modern thin-sets are not just sand and cement. They are highly engineered polymers. When you mix a polymer-modified mortar, you are creating a crystalline structure that interlocks with the microscopic pores of your substrate. If the bench is loose, the bond has been interrupted. This often happens because of ‘skinning,’ where the mortar sits too long on the bench and forms a dry film before the tile is pressed into it. To fix a loose bench, you must remove the old mortar and expose the raw substrate. If you are working with a concrete block bench, you need to dampen the surface to prevent the block from sucking the moisture out of the mortar too quickly. This is called ‘burning in’ the mortar. You take the flat side of your trowel and press the mortar hard into the surface to ensure every pore is filled before you comb out your ridges. This level of detail is what separates a master from a handyman.
“A floor is only as good as the subfloor beneath it; deflection is the enemy of every joint.” – Master Flooring Axiom
Preparing the surface for a permanent hold
Surface preparation is the stage where most people fail. Dust is the ultimate bond-breaker. If you have been cutting tile or baseboards makeover ideas nearby, your bench is likely covered in a fine layer of silica or wood dust. This dust acts like millions of tiny ball bearings, preventing the adhesive from actually touching the bench. You need to vacuum the area with a HEPA-rated vacuum and then wipe it down with a damp sponge. Allow it to dry until it is SSD (Saturated Surface Dry). This means the material is damp but no standing water is visible. In high-heat areas like Arizona or Nevada, the substrate can get so hot that it flashes the mortar, causing it to fail instantly. You have to manage the temperature of your materials. Keep your mortar bags in the shade and use cool water for mixing. This ensures the chemical reaction happens at the correct rate for maximum tensile strength.
Selecting the right adhesive for vertical stability
Vertical surfaces like the sides of a shower bench require a mortar with high sag resistance. You cannot use a cheap, entry-level thin-set here. You need a mortar that meets or exceeds ANSI A118.15 standards. These mortars have a high concentration of dried polymers that provide ‘grab’ the moment the tile or the bench component hits the wall. If you are securing a pre-fabricated foam bench, you might even consider an epoxy adhesive. Epoxy is a two-part system that creates a bond stronger than the materials it is joining. It is waterproof, chemical-resistant, and has almost zero shrinkage. However, epoxy is difficult to work with and has a short pot life. You have to be fast and precise. If you mess up an epoxy bond, you aren’t just wiping it off with a sponge; you are grinding it off with a diamond blade. This is part of the grout restoration secrets for long lasting results because a stable bench means the grout around it will never crack or flake away.
| Material | Density | Waterproofing Level | Bond Strategy |
|---|---|---|---|
| EPS Foam | Low | High | Thin-set or Epoxy |
| Concrete Block | High | Medium | Modified Mortar |
| Wood Frame | Medium | Low | Membrane + Fasteners |
| Structural Board | Medium | High | Polyurethane Adhesive |
Integrating the bench with adjacent wall tile
The bench does not exist in a vacuum. It is part of a larger system that includes the walls and the floor. When securing a loose bench, you have to consider the expansion joints. You should never butt the bench tight against the wall tile without leaving a gap. I always leave a 1/8 inch gap at every change of plane. This gap will not be filled with hard grout. It will be filled with a 100 percent silicone sealant that matches your grout color. This allows the bench to move slightly as it expands when the hot water hits it, without cracking the tiles. If you look at how to refresh grout without replacing it, you will see that the most common failure point is the corner where the bench meets the wall. People fill this with grout, and it inevitably cracks because the two surfaces move at different rates. Using silicone in these joints is an uncompromising rule for any professional installer.
The final barrier before the grout lines
Before you even think about opening a bag of grout, you must perform a ‘stress test’ on the bench. Once your adhesives have cured for at least 24 to 48 hours, apply firm pressure to different areas of the bench. If you hear any clicking, crunching, or see any movement, you have failed. You must stop and fix it now. It is much easier to remove a tile today than to tear out a leaking shower in two years. Check the perimeter where the bench meets the tile cleaning tips are often needed later. If the bench is solid, you can proceed to waterproofing. Apply a liquid-applied membrane over the joints and fastener heads. Ensure you have the correct dry film thickness. You can use a wet-film gauge to check this. It might seem like overkill, but the physics of water penetration are relentless. Water will find every pinhole you missed.
Pre-grout stability checklist
- Verify all 316 stainless steel fasteners are driven into solid blocking.
- Clean all dust and debris from the thin-set ridges with a stiff brush.
- Ensure the mortar has had a full 24-hour cure cycle at 70 degrees Fahrenheit.
- Check that expansion gaps of 1/8 inch are maintained at all wall transitions.
- Apply waterproofing membrane over all mechanical penetrations.
- Confirm no ‘hollow’ sounds exist when tapping the bench surface.
Avoiding common mistakes in moisture management
The biggest mistake is thinking that grout is waterproof. It is not. Grout is porous. Water will pass through it and sit on the substrate. If your bench is secured with wood that isn’t properly protected, that wood will swell. When wood swells, it exerts thousands of pounds of pressure, which will pop your tiles right off the bench. In humid climates like Florida, this process is accelerated. You must use a topical waterproofing system that sits directly behind the tile. This keeps the entire bench structure dry. Also, ensure the bench has a slight pitch toward the floor. A 1/4 inch per foot slope is standard. This ensures water runs off the seat and down the drain instead of pooling against the wall grout. Pooling water is the primary cause of mold and grout failure. If you are looking for showers with a style, remember that a functional slope can be hidden with clever tile layout, but it must be there.
“Substrate preparation is the single most important factor in the longevity of a ceramic tile installation.” – Master Flooring Axiom
Securing a loose shower bench requires a transition from a decorator’s mindset to an engineer’s mindset. You are building a structural component that must withstand moisture, heat, and mechanical load. Use the right chemistry, the right fasteners, and never rush the cure times. Your patience in the preparation phase determines the lifespan of the bathroom. If you take these steps, your grout will stay intact, your waterproofing will remain uncompromised, and the bench will be as solid as the day it was built. If you are ever in doubt about the materials you are using, always consult the manufacturer’s technical data sheets. They provide the exact shear strength and cure times for the specific climate you are working in. This technical rigor is the hallmark of a master installer who understands that the beauty of a shower is only skin deep, but its failure is always structural.