
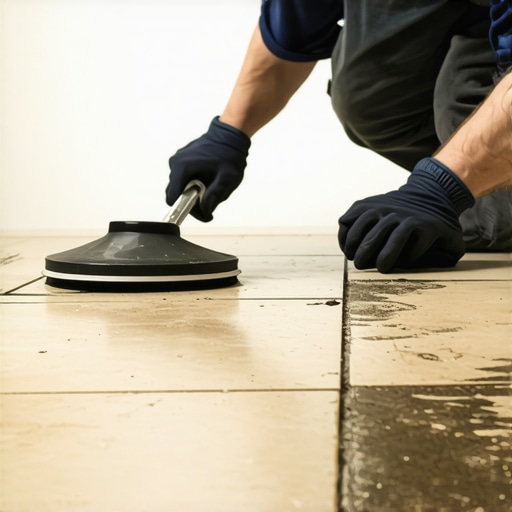
Most guys skip the leveling compound. They think the underlayment will hide the dip. It won’t. I spent three days grinding concrete on a job last month just so the floor wouldn’t click like a castanet. That same job had a massive grout spill on some expensive Italian porcelain. I had to get that cement off without leaving a single scratch on a ten thousand dollar floor. If you think removing hardened grout is just about elbow grease, you are already behind the curve. It is about the physics of friction and the chemistry of Portland cement. I have spent twenty five years smelling like WD-40 and oak dust, and I can tell you that a tile floor is a structural system. When grout hardens where it should not be, it is not just a stain. It is a chemical bond that has fused with the microscopic pores of your tile. To remove it without ruining the glaze, you need a plan that respects the material properties of both the substrate and the additive.
The molecular bond of Portland cement
Removing hardened grout requires breaking the mechanical and chemical bond without fracturing the tile glaze or the underlying substrate. Grout is a mixture of water, cement, and sand that undergoes a chemical reaction called hydration. Once it hardens, it forms a crystalline structure that locks into the tile. You are essentially performing a controlled demolition of a calcium silicate hydrate matrix. This matrix is designed to be permanent, which is why attacking it with the wrong tools leads to chipped edges and broken hearts. If you are dealing with a haze rather than chunks, you might find that [tile cleaning tips for a sparkling bathroom](https://elegantfloorz.com/tile-cleaning-tips-for-a-sparkling-bathroom-in-2025) offer a better starting point before you bring out the heavy machinery.
The tool kit for a surgical extraction
Speed is your enemy when you are working with hardened cement. You need tools that offer precision and variable control. An oscillating multi-tool with a carbide grit blade is the industry standard for a reason. It uses high frequency vibrations rather than a rotating motion. This allows you to nibble away at the grout without the blade walking across the face of your tile. If you use a rotary tool like a Dremel, one slip and you have carved a permanent scar into your floor. I always keep a manual grout saw handy for the tight corners near the [chic baseboard designs](https://elegantfloorz.com/chic-baseboard-designs-that-transform-rooms-in-2025) because the machine cannot reach the last eighth of an inch.
“Grout is not just a filler; it is a structural component of the tile assembly that must resist compressive forces while remaining porous enough to breathe.” – Master Flooring Axiom
The physics of the oscillating blade
When you pull the trigger on an oscillating tool, you are looking at thirty thousand movements per minute. This speed creates heat. Heat can expand the tile and the grout at different rates, which sometimes helps the bond break. However, too much heat can also scorch the tile glaze or melt the plastic spacers that some lazy installers leave behind. You should work in three inch sections. Move the blade in a steady, back and forth motion. Do not force it. Let the carbide grit do the work. If you feel the tool jumping, you are pushing too hard. The goal is to turn the solid grout back into dust.
Why household vinegar is a liability
Many homeowners reach for vinegar because they heard it dissolves minerals. While acetic acid does react with the calcium carbonate in grout, it is a weak acid. It takes a long time to work, and in the process, it can etch the surface of natural stone like marble or limestone. Even on glazed porcelain, prolonged exposure to acid can weaken the integrity of the remaining grout joints you actually want to keep. If you are trying to [refresh grout without replacing it](https://elegantfloorz.com/how-to-refresh-grout-without-replacing-it), stay away from the kitchen pantry. Use a dedicated phosphoric acid cleaner if you must use chemicals, but only after you have exhausted mechanical means.
The chemical lie of water saturation
There is a common myth that soaking the grout in water makes it easier to remove. The reality is that water can actually act as a lubricant for the blade, which sounds good but often leads to the tool sliding out of the joint. Furthermore, if you are working in [showers with a style](https://elegantfloorz.com/showers-with-a-style-trendy-ideas-for-small-bathrooms), saturating the area can push moisture behind the tile into the wall cavity before you have had a chance to reseal the joints. Keep it dry. The dust is easier to manage with a vacuum than a slurry of grey mud is to clean off your baseboards.
Grout hardness comparison for removal
| Grout Type | Hardness Level | Primary Removal Tool | Risk to Tile |
|---|---|---|---|
| Unsanded Cement | Medium | Hand Scraper | Low |
| Sanded Portland | High | Carbide Blade | Moderate |
| Polymer Modified | Very High | Oscillating Tool | High |
| Epoxy Grout | Extreme | Heat & Diamond | Critical |
Protecting the porcelain skin
The glaze on a tile is only a few microns thick. It is basically a thin layer of glass. Once that glass is scratched, the tile is ruined because dirt will find its way into the scratch and create a permanent dark line. When you are removing grout near the edges, you must keep the tool at a ninety degree angle to the floor. Never tilt the tool. If you tilt it, the side of the blade will rub against the tile edge and create what we call metal marking. This is why I often apply two layers of painter’s tape to the edges of the tile before I start. It provides a tiny buffer zone for that 1/8 inch margin of error.
The shower pan disaster waiting to happen
Removing grout in a shower is a different beast than a kitchen floor. Beneath that tile is a waterproofing membrane. If you go too deep with your blade, you will puncture the liner. Once that liner is compromised, you are looking at a multi thousand dollar tear out because of a single pinhole. You must know the depth of your tile. Most floor tiles are 3/8 of an inch thick. Set your blade depth or mark it with tape so you never go deeper than a quarter inch. For those looking for [modern shower designs for 2025](https://elegantfloorz.com/showers-that-wow-modern-designs-for-2025), remember that the best design is one that stays watertight.
Managing the perimeter and baseboards
The hardest grout to remove is the stuff shoved under the baseboards. Most installers get sloppy at the edges because they know the trim will cover it. But if you are doing a [baseboards makeover](https://elegantfloorz.com/baseboards-makeover-ideas-to-elevate-your-space), you will find those old chunks of cement blocking your new boards from sitting flush. I use a sharp wood chisel and a small hammer for this. It is a slow, tedious process of tapping and chipping. You have to be careful not to blow out the bottom of the drywall or the plaster.
A checklist for successful grout extraction
- Inspect the tile edges for pre-existing chips before you start.
- Vacuum the work area every three inches of progress to maintain visibility.
- Tape off the baseboards with heavy duty painter’s tape to prevent scuffs.
- Wear a P100 respirator because silica dust is no joke for your lungs.
- Set the oscillating tool to a medium speed to control heat buildup.
- Keep a bottle of water nearby only to cool the blade, not to soak the floor.
The regional climate factor
If you are working in a place with high humidity, like the Gulf Coast, the grout might stay slightly softer for a few days, but it also becomes more gum like when heated by a blade. In the dry heat of the desert, grout becomes brittle and can shatter like glass when struck. You have to adjust your pressure based on how the material reacts. Brittle grout requires a light touch to prevent it from taking a piece of the tile with it when it pops out. If you are struggling with the final look, looking into [grout restoration secrets](https://elegantfloorz.com/grout-restoration-secrets-for-long-lasting-results) can help you finish the job like a professional.
The final walkthrough
Once the bulk of the grout is gone, you will still have a ghost of a haze on the tile. This is where a white nylon scrubbing pad and a little bit of elbow grease finally come into play. Do not use steel wool. Steel wool will leave microscopic metal particles that will rust the next time you mop. Use a vacuum with a HEPA filter to get every last grain of sand out of the joints. If the joints are clean and deep, your new grout will have a solid mechanical bond. A floor is a performance surface. Treat it with the respect that engineering demands, and it will last a lifetime. If you have questions about specific tile types, feel free to [contact us](https://elegantfloorz.com/contact-us) for more technical guidance.