
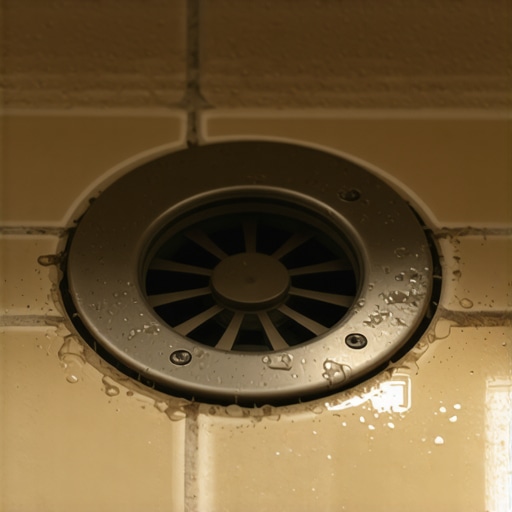
Why Your Shower Drain Seal Is Failing and How to Test It
Most guys skip the leveling compound. They think the underlayment will hide the dip. It won’t. I spent three days grinding concrete on a job last month just so the floor wouldn’t click like a castanet. That same lazy attitude is why shower drains fail. You see, a shower is not just a pretty box of tile. It is a hydraulic system. If the seal between the drain body and the waterproofing membrane fails, your home is essentially a slow-motion shipwreck. I have seen joists that look like wet cardboard because a homeowner ignored a tiny stain on the ceiling below. When you smell oak dust and WD-40 on a job site, you know we are doing things right. We don’t hide mistakes with caulk. We build for the next fifty years, not the next five minutes.
The physics of the clamping ring failure
A shower drain seal fails when the mechanical pressure between the clamping ring and the drain body is uneven or the membrane has suffered from plasticizer migration. This happens when the bolts are over-tightened or under-tightened, leading to a breach in the gasket area. The clamping ring is designed to create a liquid-tight compression seal. When the subfloor shifts due to deflection, the drain body moves, but the heavy mortar bed stays still. This creates a shearing force. Over time, this shear stress creates micro-fissures in the sealant or the liner itself. I have seen guys use cheap plumbers putty where they should be using 100 percent silicone. Putty dries out. It cracks. Once it cracks, the water finds a path through capillary action. It does not take a flood to ruin a house. It takes a drip, every morning, for three years. That is how the rot wins.
“A floor is only as good as the subfloor beneath it; deflection is the enemy of every joint.” – Master Flooring Axiom
Why your subfloor is lying to you
Subfloor deflection causes the drain assembly to flex and break its bond with the surrounding mortar bed and tile. If your subfloor is 3/4 inch plywood but the joists are 24 inches on center, that floor is going to bounce. That bounce is the silent killer of grout and drain seals. Every time you step into the shower, you are applying hundreds of pounds of pressure per square inch to a specific point. If the subfloor gives even a 1/16 of an inch, the rigid tile and grout cannot follow. The bond snaps. This is why grout restoration secrets for long lasting results always start with a rigid substrate. Without a stiff floor, you are just putting a band-aid on a broken leg. You need to check the L/360 rating of your floor before you even think about laying a single tile. If you do not, you will be back here in two years tearing it all out.
The chemistry of the solvent weld
The bond between the PVC drain and the waste pipe is a chemical weld, not a glue joint, and any contamination during the curing process leads to a slow leak. When we talk about PVC primer and cement, we are talking about melting the plastic together. If there is dust or moisture on the pipe when you apply that purple primer, the weld will be incomplete. Under the heat of a 15 minute hot shower, that pipe expands. When the water turns off, it contracts. If that weld is not perfect, the thermal expansion eventually pulls the joint apart. This is why I always sand the burrs off the pipe. If you leave those little plastic curls, they get trapped in the joint and create a channel for water to escape. It is a basic mechanic’s rule: clean surfaces make permanent bonds. Anything less is just a hack job waiting to happen.
How to test for a slow death
The flood test is the only definitive way to verify if your shower drain seal is holding water under hydrostatic pressure. You cannot just look at a drain and know it is sealed. You have to force it to fail under controlled conditions. This involves plugging the drain and filling the shower pan with water to the top of the curb. You mark the water level and wait. If that water level drops after twenty-four hours, you have a leak. It might be the liner, or it might be the drain seal. To isolate the drain, you use a test ball or a mechanical plug that sits inside the pipe below the clamping ring. If the water holds, the pipe is good. If it drops, your seal is shot. This is the part where most DIYers get lazy. They don’t want to wait twenty-four hours. They want to see the showers that wow modern designs for 2025 and get to the pretty stuff. But if you skip the flood test, you are gambling with your framing.
| Material Type | Expansion Rate | Chemical Resistance | Expected Lifespan |
|---|---|---|---|
| ABS Plastic | High | Moderate | 25-40 Years |
| PVC Plastic | Moderate | High | 50+ Years |
| Cast Iron | Very Low | Low (Corrosion) | 30-50 Years |
| Stainless Steel | Low | Very High | 75+ Years |
The ghost in the expansion gap
The lack of a proper expansion gap at the perimeter of the shower floor causes the tile to shove the drain assembly out of alignment. Physics dictates that everything expands when it gets warm. When you run hot water, your tile expands. If you jammed that tile tight against the walls without a movement joint, that force has to go somewhere. Usually, it pushes inward toward the drain. This puts lateral pressure on the clamping ring. It can actually snap the bolts or crack the plastic flange. I have seen drains that were literally sheared off because the installer didn’t leave a 1/8 inch gap at the wall. This is also where tile cleaning tips for a sparkling bathroom in 2025 become vital. If those gaps get filled with hard mineral deposits, the expansion room disappears. You need to keep those joints clean and filled with flexible 100 percent silicone, not hard grout.
- Buy a 2-inch mechanical test plug with a rubber gasket.
- Clear all hair and soap scum from the drain throat before testing.
- Fill the pan to within 1 inch of the threshold.
- Mark the water line on the tile with a wax pencil.
- Check the ceiling or crawlspace below for any signs of moisture.
The mistake everyone makes with baseboards
Moisture from a leaking drain seal often travels along the subfloor and rots out the bottom of your baseboards before you ever see a puddle on the floor. Water is lazy. It follows the path of least resistance. Often, that path is the gap between the subfloor and the wall plate. By the time you notice your baseboards are warping or the paint is peeling, the damage is done. This is why I tell people to check out baseboards makeover ideas to elevate your space but also to look for the signs of failure. If your baseboard feels soft or looks darker than the rest of the trim, you have a moisture problem. It is usually not a spill. It is a leak from the shower that has wicked through the plywood. Don’t just replace the wood. Find the source. Usually, it is that 1/8 inch gap in the drain seal that you thought didn’t matter.
The chemical breakdown of modified thin-set
Modified thin-set contains polymers that increase bond strength but can fail if the shower is put into service before the full 21-day cure cycle. People are in a hurry. They want to use their new shower forty-eight hours after the grout is dry. That is a mistake. The polymers in the mortar need time to cross-link and reach full hydrophobic strength. If you saturate that mortar too soon, the water interrupts the chemical bond. The mortar becomes mushy. It loses its grip on the drain flange. Once that bond is gone, the drain can move independently of the tile. That movement is what breaks the secondary seal. I have pulled up tile where the thin-set was the consistency of toothpaste because the homeowner couldn’t wait. Use a fan. Keep the humidity low. Let the chemistry do its job. A floor is a structural engineering challenge, not a race. You want it done fast or you want it done right? You can’t have both when it comes to hydration and curing.
Final thoughts on shower integrity
You have to respect the materials. If you treat a shower like a hobby project, it will fail. You need to understand the PSI of your mortar bed, the mil-thickness of your waterproofing membrane, and the torque on those drain bolts. If you take the time to do a flood test and ensure your subfloor is rock solid, you will never have to worry about a leaking drain. If you don’t, you will be calling someone like me to tear it all out in three years. And I won’t be cheap. Because I have to fix your mistakes before I can build the floor you should have had in the first place. Keep your tools clean, your levels true, and your moisture meter handy. That is the only way to build a floor that lasts.